What if I said it was super easy to add Terms and Conditions on Wix? Better yet, what if I showed you how to do it yourself?
In this guide, I’ll walk you through it all, from the whys to the whats and the hows!
→ jump to How to add Terms and Conditions on Wix
Terms and Conditions set the rules for users while visiting your website. That being said there’s actually no legal requirement for defining Terms and Conditions. While Terms and Conditions may not be required by law, having Terms and Conditions can limit your liability so it’s a smart thing to include.
If you’re running an e-commerce site, please note that having terms and conditions may be mandatory as they typically contain legally required information like warranty and withdrawal information
If you are gathering users’ personal data, you are required by law to have a formal Privacy Policy.
💡 What about copyright?
As terms and conditions don’t grant copyrights, but instead help to establish rules around copyright and any licenses you have related to it. Read up more on how to copyright your website here.
Each website’s Terms and Conditions will be unique. That being said, if you want to prevent abuse it’s a good idea to include these clauses in your Terms and Conditions for Wix:
- Identification and description of your business
- User guidelines that clearly state what is acceptable use while using your website
- Disclaimers and limitation of liability statements
- Governing law clause, that state which law governs your Terms and any issues arising from them
- The consequences of any abuse on the site
You can see more here:
Our Terms and Condition Generator is optimized for Wix. Start generating your Terms and Conditions now
How to add Terms and Conditions on Wix
Now that you’ve generated your Terms and Conditions with iubenda, you need to integrate it into Wix. There are three ways to do this:
- By using our widget (our most popular embed option – opens the document in a lightbox style modal window)
- Via direct link to the document (opens in a new page or tab); or
- Directly embed the Terms and Conditions into a page on your website
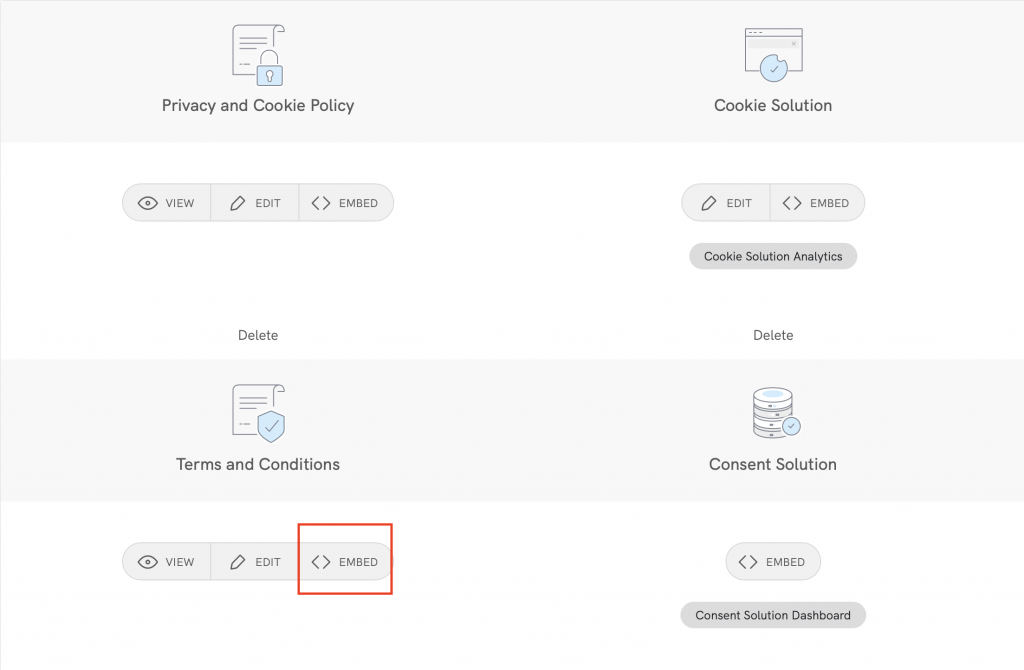
To get started first head over to your iubenda dashboard, click on [Your website] > Terms and Conditions > Embed
Method 1 – Widget
The widget is typically placed in the footer of your Wix site and displays either a text link or button. When clicked, it opens a lightbox-style modal window to display your terms and conditions document.
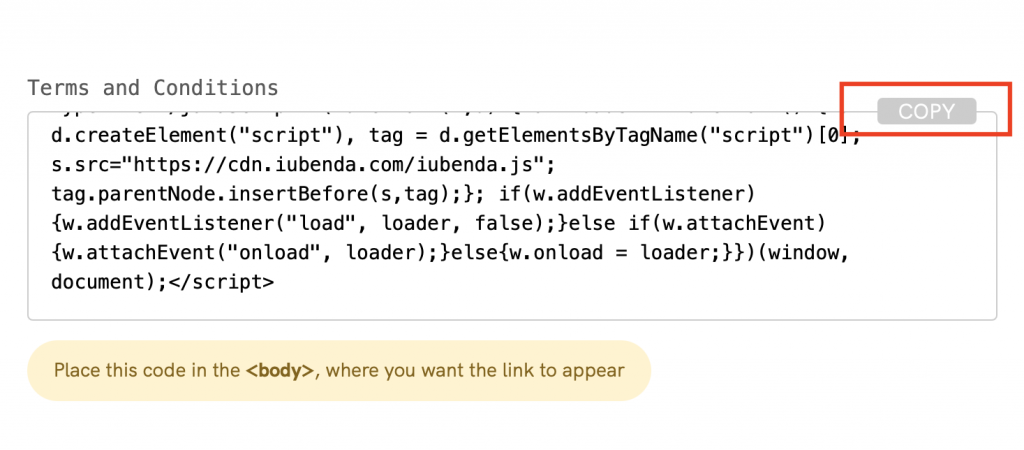
In the embed section, click on Add a widget to the footer scroll down to Terms and Conditions and click on COPY
Next, open your Wix project and follow the sequence below:
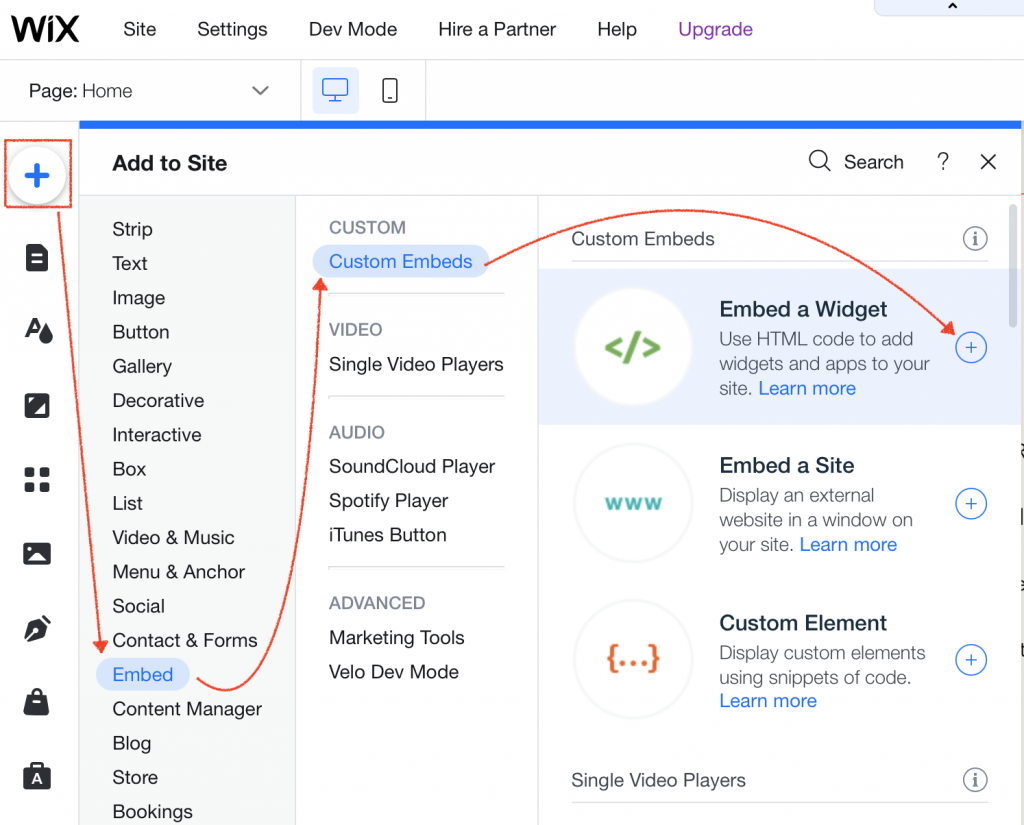
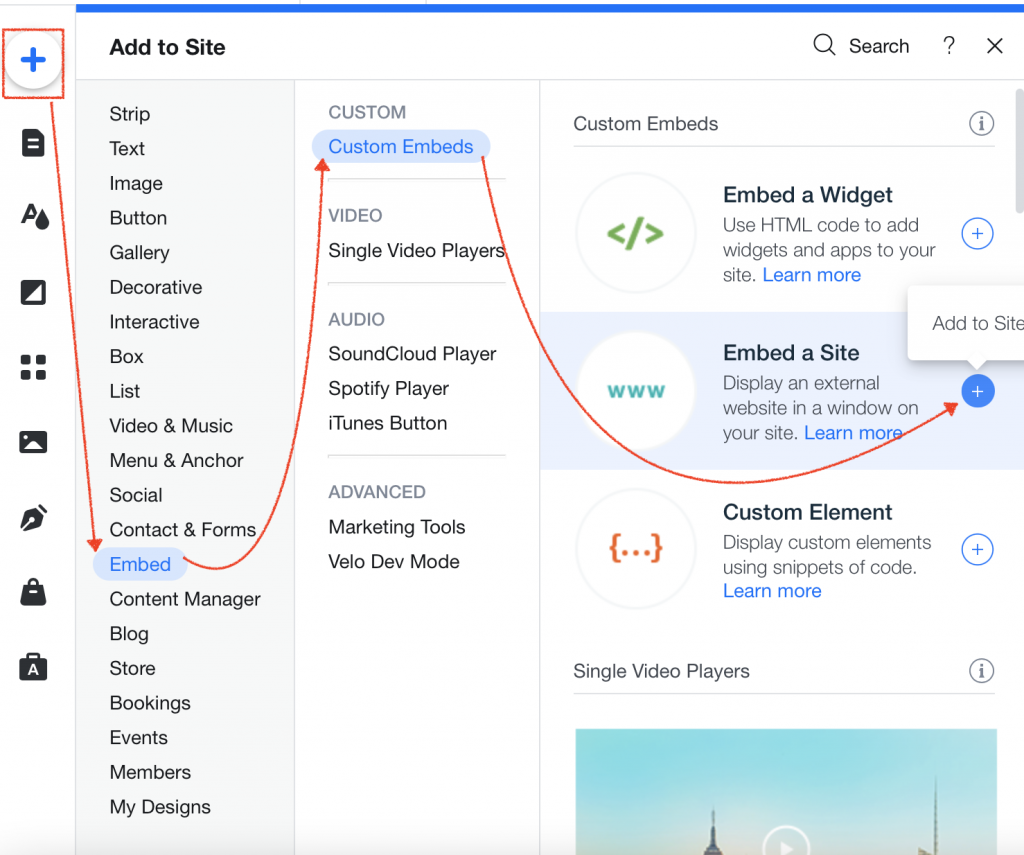
Click on the ‘+’ button > Embed > Custom Embeds > Embed a Widget > ‘+’ button
This will open up a box on your project, here you can Move To Footer (see image below)
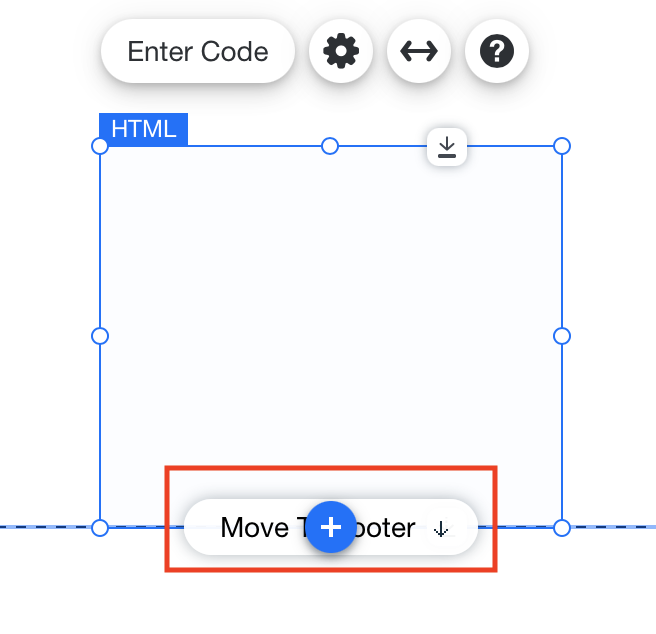
Next, add your code: Click on Enter Code, select Code then paste your iubenda Terms and Conditions code and click on Update
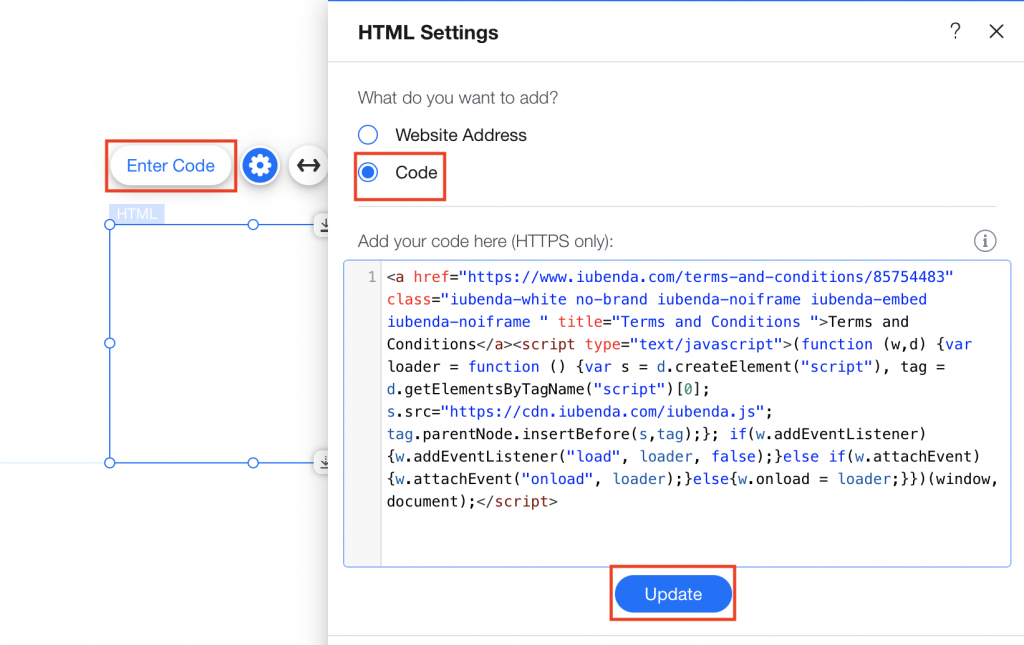
You’ve just added your iubenda Terms and Conditions widget to Wix! Below is an example of the results!

Method 2 – Direct link
To add a direct link, click on Use a direct link and click on COPY under the section titled “Terms and Conditions”
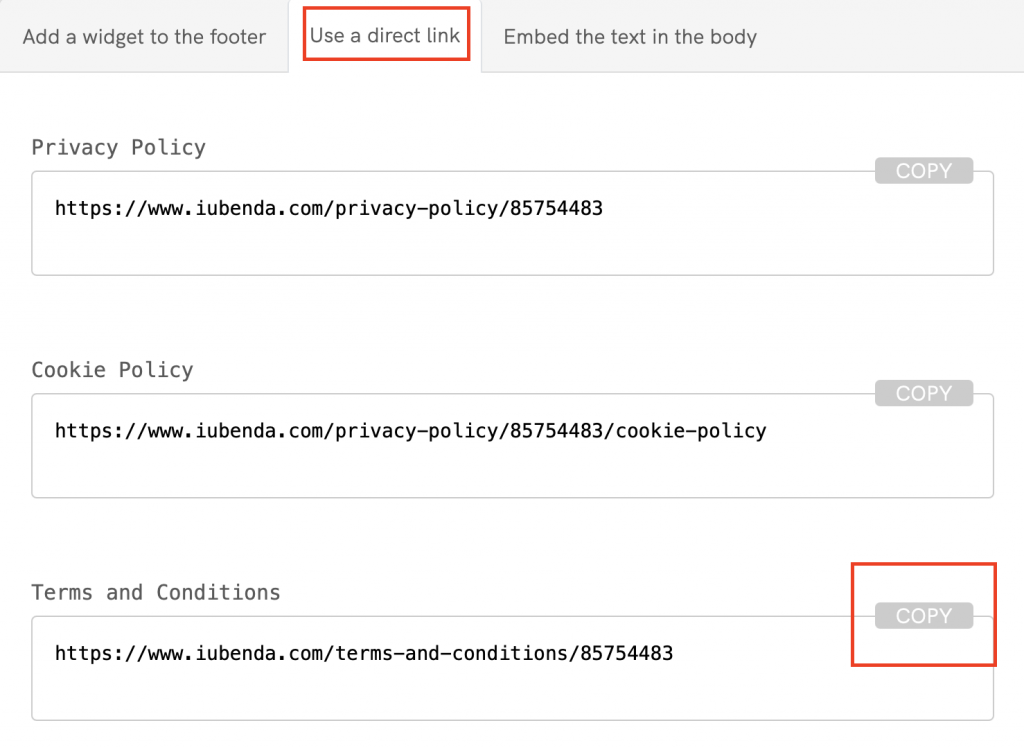
Then, head over to your Wix project and follow the sequence below:
Click on the‘+’ button > Embed > Custom Embeds > Embed a site > ‘+’ button
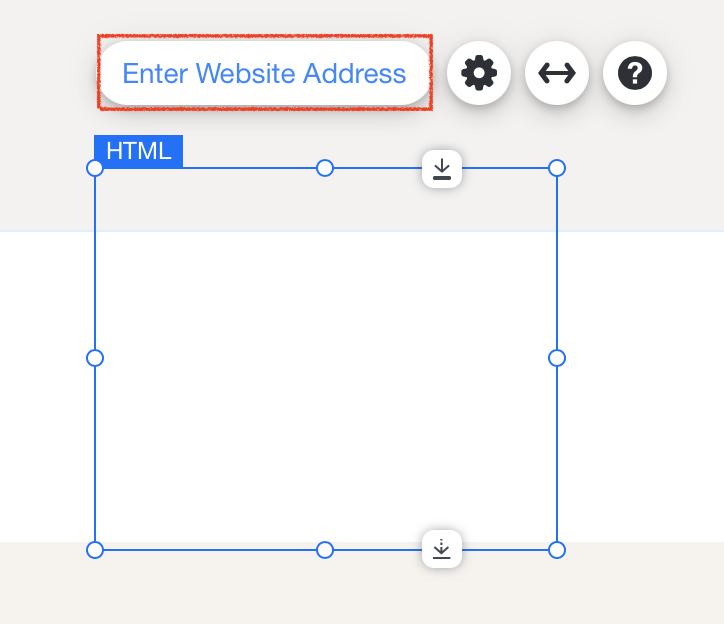
You should see a box appear on your project (as pictured below), click on Enter Website Address
Select Website Address and paste your iubenda link here, then click on Apply.
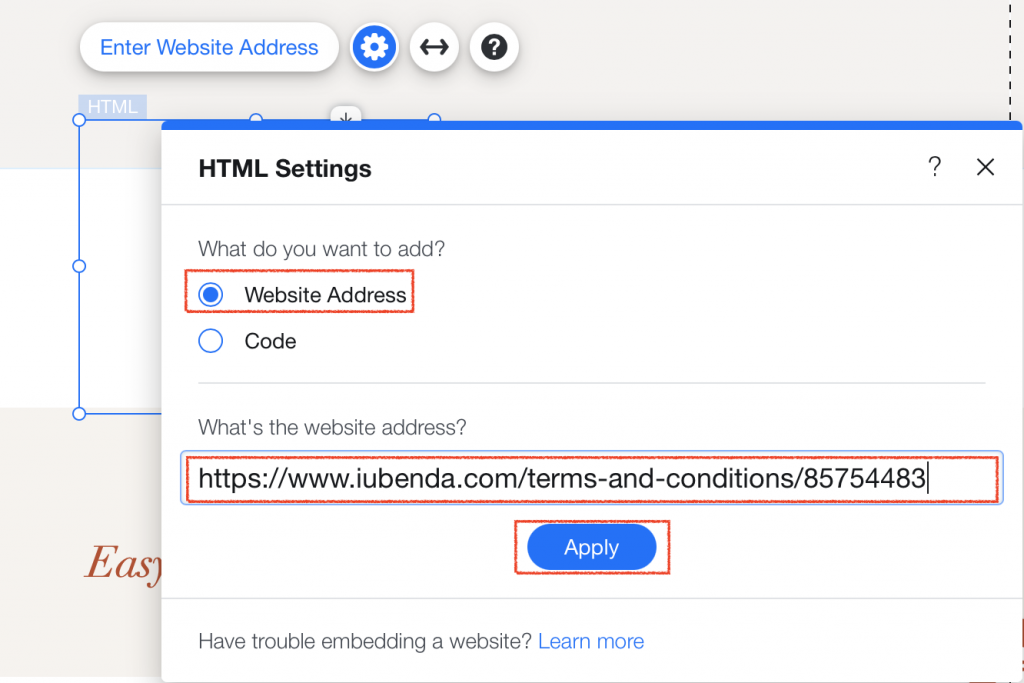
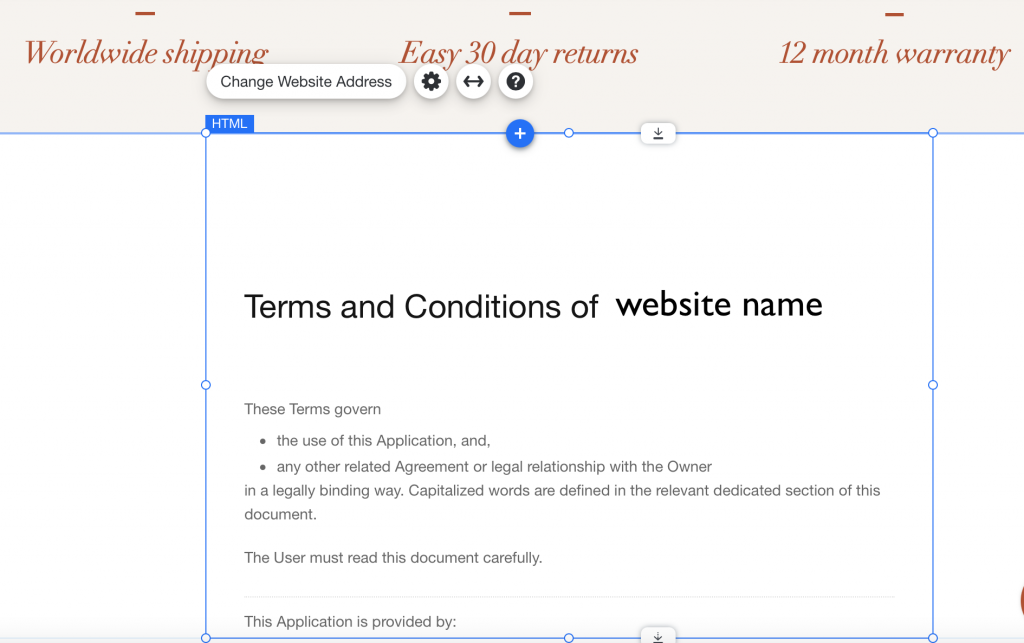
And you’re done! Here’s the result! From here you can edit the page layout how you like.
Method 3 – Embedded Text
The direct text embedding option makes your Terms and Conditions Document look as if it is a part of your own site. For direct text embedding, you need to create an empty page on Wix and paste our code there.
> Embed the text in the body >Terms and Condition > Copy

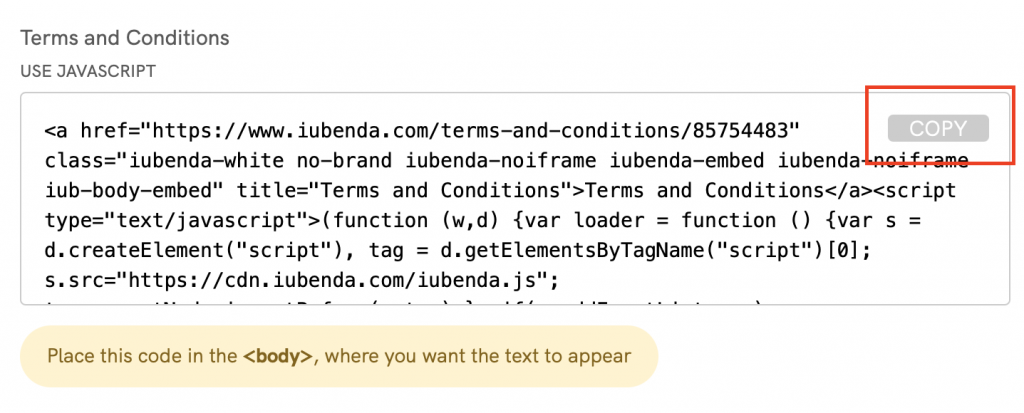
Copying the code directly will still apply iubenda styling (fonts etc.) to your document. If you’d like the document to take the styling directly from your website, select the white label option here.
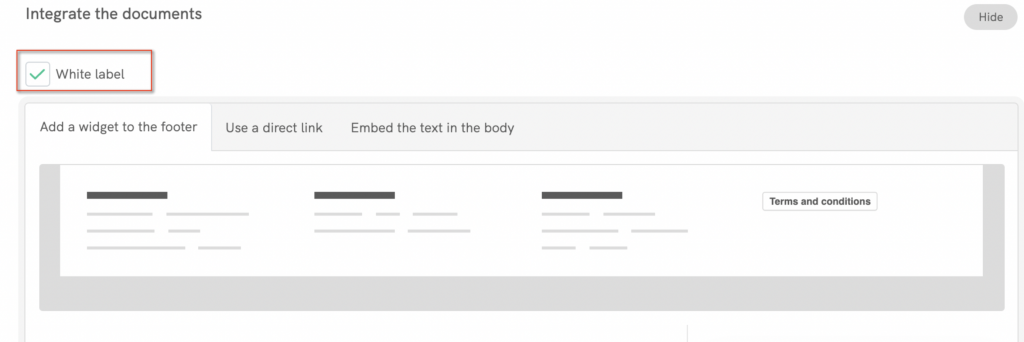
This will strip all iubenda styling from your document.
Next, open your Wix project and add a new page as shown below:
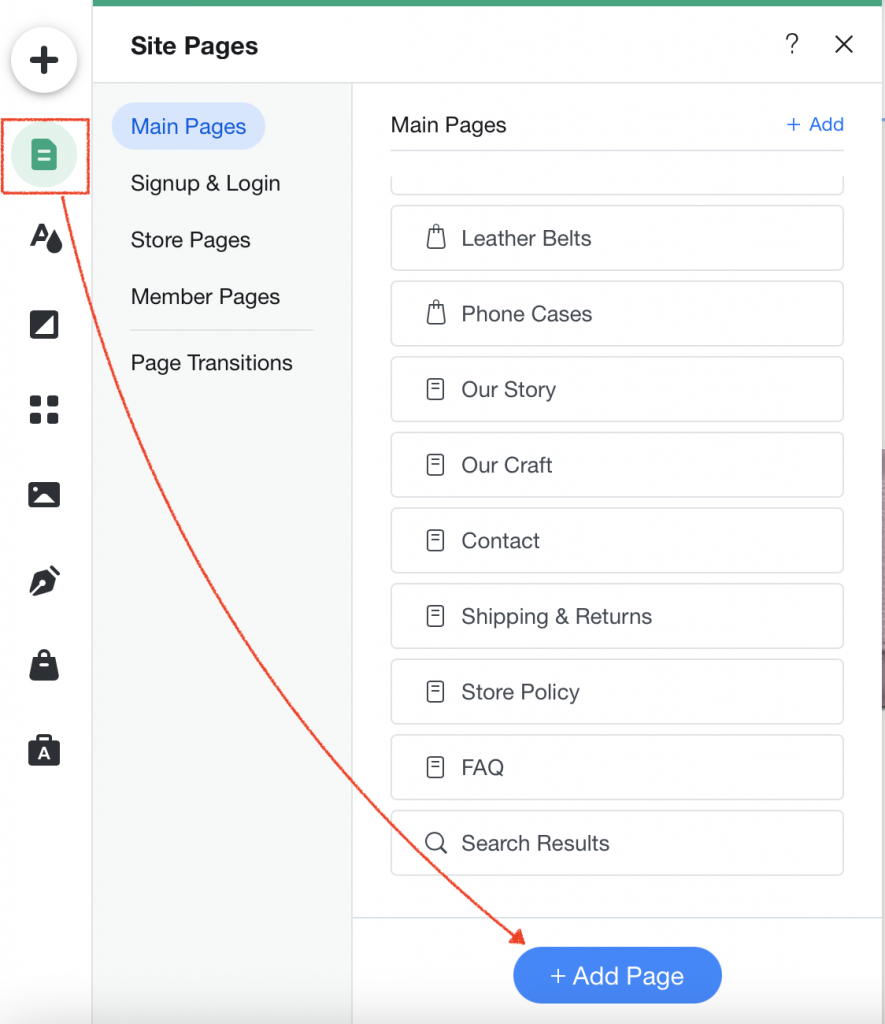
Then, add a blank page by selecting the ‘+ blank page’ button on the left of your screen.

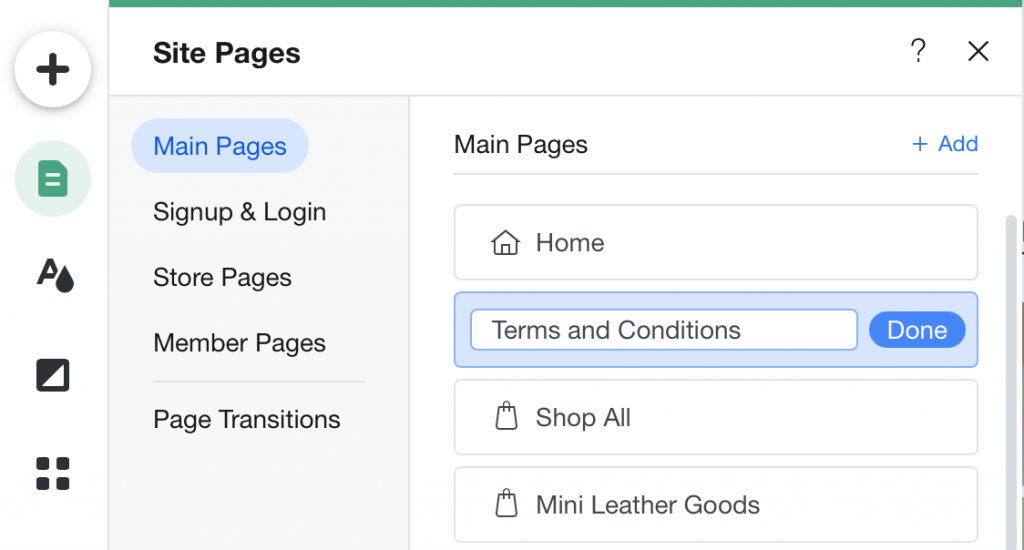
After that, rename your page Terms and Conditions and select Done.
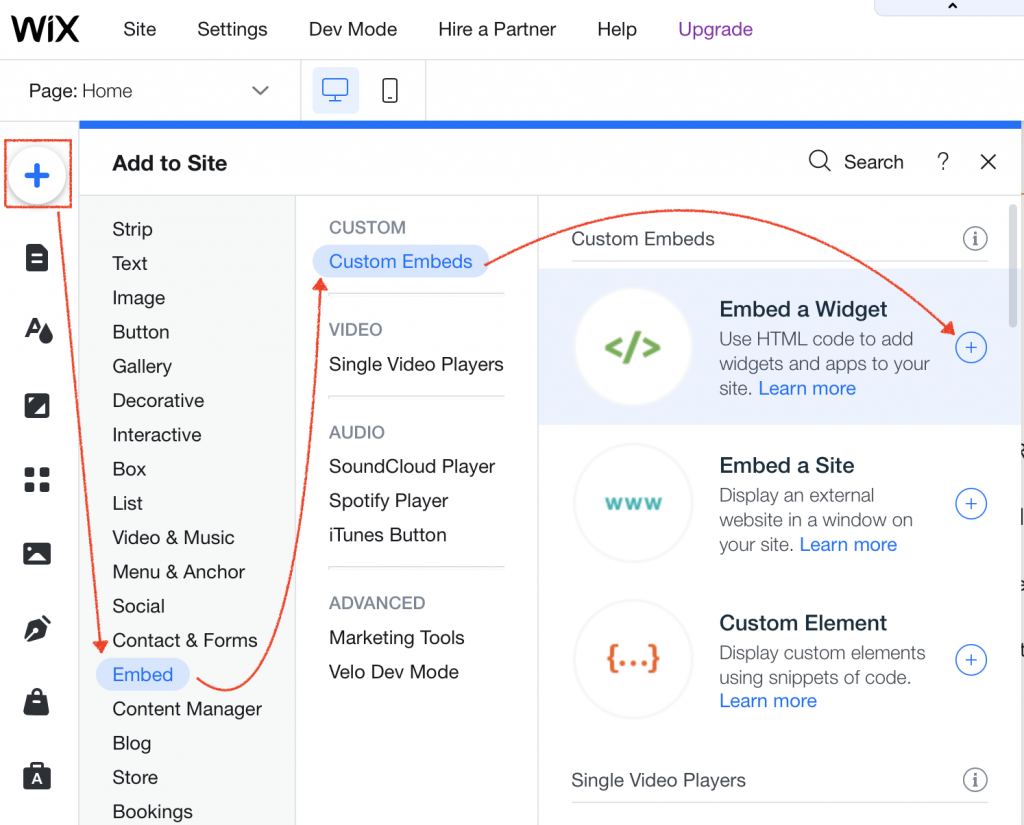
Then, you need to add to this new page as follows:
‘+’ button > Embed > Custom Embeds > Embed a Widget > ‘+’ button
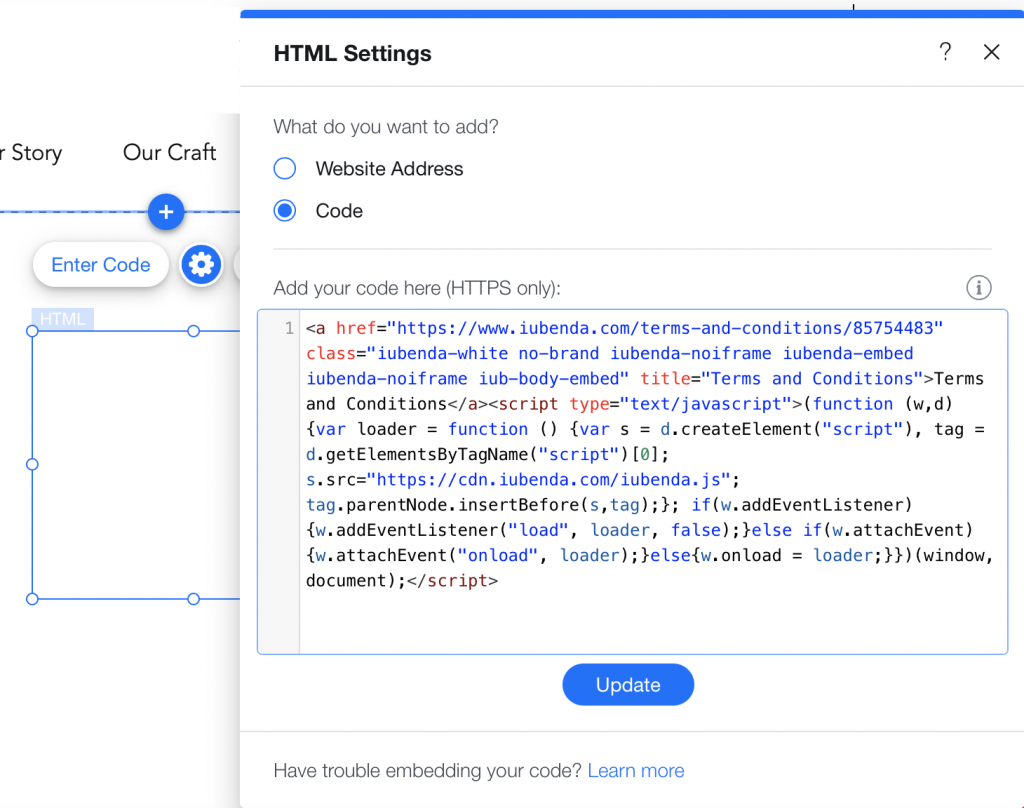
Lastly, click on Edit Code select Code, and paste your iubenda code here, then click on Update
And you’re done! See is an example of our results below:
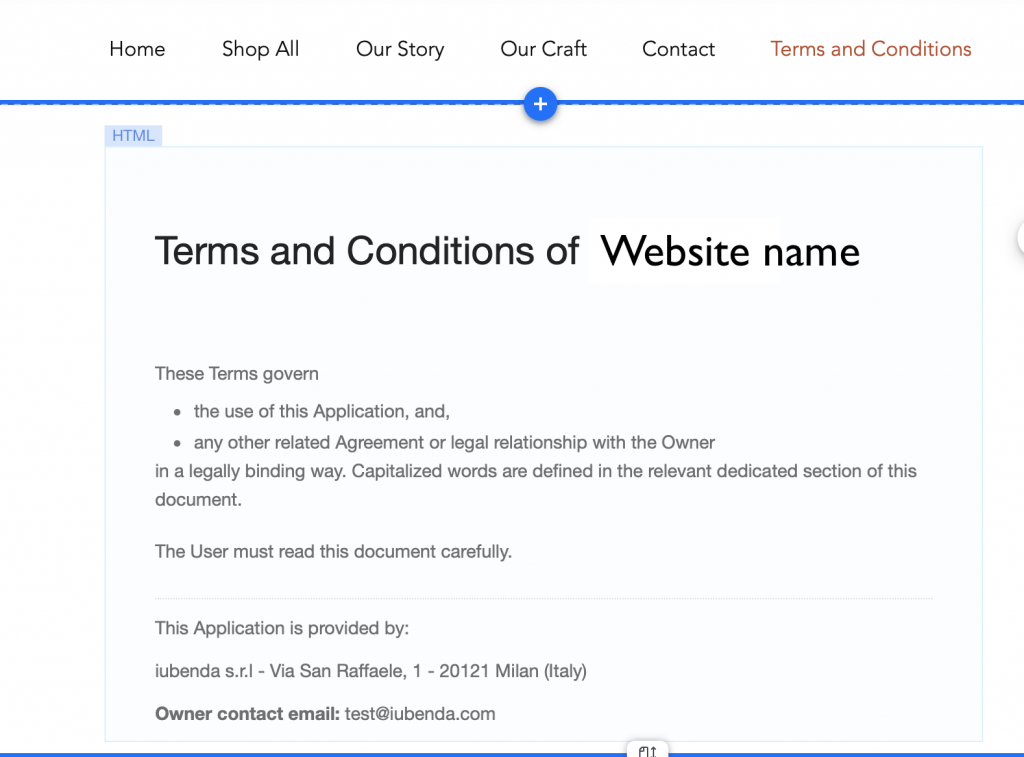
Hurray! You’ve just successfully added your Terms and Conditions to your website!
💡Not sure what privacy documents you need for your Wix? Do this quick quiz to see which laws apply to you and your business.