This is a guide for integrating iubenda with WordPress.
The WordPress.com platform does not allow for the inclusion of JavaScript. Therefore if you use WordPress.com, please read this guide instead.
Streamline your iubenda implementation on WordPress with our 1-Click Embedding feature. Discover all the details in our guide.
What you need
In order to follow this guide, you need:
- A WordPress blog or a website powered by WordPress, with access to the Admin panel (usually something like www.yourwebsite.com/wp-admin or www.yourwebsite.com/blog/wp-admin )
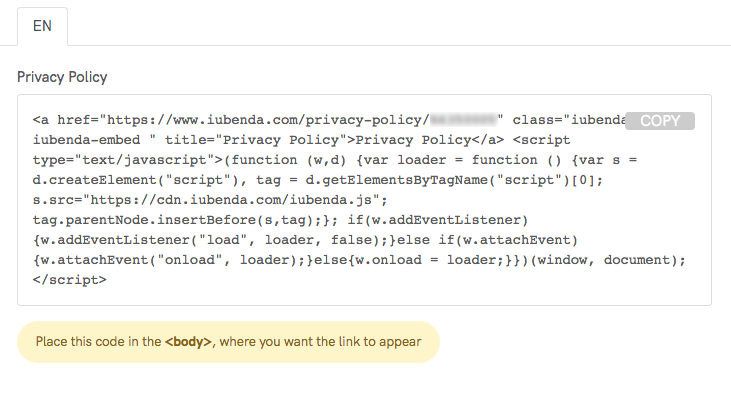
- The embedding code of the privacy policy you want to integrate – you can find this by going here: dashboard > [Your website/app] > <>Embed. The embedding code looks like this:

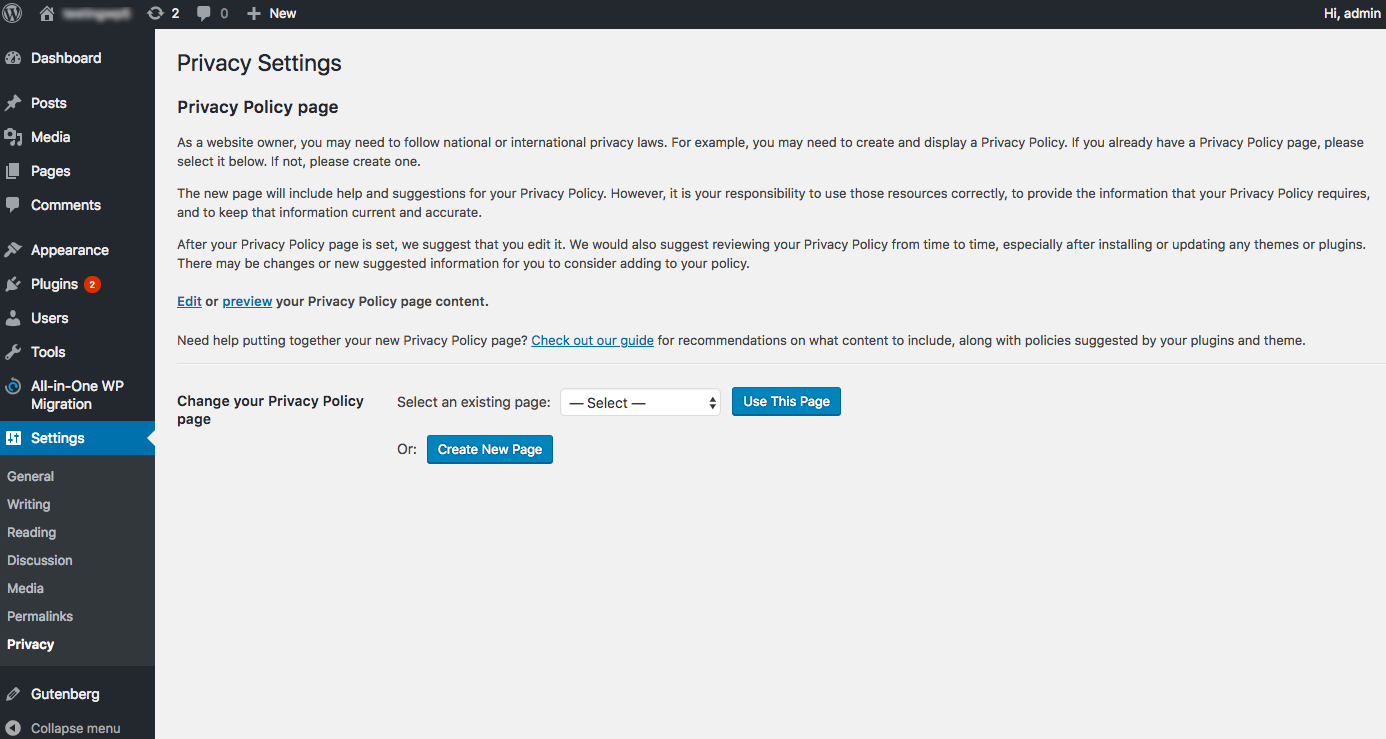
With the release of the WordPress 4.9.6 Privacy and Maintenance Release, the WordPress backend now includes a dedicated Privacy section which can be found under Settings > Privacy.
This gives you an additional, easy-to-setup way to include your privacy via the direct text embed method.
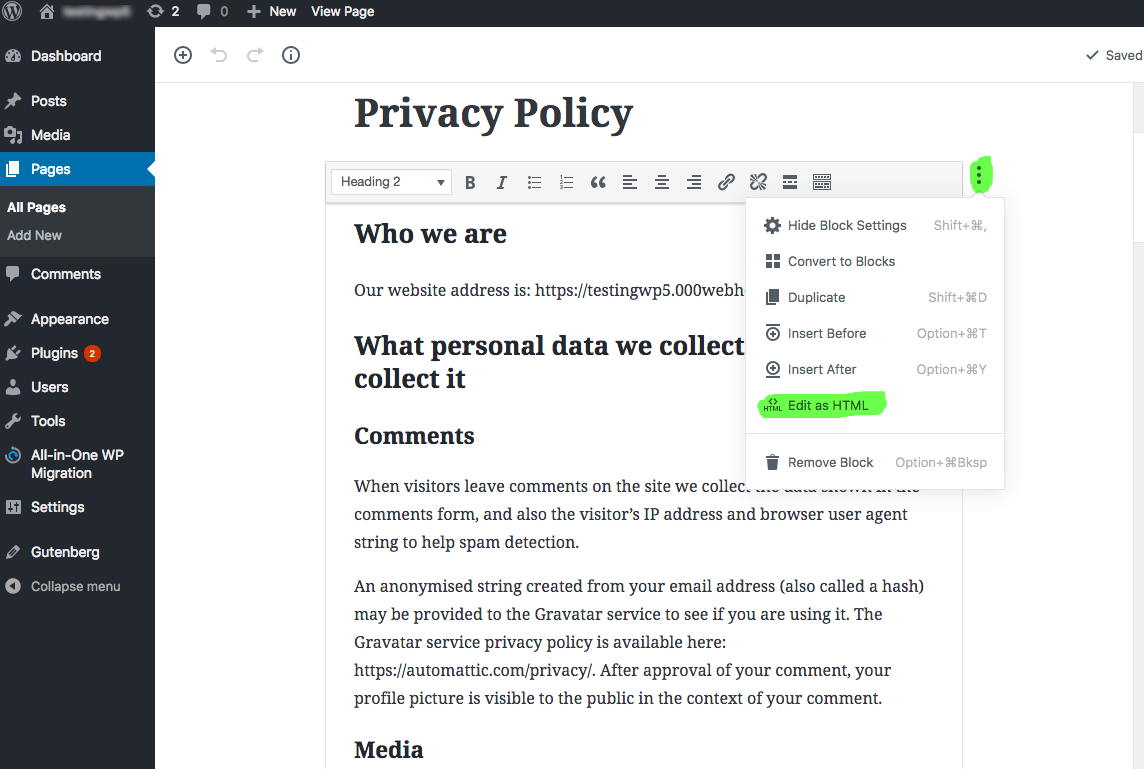
To do this, you’ll need to click on Create New Page, then select code view or html view in the text editor:
Next, delete the WordPress starter text, then paste in the iubenda direct text embed code (find this under the tab of the same name, in the integration section of your dashboard).And you’re done!
You can read the full direct text embed tutorial here.
Note: Direct page embed is a Pro/Ultra feature. If you don’t have a Pro/Ultra account, simply using the standard embedding method via a Footer Widget as demonstrated below, will be enough.
Caution
The WordPress privacy page is only automatically linked to via your site’s registration and login pages. Since most privacy laws (including the GDPR) require that your privacy policy be easily accessible throughout your entire website, you’ll need to manually link to your privacy page via your main menu, footer menu, or, via an integration method such as the footer widget method directly below.
How to integrate the privacy policy via the footer widget
To begin, access the admin panel of your WordPress website or blog by typing an address similar to the following: www.yourwebsite.com/wp-admin or www.yourwebsite.com/blog/wp-admin. (you must be logged into your WordPress site in order to access the admin panel)
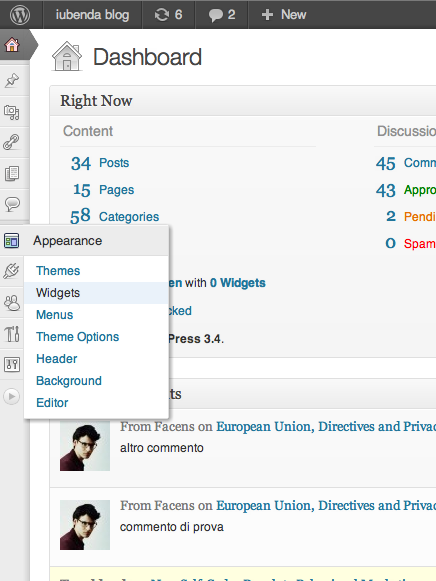
On your admin panel, access the Widgets section, available from here:
The widget section will look like this:
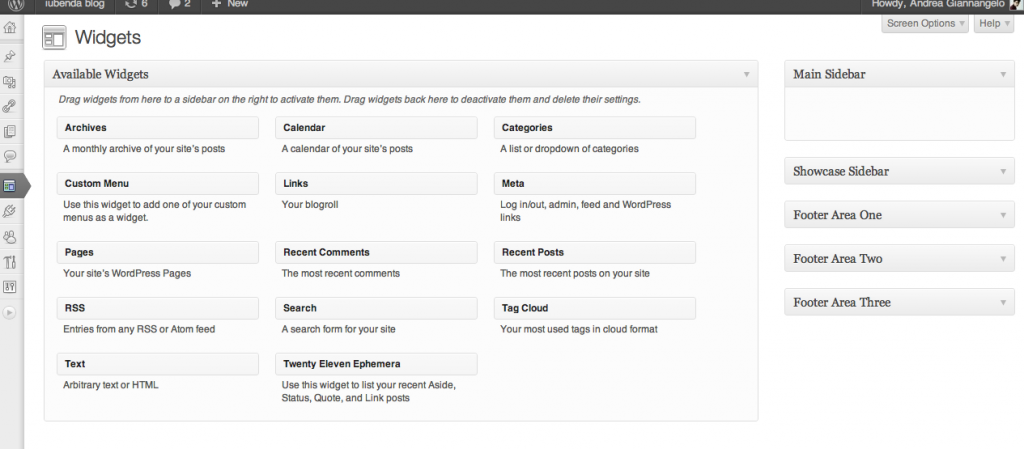
Depending on your chosen theme, you will encounter different sections on the right of the screen, referring to the Sidebar or to the Footer. Each of the boxes on the right allows you to insert content in the respective sections of your WordPress website. You must therefore choose which of these sections you want to place the privacy policy link into. The most common choice is the Footer, although placing it in the Sidebar is also a possibility. In any case, you can modify this preference at any time.
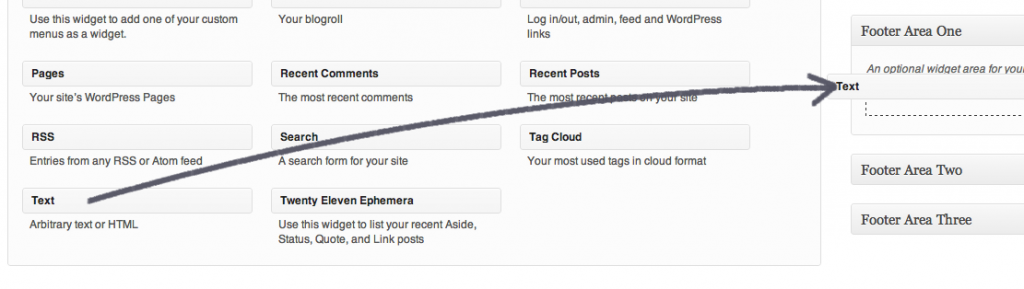
After selecting the section, you must drag the Text box from the left to the section on the right, as shown in the screenshot below:
The widget will then open this way:
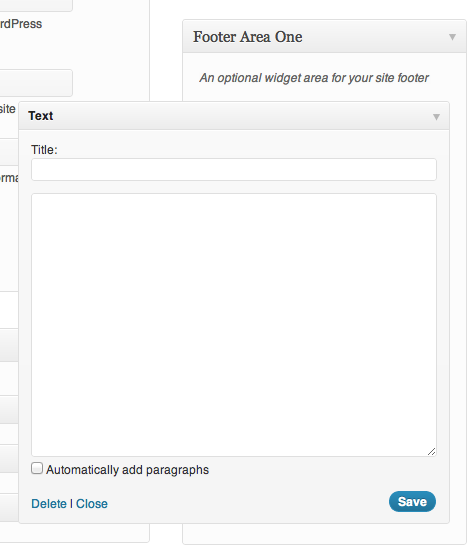
The iubenda embedding code must be pasted here as follows:

Hit save.
On your website you should now see something like this:
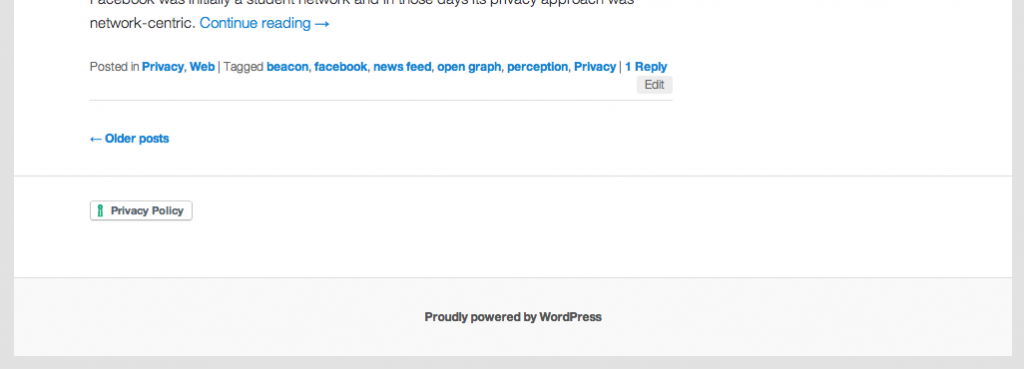
If you see the privacy policy link, everything is functioning properly.
Does my site need terms and conditions?
Though not always legally required, a Terms and Conditions document is pragmatically required. It governs the contractual relationship between you and your users and is therefore essential for protecting your content from a copyright perspective as well as protecting you from potential liabilities.
The Terms and Conditions document is a legally binding agreement, therefore not only is it important to have one, but it’s also necessary to ensure that it’s clear, easily understandable, precise and that users can both easily see it and agree to it in an unambiguous way (for example, clicking a checkbox with a visible link to the document before being allowed to create an account or comment).
You’ll likely need a Terms and Conditions document if any of the following apply to you:
- You have different user levels (eg. registered vs non-registered);
- You want to set the rules for user behavior (including comments) and state grounds for termination of accounts;
- Your users are allowed to upload content;
- You participate in some kind of commerce, including affiliate programs;
- You’d like to protect your blog and it’s content by stating how it can be used.
Read What Are the Terms and Conditions and When Are They Needed? to learn more or create your document in minutes with our Terms and Conditions Generator.