If you want to remove the iubenda privacy widget or replace it with a simple link in your website’s footer, this guide will show you how. By removing the floating widget, you can give users a less intrusive way to manage their cookie preferences.
We’ll walk you through all the options to keep your site compliant with EU regulations, US laws like California’s CCPA and CPRA, and the requirements of the Transparency and Consent Framework (TCF). Let’s find out! ⬇️
In short: What is the Privacy Widget?
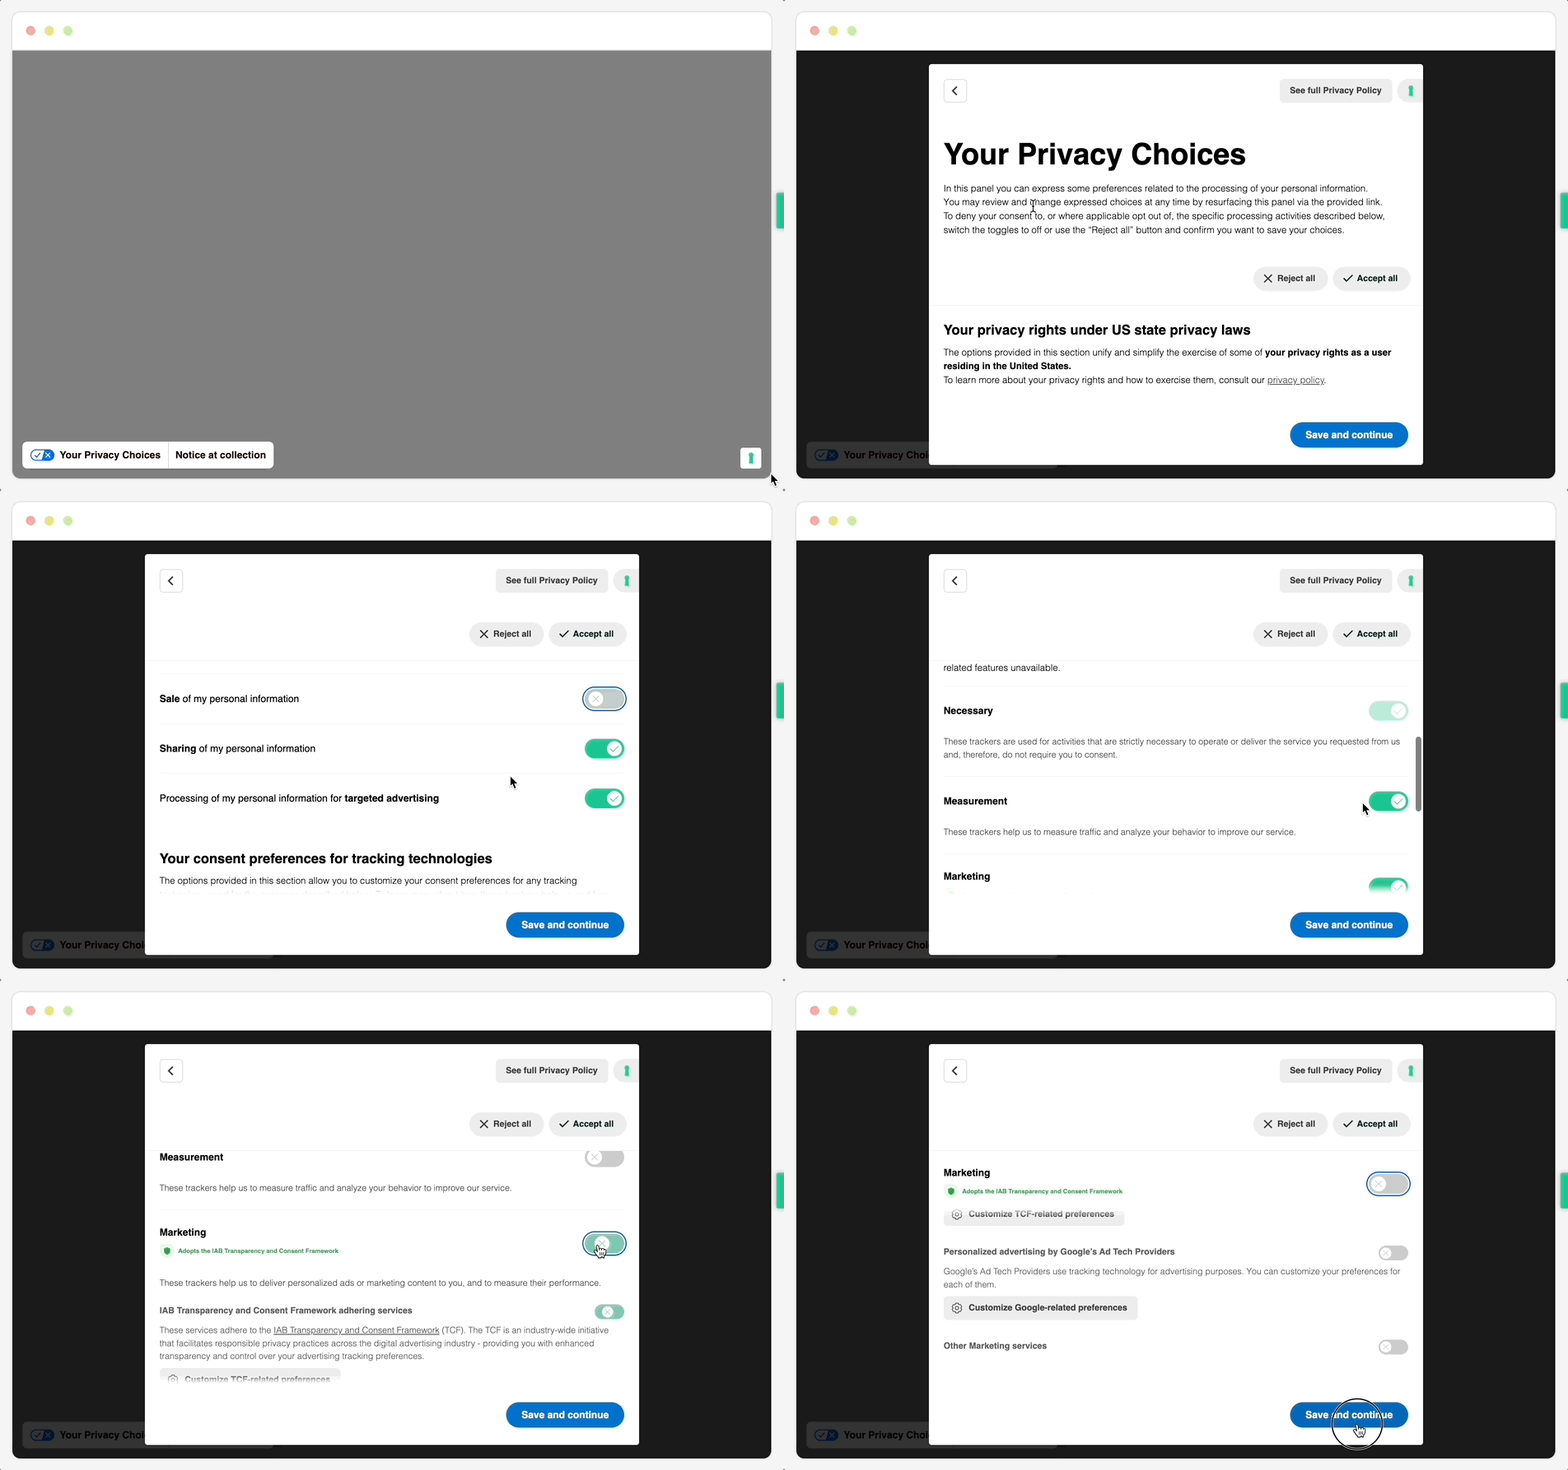
The privacy widget is a feature that allows users to access and edit their tracking preferences at any time after they’ve made their initial choices. However, in some cases it is possible you may want to remove the floating widget or offer users a less prominent option, such as footer link, to provide users with access to these settings. Here’s how you can do that:
Privacy Widget Example:

Disabling the Privacy Widget
To disable the privacy widget, you have two main options: manually adjusting the script or disabling the widget through the Privacy Controls and Cookie Solution Configurator.
💡 If you’d rather not modify the script manually, simply follow the steps below to disable the widget directly through the iubenda interface.
Important Note for Users with TCF Enabled
If you have enabled the Transparency and Consent Framework (TCF), the privacy widget is automatically added by the IAB framework, and removing it entirely is not permitted. You must provide users with the ability to update their cookie preferences to comply with TCF requirements. For more details, please refer to the section below on TCF-enabled sites.Modify the Script Manually
To disable the privacy widget, follow these steps:
Within the banner script, set the floatingPreferencesButtonDisplay parameter to false within the banner script.
This will prevent the widget from displaying on the site.
Example:
<script type="text/javascript">
  _iub.csConfiguration = {
    "floatingPreferencesButtonDisplay": false
  };
</script>
Disable the Widget via Configurator
If manually adjusting scripts seems overwhelming, you can easily disable the widget directly through the Privacy Controls and Cookie Solution Configurator:
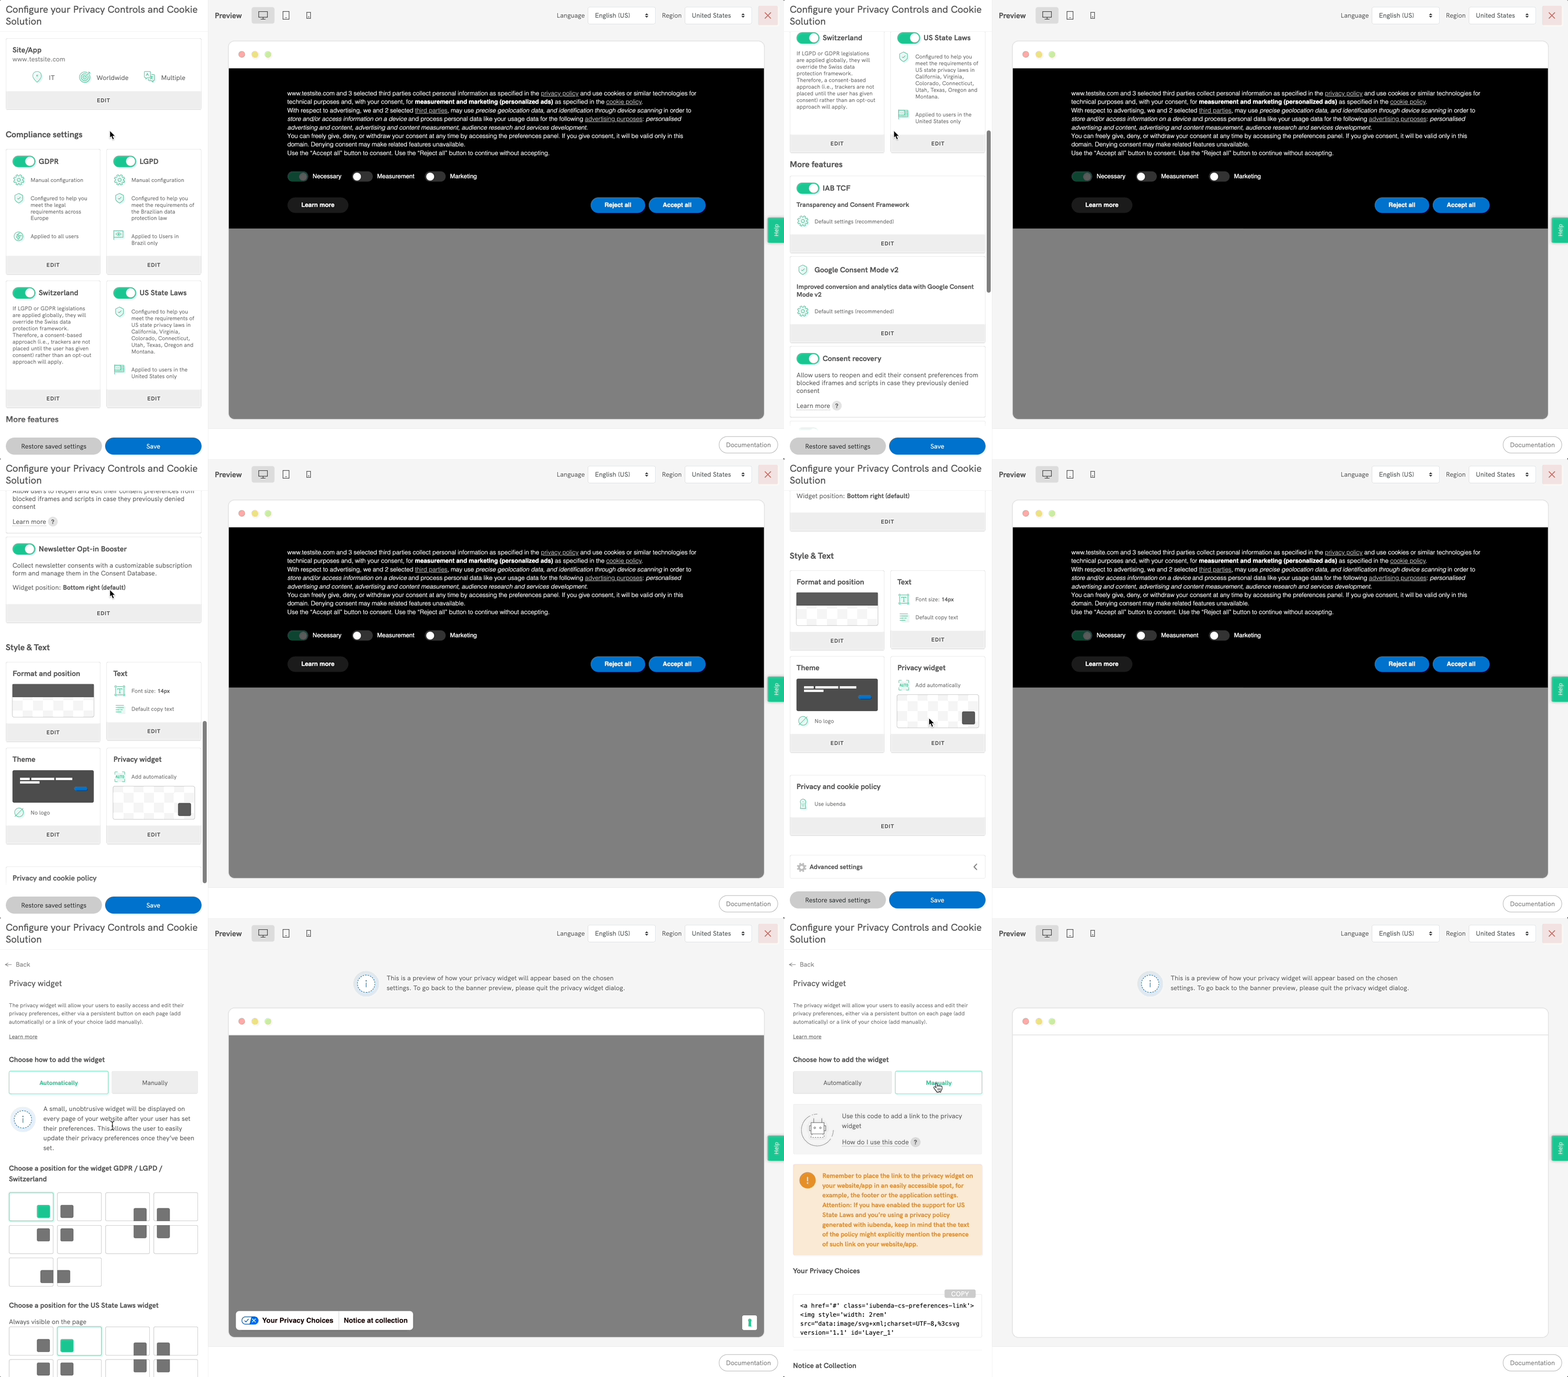
- Go to your iubenda Dashboard.
- Navigate to the Privacy Widget section and click “EDIT“.
- Set the widget to “Manually” and save your settings.
- Re-embed the updated script into your website or iubenda WordPress plugin.

Adding a Link in the Footer
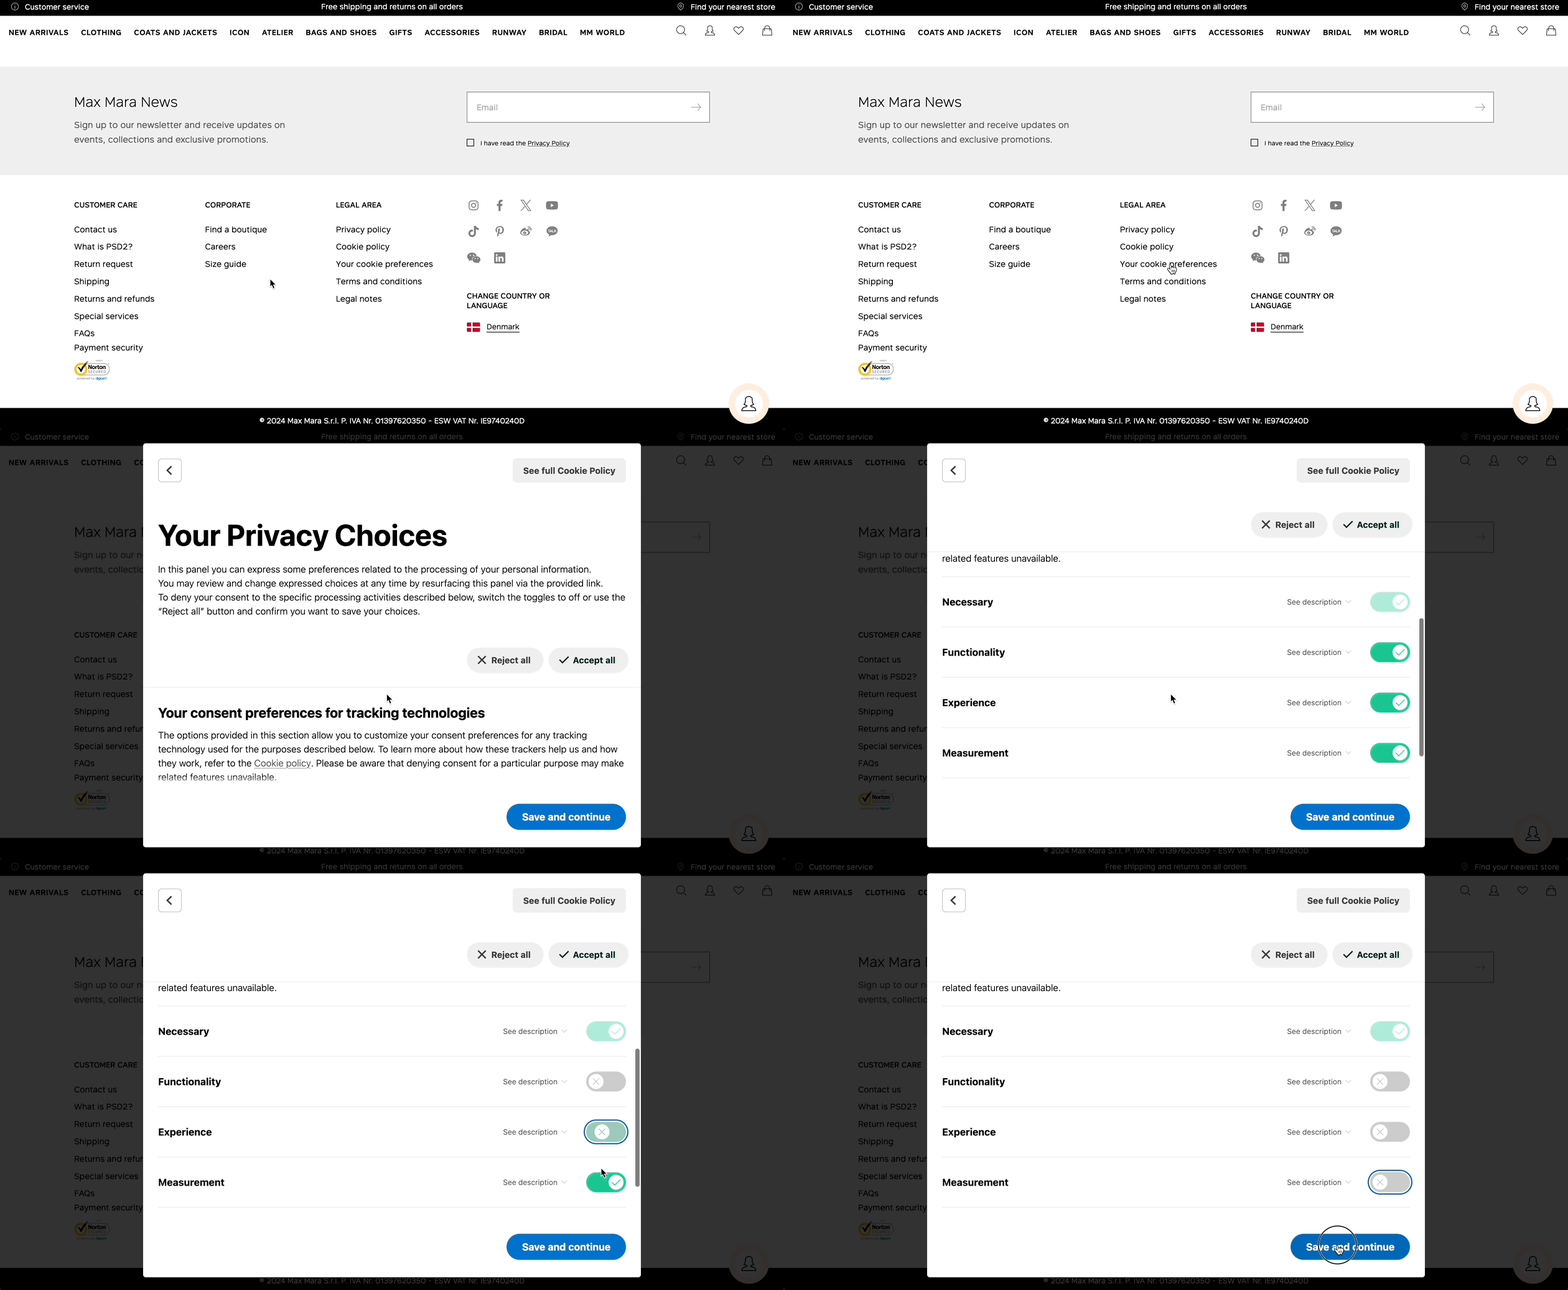
Instead of the predefined widget, you can offer users a direct link in the footer to re-open and update their consent preferences. This link will serve the same purpose as the privacy widget but in a more discreet way.
When clicked on, the link will allow your users to re-open the consent preferences modal and access or update their tracking preferences. Please note that this option is required by most data protection authorities and must be present on every page of your website.
Example:

To do this, follow these steps:
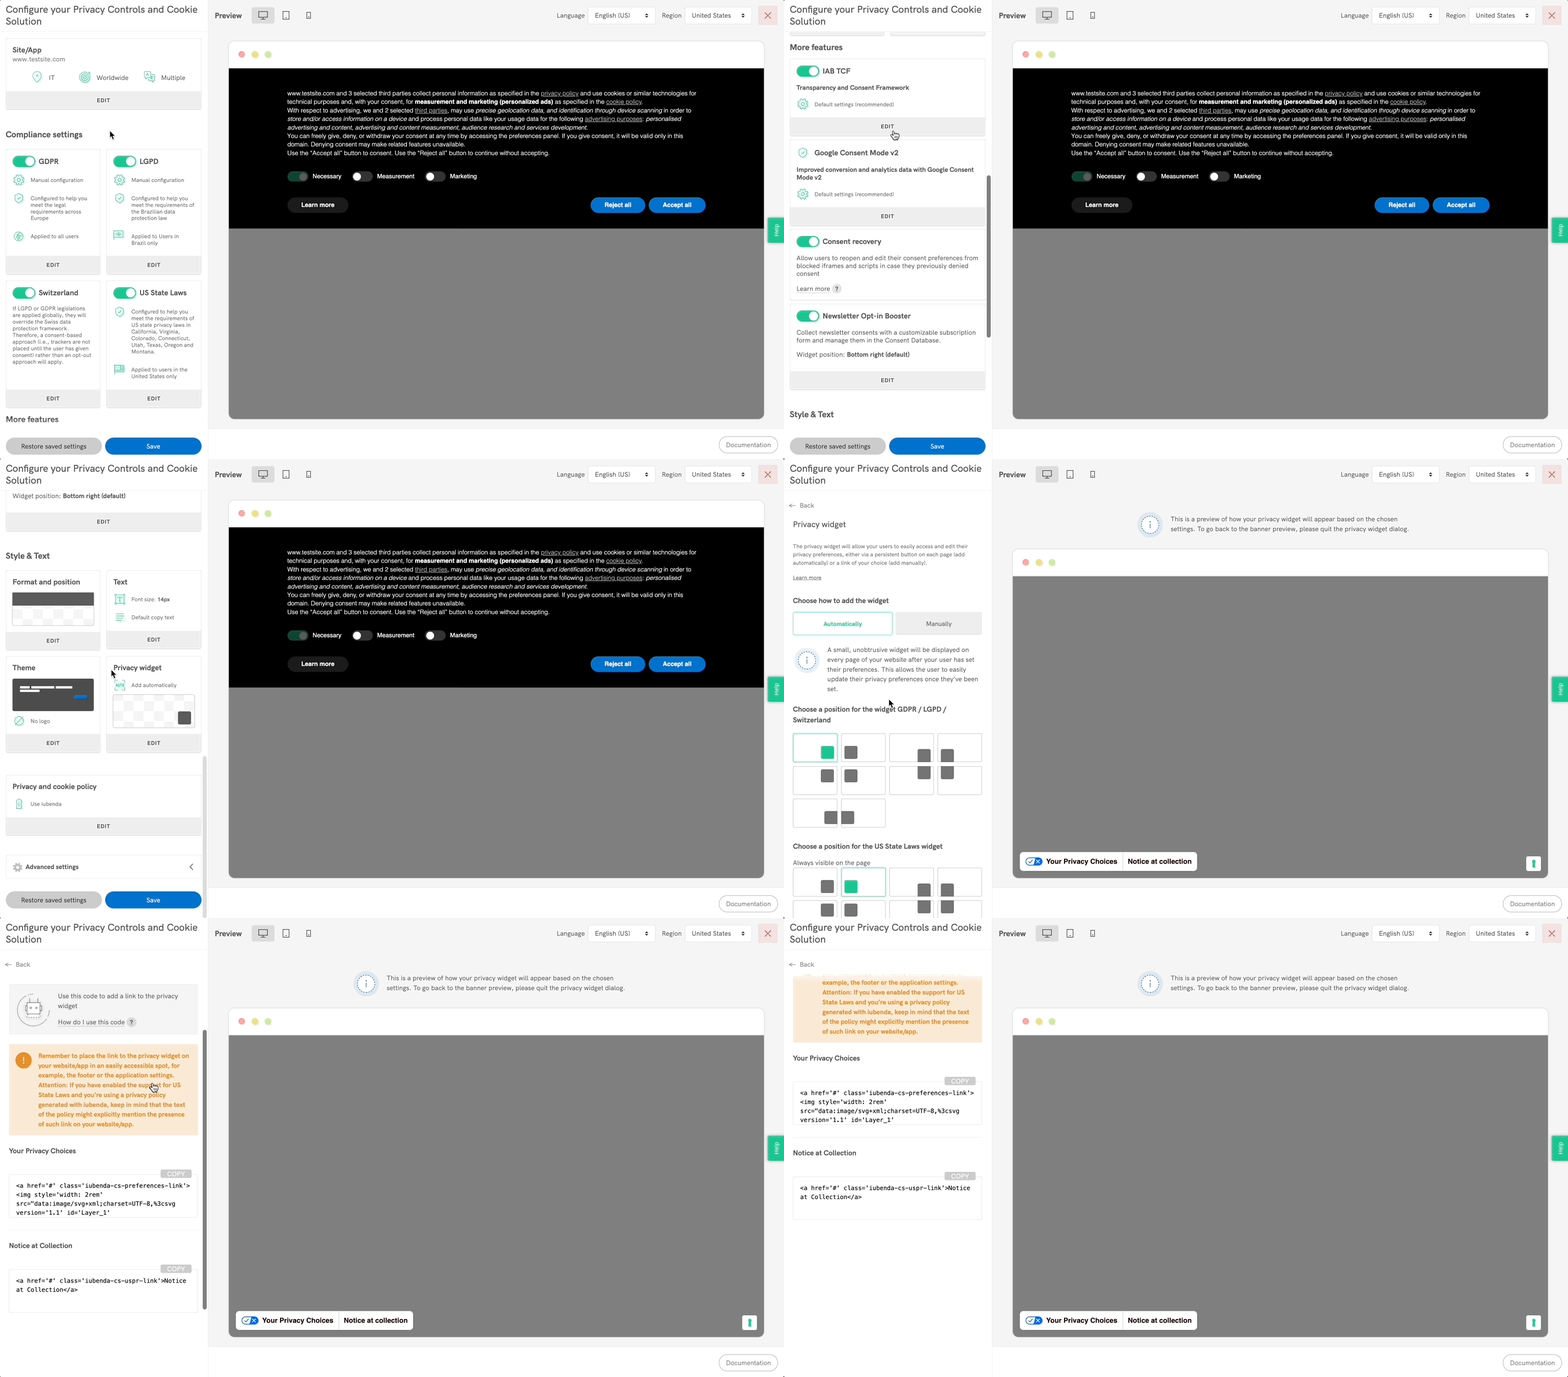
- Go to the Privacy Controls and Cookie Solution Configurator.
- In the Privacy Widget section, click “EDIT”, and choose “Manually”
- Copy/paste this code into your preferred website element (e.g. page footer or header) to integrate into your website.
Use the class iubenda-cs-preferences-link to allow users to access and update their tracking preferences, via a “Your Privacy Choices” link.
Use the class iubenda-cs-uspr-link for US-specific privacy preferences, such as “Notice at Collection” to comply with regulations like the CCPA/CPRA.

❗️ Important
The widgets will only disappear once you embed these links on your website.
Consider that, for US compliance, some state laws, such as the California Consumer Privacy Act (CCPA), amended by the California Privacy Rights Act (CPRA), require a predefined format for this link. The link must be labeled “Your Privacy Choices” and should be accompanied by a specific blue and white icon. This ensures that users can easily access their privacy controls at any time.

For Users with TCF (Transparency and Consent Framework) Enabled
If you have enabled TCF, the IAB framework automatically adds the privacy widget to your site. In this case, to meet TCF framework requirements, you must always give users the ability to update their cookie preferences. This means you are required to manually add a link that allows users to do so. This link is crucial for complying with TCF standards and ensures users can adjust their consent for advertising tracking at any time.
To meet this requirement, include the following link in your site:
<a href="#" class="iubenda-advertising-preferences-link">Update your advertising tracking preferences</a>
Replace the "#" in href="#" with the appropriate URL path that opens the consent preferences modal.
Additional Options for Customizing the Widget
If you decide to keep the widget but want to change its appearance or behavior, here are some additional configuration options available:
- Position: Define where the widget will appear on the page using the
floatingPreferencesButtonDisplayoption. Available values includefalse,true,top-left,top-right,bottom-left,bottom-right(default if set to true),anchored-center-left,anchored-center-right, etc. - Button Text: Use
floatingPreferencesButtonCaptionto change the text of the privacy widget button. - Button Icon: You can choose whether to show an icon with
floatingPreferencesButtonIcon. Set this totrue(default) orfalseto hide it. - Hover Effect: To show text on hover, use
floatingPreferencesButtonHover. - Button Shape: You can make the button round by setting
floatingPreferencesButtonRoundtotrue. - Z-Index: If you encounter overlapping issues with other elements on your page, use
floatingPreferencesButtonZIndexto set a custom z-index value.
👉 For more information, check out our Privacy Controls and Cookie Solution (Advanced Guide).