
You can also do this by prompt. Connect iubenda to Claude or ChatGPT and ask it to scan your site and configure your cookie banner, then install it with the steps below. See how it works
Built your website on PrestaShop and need to manage cookies? In this guide, you’ll learn when you need a cookie policy or consent management platform (CMP) for PrestaShop and how to add iubenda’s Privacy Controls and Cookie Solution to your PrestaShop store using the official iubenda plugin.
Jump directly to How to add iubenda’s Privacy Controls and Cookie Solution to your PrestaShop site.
Do I need a cookie policy for PrestaShop?
Yes, and here’s why.
If you have EU-based users and your store uses cookies (which it most likely does), you need to manage cookie consents according to the ePrivacy Directive and GDPR. This means you need to block cookie scripts and similar technologies until the user gives consent.
Also, for the consent to be considered valid, you need to make certain disclosures via a cookie banner and link to a more detailed cookie policy. See our getting started guide.
Need to add a privacy policy to your PrestaShop store? See the PrestaShop privacy policy integration guide.
The integration on PrestaShop works through the official iubenda plugin. Once installed and configured, the plugin automatically injects the iubenda code into the <head> tag of every page, manages banner display and consent storage, and detects and blocks a wide list of third-party scripts server-side.
Caution
- The module is compatible with PrestaShop 1.7 and later. For PrestaShop 1.6, see the manual embedding section below.
- You also need to have overrides enabled (enabled by default).
What the solution supports
When you embed the Privacy Controls and Cookie Solution on your PrestaShop site, you get access to the full feature set of the iubenda cookie management platform:
- Fully customizable cookie banner with options to match your store’s branding and colors
- Automatic cookie policy generation based on the services detected on your site
- Auto-blocking of scripts that install cookies before consent is collected
- Integration with Google Consent Mode v2 (iubenda is a Google-certified CMP)
- Integration with IAB’s Transparency and Consent Framework (TCF 2.3)
- Support for US state privacy laws (CCPA/CPRA, VCDPA, CPA, CTDPA, and others)
- Support for the Swiss Federal Act on Data Protection (FADP)
- Support for Brazil’s LGPD
- Granular, per-category consent (e.g. Functionality, Experience, Marketing)
- Geo-detection to limit consent requests to regions where legally required
- Storage of consent proofs for accountability
- Simplified management for multilingual PrestaShop stores
- AdRoll
- AddThis widgets
- Bing
- CodePen
- Criteo
- Disqus
- Elevio
- Facebook Comments
- Facebook widgets
- Freshchat
- Google AdSense
- Google Analytics
- Google Maps
- Google ReCaptcha
- Google Site Search
- Google Tag Manager
- Google oAuth
- Google+ widgets
- Headway
- Instagram widgets
- Kissmetrics
- LinkedIn widgets
- Mixpanel
- Neodata
- Olark
- Optimizely
- Outbrain
- PayPal widgets
- Pingdom
- Pinterest widgets
- Segment
- ShareThis widgets
- Twitter widgets
- UserVoice
- Vimeo
- YouTube
1. Generate a cookie policy
Before adding the cookie banner, generate a cookie policy for your PrestaShop store. Head over to your iubenda dashboard and click on [Your website] > Privacy and Cookie Policy > Edit. Add each service your site uses (e.g. Google Analytics, embedded videos, social buttons, payment providers) so that your cookie policy accurately reflects your data processing activities.
Once your cookie policy is ready, the Privacy Controls and Cookie Solution will automatically link to it from your cookie banner.
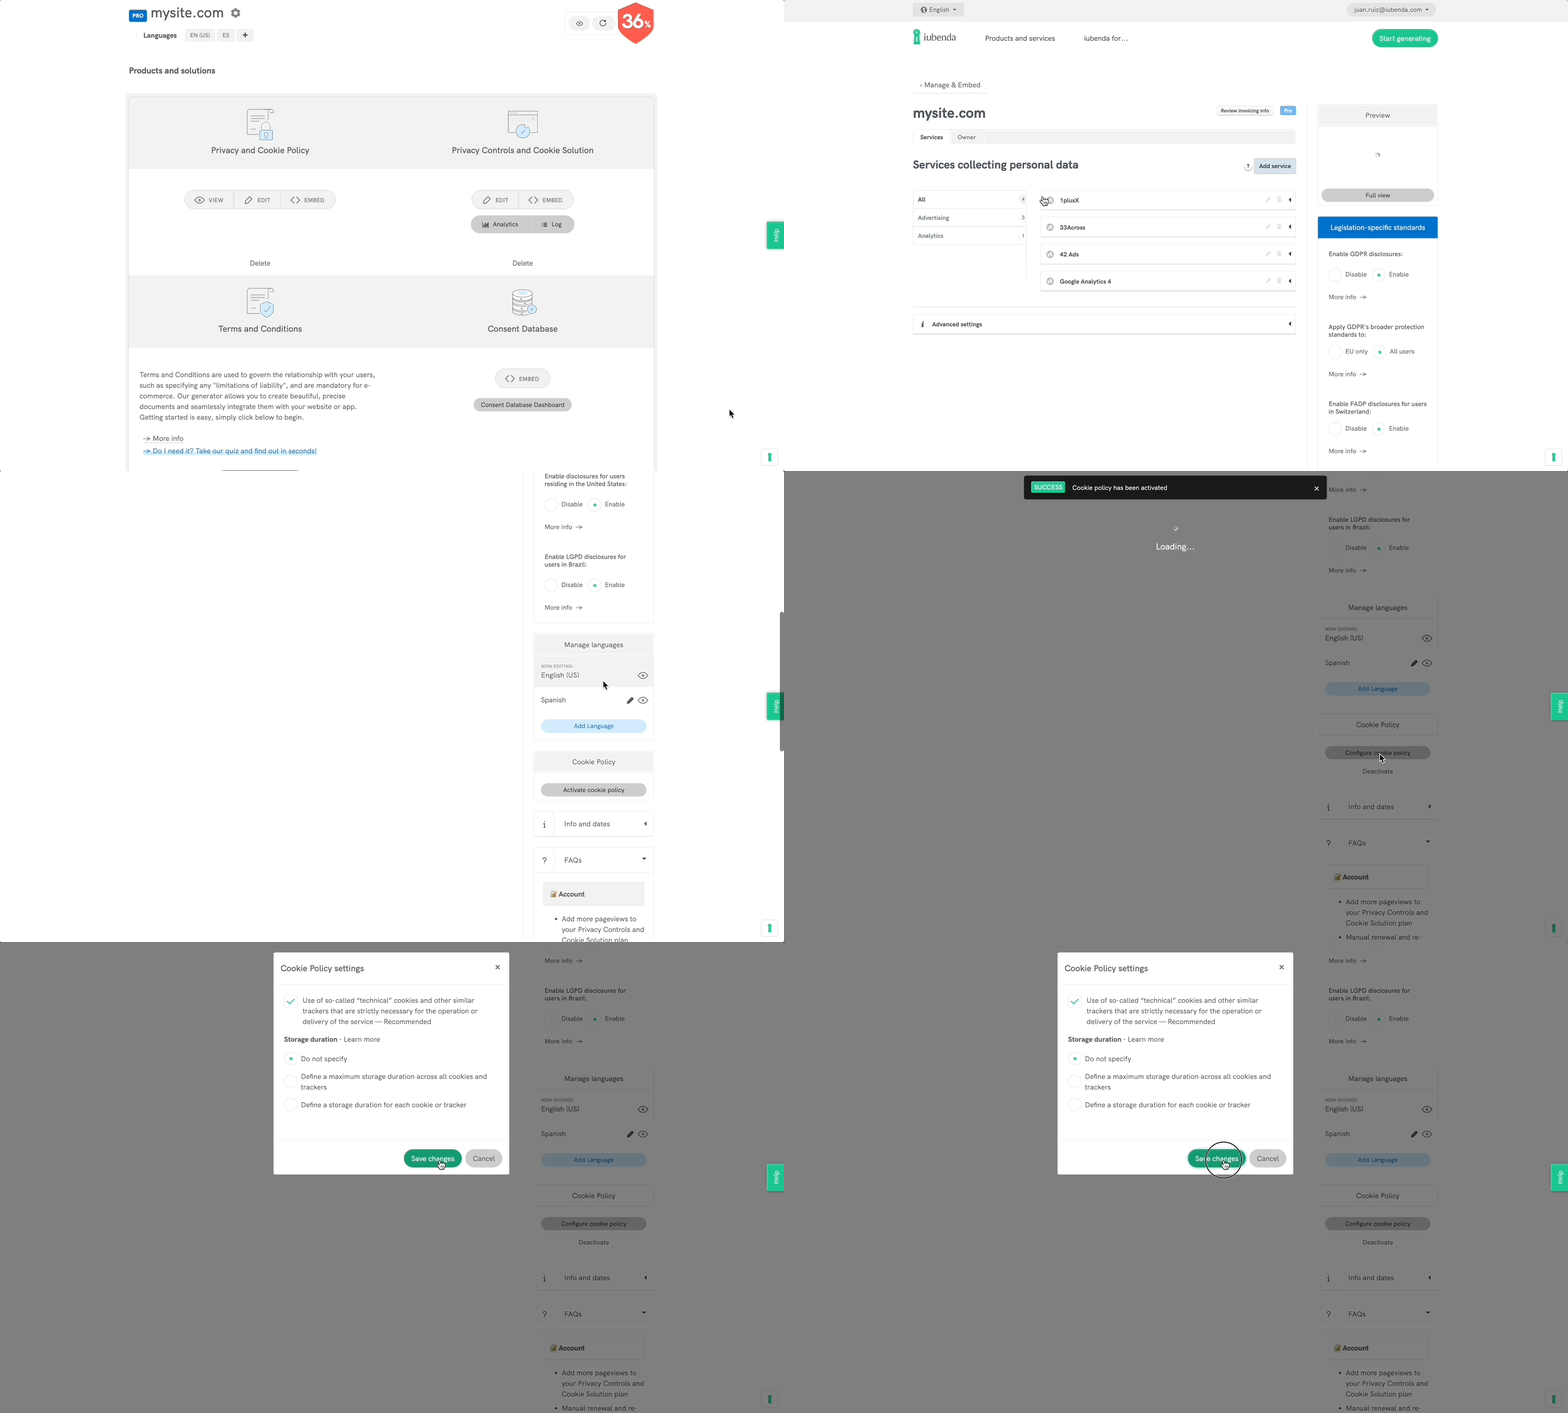
If you already host your cookie policy at a custom URL, you can link to it manually in the Privacy Controls and Cookie Solution settings under Edit > Privacy and cookie policy > Edit > Link your own.
2. Add the cookie banner
Not sure what privacy documents you need for your PrestaShop store? Take this quick quiz to see which laws apply to you and your business.
Once you’ve generated and customized your Privacy Controls and Cookie Solution, follow the steps below to integrate it with your PrestaShop store using the official iubenda plugin.
Step 1: Install and activate the iubenda plugin
- Log in and open the admin section to get to your main PrestaShop dashboard.
- Click on Modules > Modules & Services in the sidebar menu.
- Click on Upload a module in the header section.
- To install the module, upload the zip file (click here to download). You must point to the module’s zip archive, and not its folder or any of its unpacked files.
Se a instalação for bem-sucedida, você receberá esta mensagem:
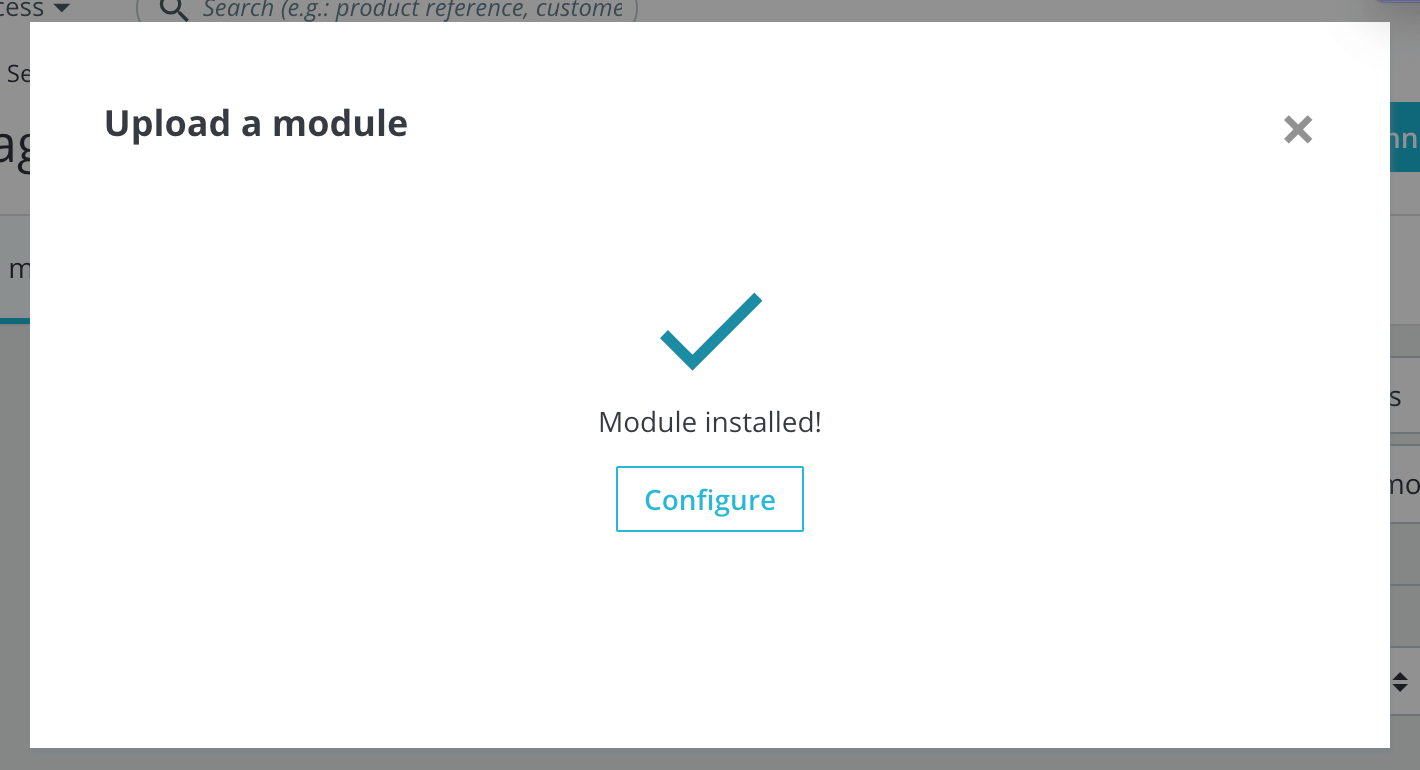
The module will then appear in your list of modules under Modules & Services. Now it’s time to configure the module.
Step 2: Copy the embed code from iubenda
Go to your iubenda dashboard and click on [Your website] > Privacy Controls and Cookie Solution > Embed. Copy the embed code snippet from the embedding section.
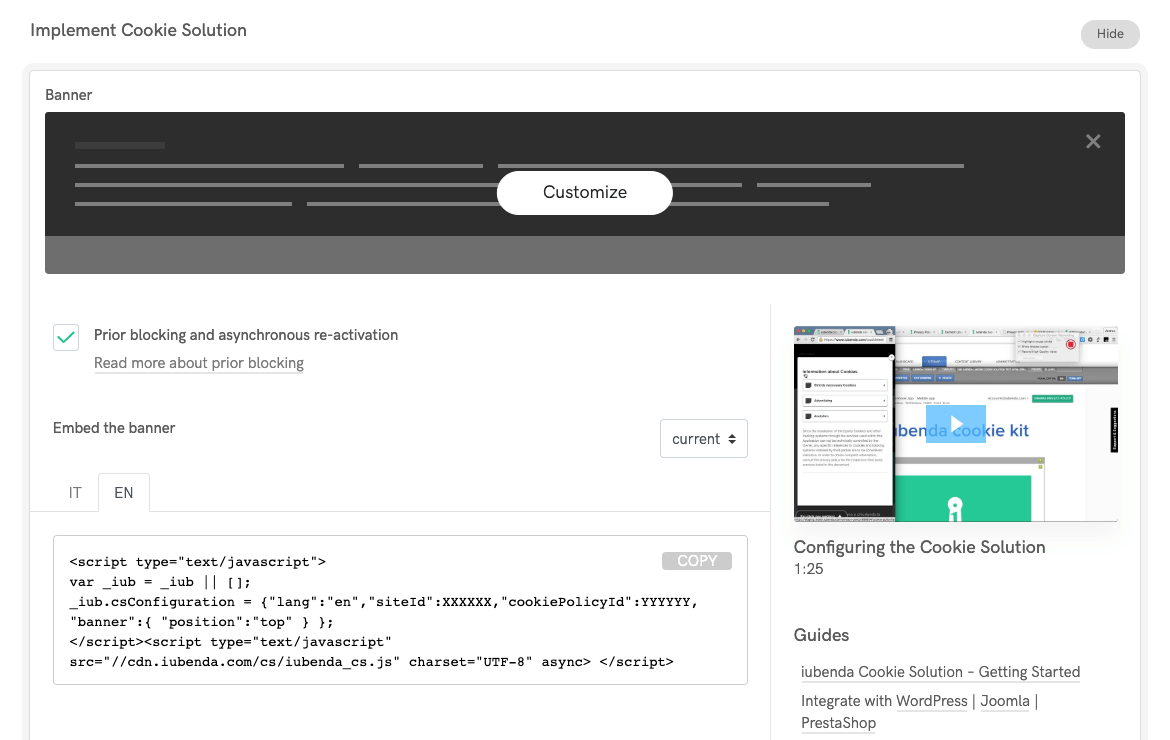
If you haven’t already generated your cookie banner and code, you can do so here, or for in-depth information, read the Privacy Controls and Cookie Solution getting started guide.
Step 3: Configure the plugin
- If you didn’t click Configure inside the “Module installed!” pop-up, navigate to the Modules & Services page and find the iubenda module.
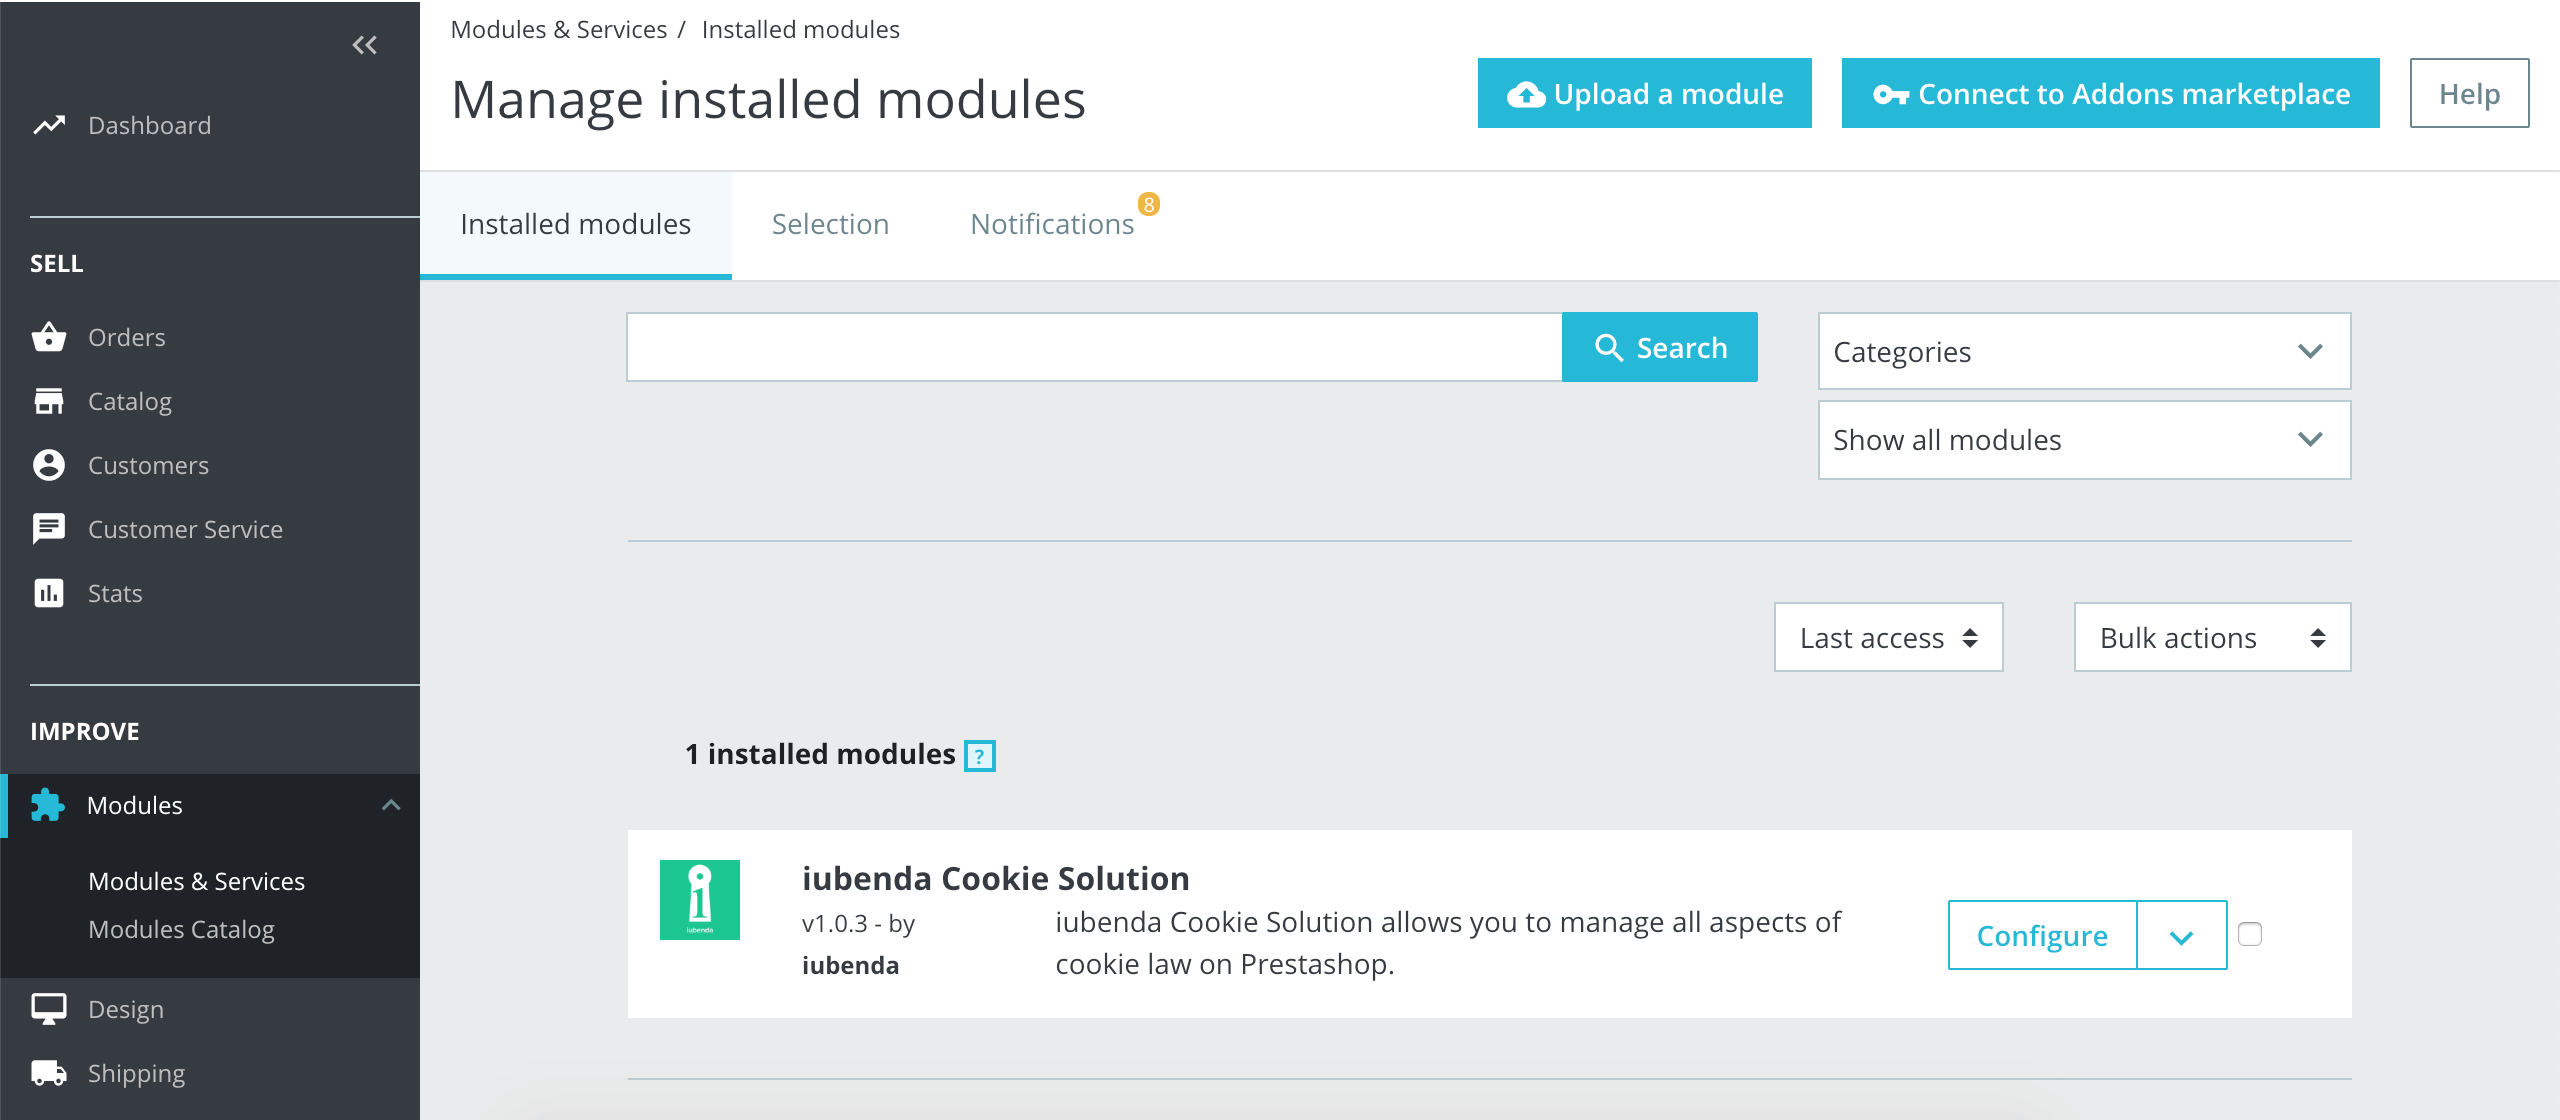
- Click Configure to open the module configuration settings.
- Paste the iubenda embed code (copied in Step 2) into the plugin form and click Save.
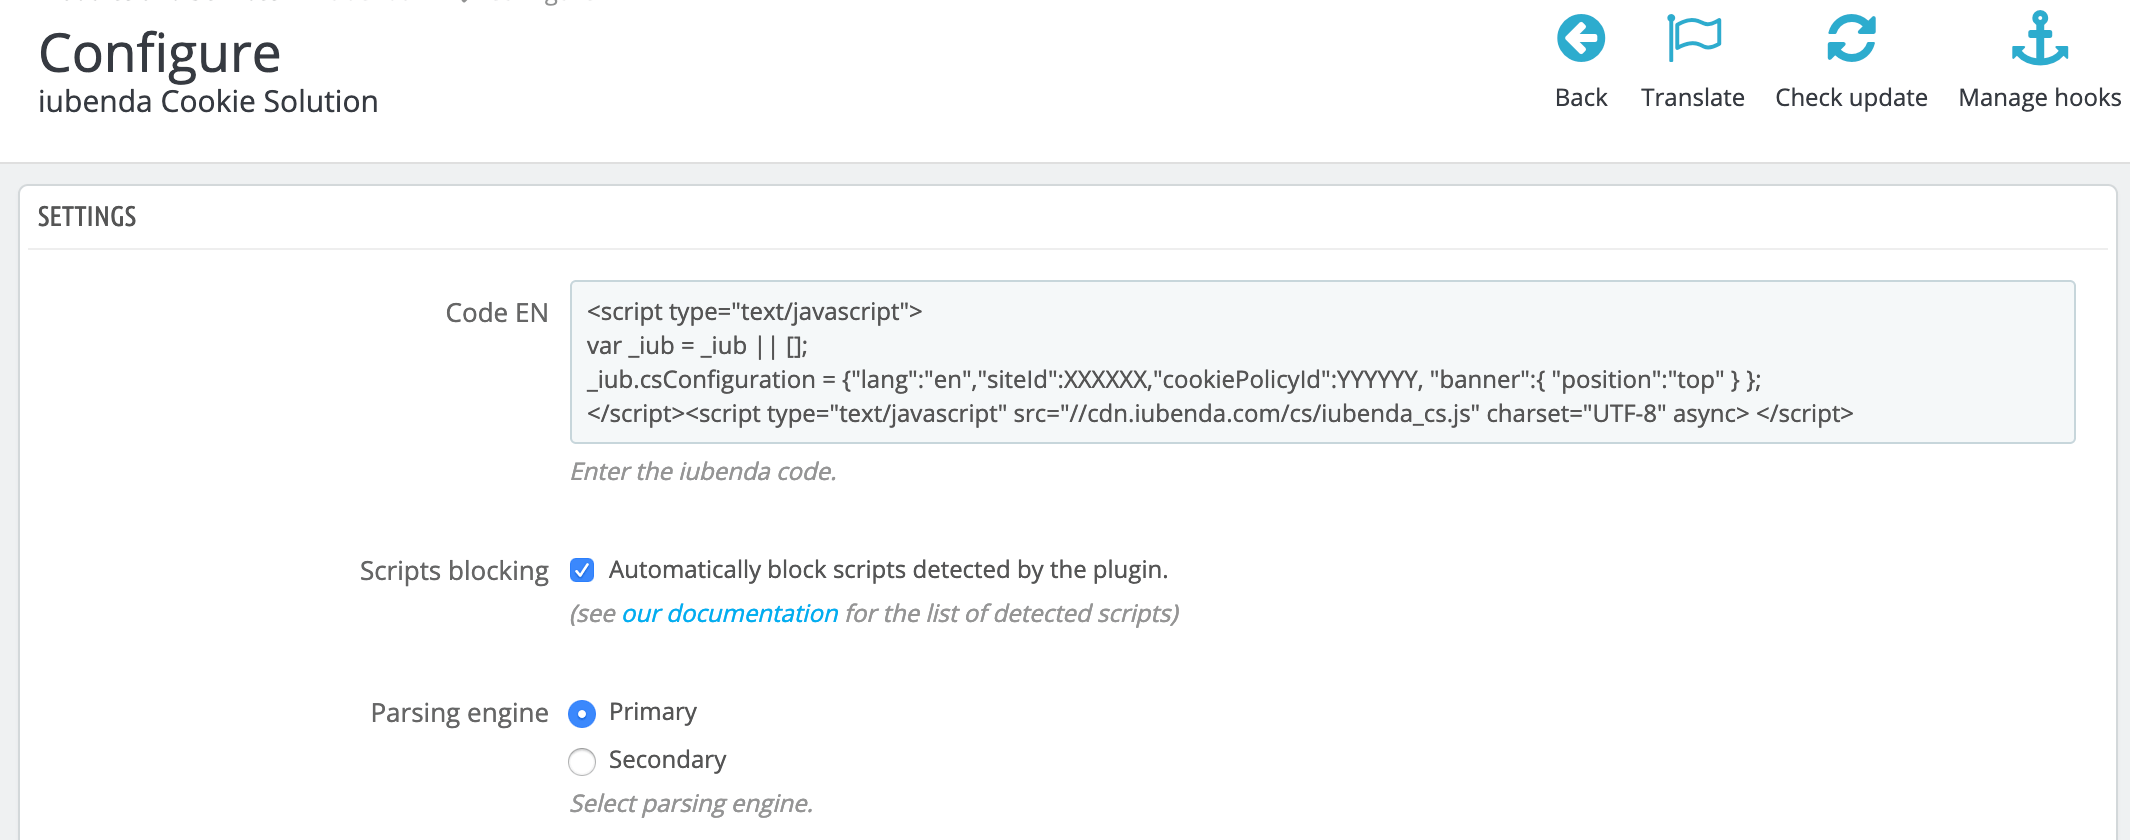
Being PHP native, we recommend the primary, faster option for the parsing engine. If you’re experiencing issues, try the alternative based on a custom HTML DOM class.
Once configured, the plugin will start to show the banner on which your cookie policy is linked, to users that visit your site for the first time, without the need for any other configuration. The plugin also recognizes and blocks the cookies from the third-party services listed above, when they’re present on your site.
3. Set up prior blocking of cookie scripts
Few categories of cookies are exempt from the consent requirement. Therefore, almost all scripts that install or can install cookies must be blocked before consent is obtained.
Simplify your cookie-blocking process with auto-blocking
There’s a simpler option available for the prior blocking of cookies and trackers. Our auto-blocking feature automates the process, saving you time and effort. The PrestaShop plugin also detects and blocks a wide list of common third-party scripts server-side, so many services are covered out of the box.
If you prefer to manually tag your scripts that install or may install cookies, you can still follow the process below for step-by-step instructions and practical examples. However, we highly recommend considering the auto-blocking feature for a more streamlined approach.
Learn more about auto-blocking and how it can simplify your cookie-blocking process.
Important
The PrestaShop plugin automatically blocks scripts that are generated server-side (returned by PHP by PrestaShop). Scripts inserted into the page via JavaScript after the page has loaded are not blocked automatically. You can block those scripts by entering the source into the Custom Scripts or Custom iframes fields in the plugin console (see below), or by using the manual tagging method described in the walkthrough that follows.
Block custom scripts from within the plugin console
The Custom Scripts and Custom iframes fields make it easy to block scripts inserted into the page directly from within the plugin console, without editing your site’s code.
- On the left menu in your admin panel, go to the Improve section and click Extensions > Plugins.
- Search “iubenda”, and when the plugin appears, click Configure.
- Scroll down to find the Custom Scripts and Custom iframes fields at the bottom of the page.
- Enter your script or iframe sources as needed, and click Save at the bottom-right of the page.
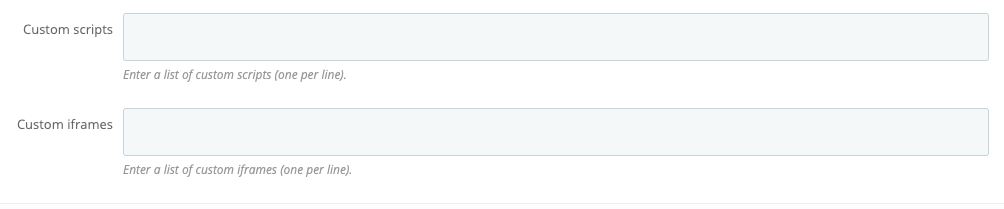
Examples: what to paste into these fields
Script. To block a social button (which inserts scripts into the page via JavaScript), enter the script source, e.g. connect.socialwebsite.net/en_US/track.js, into the Custom Scripts field.
iframe. Say you want to block scripts inserted into the page via the following iframe:
What you’d enter into the Custom iframes field is videowebsite.com/embed/ because this is the actual source of the scripts. Do not include the component id (videowebsite.com/embed/xxFhMChxx) so that all scripts coming from the actual source are blocked.
How to implement prior blocking via manual tagging on your PrestaShop site
Manual tagging is the method of prior blocking we’ll use for the tutorial below. This is the right approach for scripts inserted into the page via JavaScript after the page has loaded (which the plugin can’t block automatically). You can view other methods here.
To set up prior blocking, you need to make some minor changes to your site’s scripts. Here’s what to do:
- Identify the script/iframe for any additional services running on your site (e.g., a Twitter follow button in a PrestaShop template or CMS block)
- Add some simple text to the HTML code (we’ll show you how below)
- Save
In this tutorial, we are going to block a Twitter follow button.
Not sure which services you need to block? If you’re using a cookie policy generated by iubenda, the services listed in your cookie policy are most likely the ones you need to modify now.
Step 1: Identify the script
In your PrestaShop back office, open the template file, CMS page, or module that contains the script you need to modify (search for the service you want to block, in this case, the Twitter follow button). Template files (.tpl) can be edited via the Design > Theme & Logo section or directly on your server; CMS page content can be edited from Design > Pages.
Open the code editor for the file or block you want to change.
Step 2: Modify your script
Now, we’re going to change the script. To do this, we’ll make 3 simple changes:
- Add this class:
_iub_cs_activateto the script tags, and change the “type” attribute fromtext/javascripttotext/plain - Replace the src with
data-suppressedsrcorsuppressedsrc - Specify the categories of the scripts/iframes with a special comma-separated
data-iub-purposesattribute, e.g.data-iub-purposes="2"ordata-iub-purposes="2, 3"
More about categories and purposes
Purposes are your legal reasons for processing the particular type of user data. Different scripts on your site will fall into different categories and serve different purposes. For example, Google Analytics may be used for Measurement, while the Pinterest button may be used for Experience (Purpose 3 below). Purposes are grouped into 5 categories, each with an id (1, 2, 3, 4, and 5):
- Necessary (id:
1) - Functionality (id:
2) - Experience (id:
3) - Measurement (id:
4) - Marketing (id:
5)
For even more detailed info on categories and purposes, see our guide here.
Let’s take the Twitter follow button as an example:
We need to 1. Add the class and change the “type” attribute, 2. replace the src and 3. specify the categories.
The code structure should look like this:
Twitter follow button:


Follow @iubenda
Alternative: the wrapping method
You can also block scripts by wrapping them in iubenda comment markers directly in your PrestaShop templates. This works for both scripts and HTML/IMG/IFRAME elements:
For HTML, IMG, or IFRAME elements: