The European Accessibility Act (EAA) came into full force on June 28, 2025, bringing new requirements for website accessibility. For businesses operating within the EU, or serving EU customers, it is crucial to improve accessibility and align with these new standards. With iubenda’s Accessibility Widget, making your website more accessible has never been easier.
The new iubenda’s Accessibility Widget uses AI-powered adjustments to automatically make your website more accessible for users with various disabilities. The solution supports a range of accessibility features, making it easier for users to navigate and interact with your site.
What is iubenda’s Accessibility Widget?
iubenda’s Accessibility Widget is a fully automated widget designed to enhance your website’s accessibility. It adjusts your website in real-time to accommodate the needs of users with disabilities, including options like text resizing, high-contrast modes, screen reader compatibility, and more. Key features include:
- 🎧 Screen Reader Compatibility: Helps make your website readable by screen readers for visually impaired users.
- 🔳 Contrast and Text Resizing: Allows users to adjust the contrast and font size to suit their needs.
- ⌨️ Keyboard Navigation: Improves keyboard navigation for users with motor impairments.
- 🌀 Control Over Dynamic Content: Lets users with epilepsy or other conditions stop animations or dynamic content that might be harmful.
With a simple installation process, you can get started right away without having to overhaul your website’s code.
Step 1: Activating the Accessibility Widget
- Go to the iubenda Dashboard: From your iubenda Dashboard, find the Accessibility Widget tile under your available products.
- Activate the Widget: Click the Activate button to start using the Accessibility Widget.

Step 2: Customizing the Accessibility Widget
Once you’ve activated the Accessibility Widget, you can make it match your website’s look and feel by using the Accessibility Widget Configurator. This tool is available for both new pricing plans and legacy plans.
- Go to your iubenda Dashboard.
- Find the Accessibility Widget tile.
- Click on the Settings button to open the configurator.

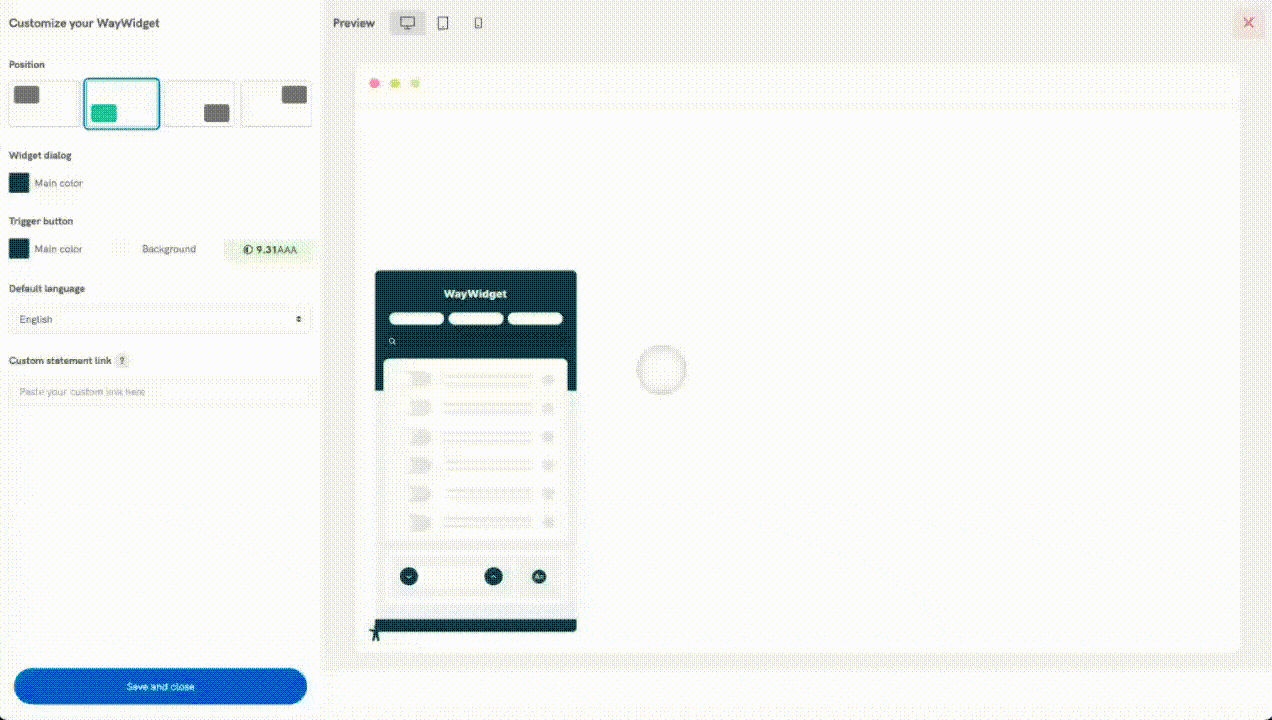
The configurator will look like this:

Inside the configurator, you’ll find several options to make the widget your own:
- Trigger Button Position: Choose where the widget’s button appears on the screen: Top-left, Bottom-left, Bottom-right, Top-right
👉 The main widget panel will always open from the bottom of the screen.
- Widget Background Color: Change the background color to better fit your site’s design. (Text customization is not available yet.)
- Trigger Button Appearance: Adjust both the icon color and the background color of the trigger button.
- Default language: Set the default language for the widget’s interface, making it more accessible for your audience.
- Accessibility Statement URL: Add a custom link to your site’s accessibility statement, so users can easily find it.
💡 Any changes you make in the configurator will be applied automatically to your Accessibility Widget, even if it’s already embedded on your website.
Step 3: Installing the Accessibility Widget on Your Website
Once you’ve activated and configured the widget, you can embed it on your site.
-
Embed the Widget: Copy the provided snippet of code for the Accessibility Widget and paste it at the very beginning of the head section of your website (right after the
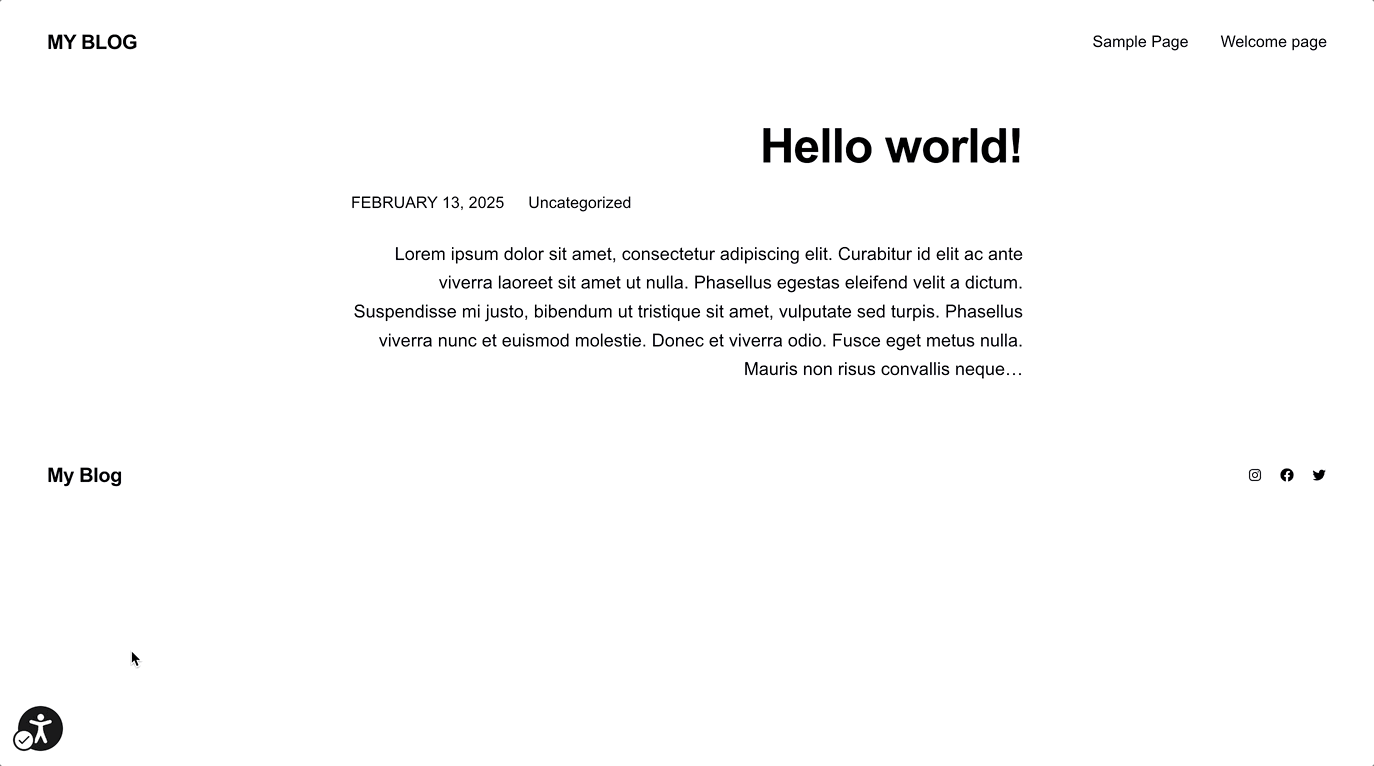
<head>tag) to install the widget. - Verify the Widget’s Functionality: After embedding, refresh your website to ensure the widget is visible and functional. You should now see a small accessibility icon:


How it Works for End Users
Once the Accessibility Widget is embedded and active on your website, end users will be able to interact with it to customize their browsing experience. As users change their settings through the widget, real-time adjustments are made to the website’s layout, ensuring that the content is instantly optimized based on the selected preferences. Here’s how the widget behaves and the features it provides:
- Widget Appearance: The Accessibility Widget appears as a small icon, when users click on the icon, it opens a menu of accessibility options, providing a seamless way to adjust the website’s layout.
- User Preferences: The widget lets users select their accessibility preferences, such as:
- Text size: Users can adjust the size of the text for better readability.
- Contrast settings: Adjust the contrast to make content stand out more clearly, especially for those with visual impairments.
- Other display options: The widget also offers a range of display settings to cater to different needs, making it easier for users to navigate the site in a way that suits them best.
- Text size and style: Enlarges or adjusts text in a way that makes it more readable without requiring a page reload.
- Contrast: Applies changes to background and text colors to enhance visibility for users with color blindness or low vision.
- Dynamic Content Control: For users who may be sensitive to animations or flashing content, the widget gives them the option to turn off animations or modify the behavior of dynamic content. This is particularly beneficial for individuals with conditions like epilepsy.
- Enhanced Navigation: In addition to visual changes, the widget improves keyboard navigation by optimizing focus order, making it easier for users with motor impairments to navigate and interact with the page efficiently.
- Screen Reader Compatibility: The widget ensures that all elements are compatible with screen readers, ensuring that visually impaired users can easily understand and interact with all the content on your site.
- Convenient and Accessible: The accessibility settings remain easily accessible at any time, with the widget floating in a fixed position on the site, allowing users to make changes whenever they need to.

With iubenda’s Accessibility Widget, you can improve your website accessibility and provide a better, more inclusive experience for all users.