Let us introduce you to our new All-in-one Compliance for GDPR / CCPA Cookie Consent WordPress plugin. A totally revamped solution that allows you to manage all of the iubenda compliance solutions to give you access to everything you need!
The iubenda plugin is an all-in-one, extremely easy-to-use 360° compliance solution that quickly scans your site and auto-configures to match your specific setup. It supports multiple legislation and minimizes the need for code copy-pasting.
Functionality
- Our WP cookie plugin automatically scans your site and auto-configures the solutions needed to match your site’s specific needs.
- Provides a fully customizable cookie banner/consent banner, manages cookie consent, and stores legally required GDPR consent proofs for cookies.
- Manages CCPA notice with working DNSMPI link
- Compatible with IABs TCF to maximize ad earning.
- Allows you to generate a fully customizable privacy and cookie policy quickly.
- Auto-detect user location and auto-applies the correct data privacy settings (needed if you have users from multiple regions like the US and the EU).
- Capture, store and manage GDPR consent records for your webforms.
- Allows the manual blocking of all other resources without direct intervention on the scripts.
- Supports the WP Consent API for improved integration with other plugins and better compliance with privacy laws.
- It displays a clean page (without a cookie banner/consent banner) to users who have already provided their consent.
- It detects bots/spiders and serves them a clean page.
- It supports the auto-assignment of categories when blocking scripts.
- It supports AMP pages.
- Effortlessly generate professional Terms and Conditions to protect you from liabilities and more.
- Translate all documents with a single click (15 languages supported).
Our solutions are fully responsive (perfect for all screen sizes) and WCAG Level AAA Compliant.
- AdRoll
- AddThis widgets
- Bing
- CodePen
- Criteo
- Disqus
- Elevio
- Facebook Comments
- Facebook widgets
- Freshchat
- Google AdSense
- Google Analytics
- Google Maps
- Google Site Search
- Google oAuth
- Google+ widgets
- Headway
- Instagram widgets
- Kissmetrics
- LinkedIn widgets
- Mixpanel
- Neodata
- Olark
- Optimizely
- Outbrain
- PayPal widgets
- Pingdom
- Pinterest widgets
- Segment
- ShareThis widgets
- Twitter widgets
- UserVoice
- Vimeo
- YouTube
Requirements
- WordPress 5.0 or higher
- PHP 7.0.0 or higher
How to start
🎥 Watch how to set up iubenda on WordPress in just a few clicks:
To begin, you can either download the plugin from the WordPress plugin repository and add it manually to your WordPress installation or access the administration panel within WordPress and click on Plugins > Add New Plugin > iubenda | All-in-one Compliance for GDPR / CCPA Cookie Consent + more.
Then install and activate it.
Once activated, head to iubenda in your WP admin panel.
💡 The iubenda All-in-One Compliance WordPress plugin is free to use, but comes with some limitations. For example, it supports up to 1,000 page views per month. If your site exceeds this or requires additional features, you’ll need to upgrade to a paid plan. For full details on the Free Plan’s limitations, see here.
How to use
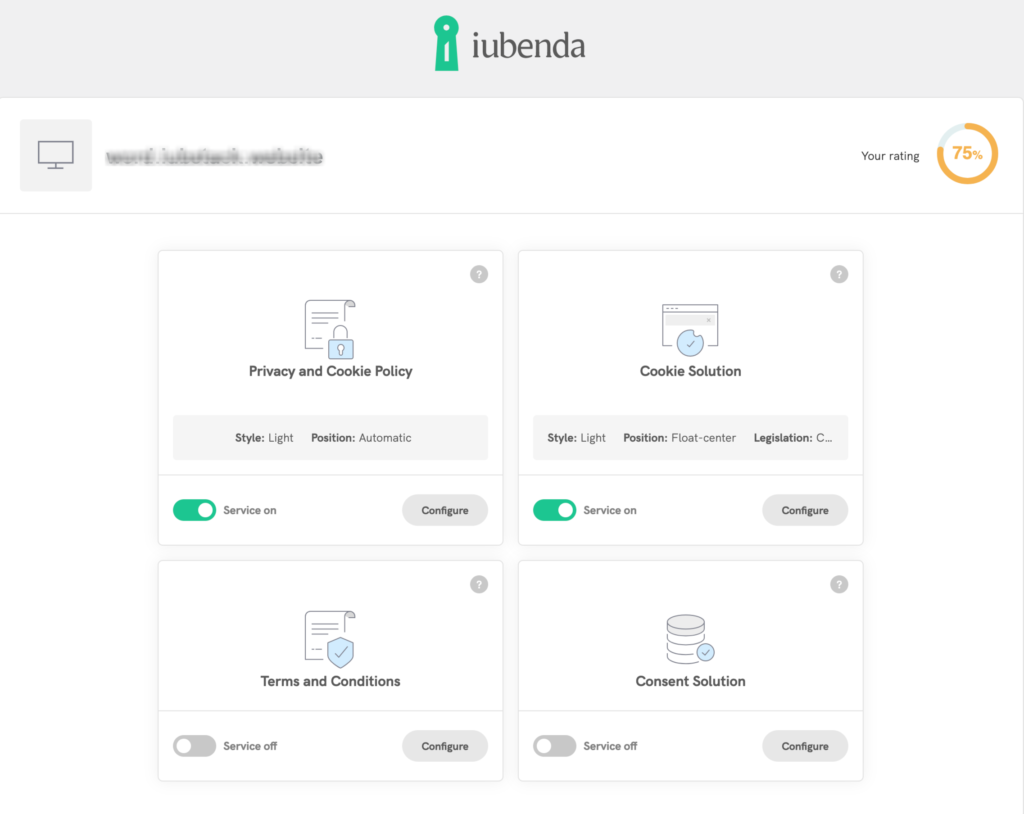
Once there, you’ll see a page like the one below in loading. Our WP plugin scans your site and provides a rating based on your site’s specific needs.
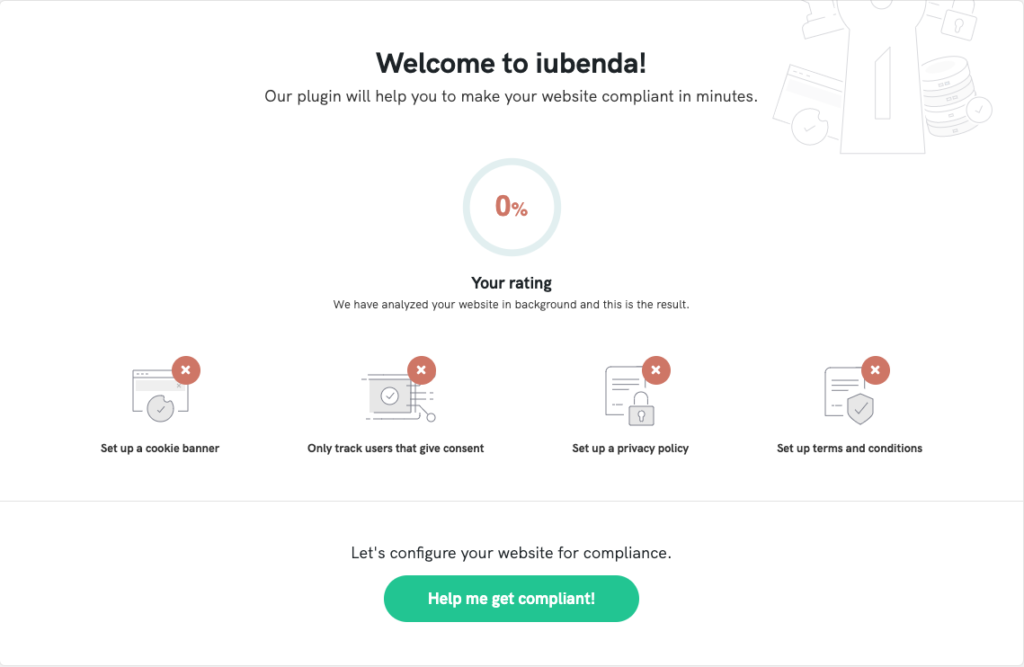
On this page, you can find your site’s compliance elements summarized.
Then, click on “Help me get compliant” to proceed.
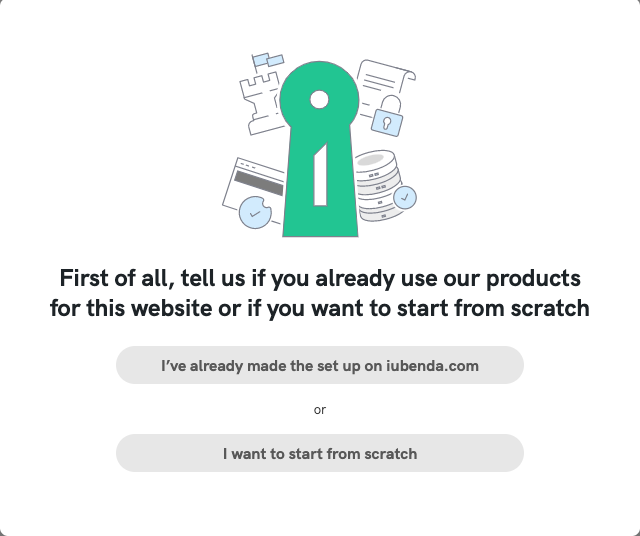
Now you can start from scratch with iubenda solutions, or if you already use some of our products, you can directly synchronize them with our plugin.
👀 Already using our products?
If you already use iubenda products for the site you want to manage with our WP plugin, you can skip straight to -> Synchronize your iubenda account with the WP plugin.
New users – Configure your products from scratch
To set up the plugin, you will be asked to choose the language of your website and then click continue.
🔎 Multilanguage website?
Choose the main language of your site, you can easily add the other languages in the following steps. For more information you can read our guide on multilingual WordPress Sites.
Finally, you will need to enter the website and email address.

Great, we’ve now created an account on iubenda.com and generated the essentials you need to proceed. You’ll receive an email to complete your account configuration, but you can still continue to configure the plugin.
Set up your Cookie banner/consent banner (and add the privacy policy button)
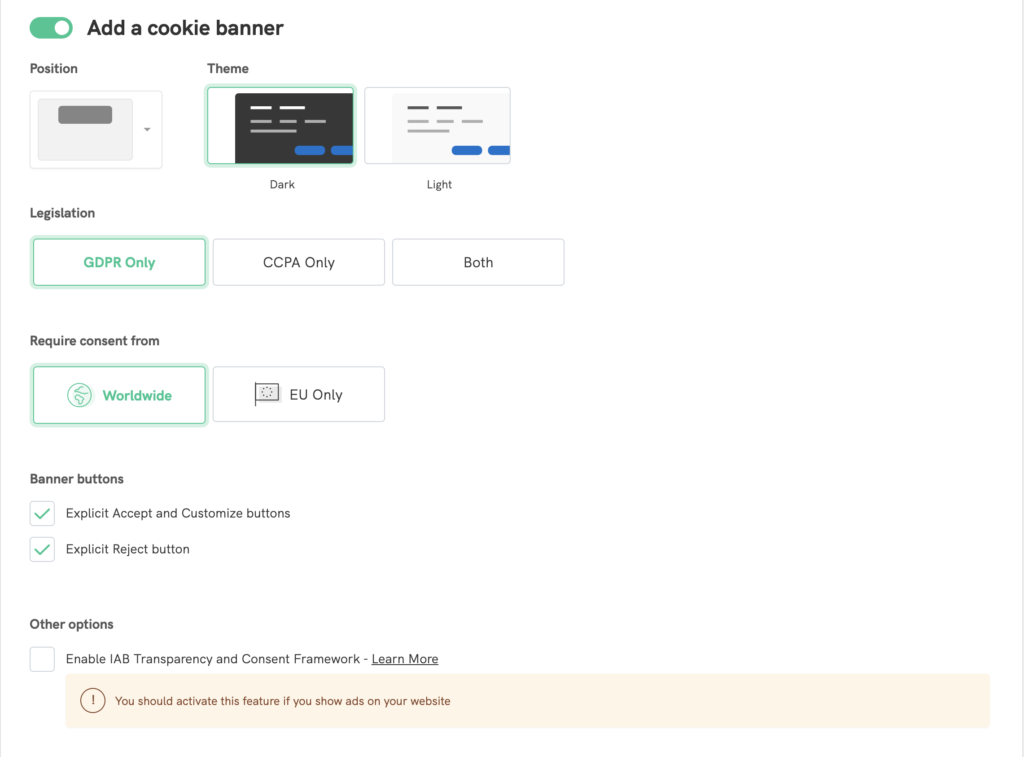
You’re now ready to set up your cookie banner/consent banner. In this step, you can select the main elements of the banner, such as the:
- Banner’s position and theme;
- The legislation with which you need to comply. Doubts? Find here what you need to comply with;
- Enable IAB TCF options (recommended if you run ads on your site);
- Enable Google AMP support;
- Automatically block scripts detected by the plugin and set.
🔎 Want to customize more?
After the first set up, you can customize all the aspect and behavior of the cookie banner/consent banner with our Privacy Controls and Cookie Solution configurator. For more info read here
After setting up your Privacy Controls and Cookie Solution, you can add your privacy policy button, choosing the style and the button position.
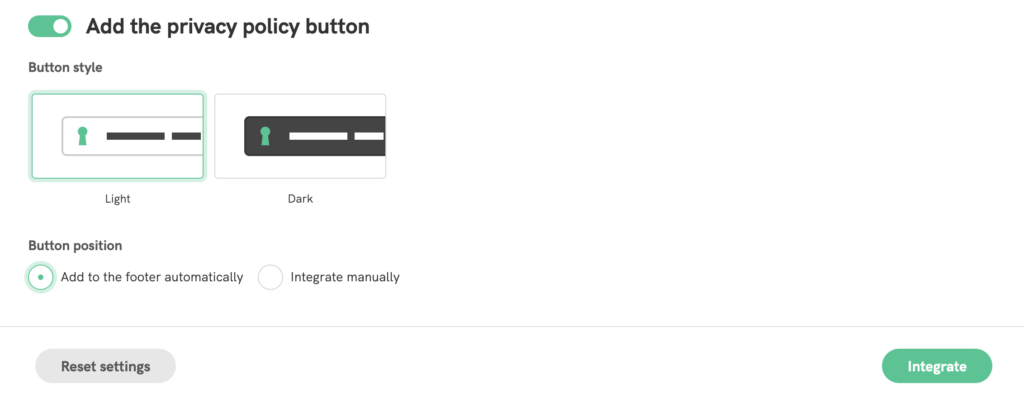
When you’re done, click on Integrate.
You have now completed the basic configuration of the cookie banner/consent banner and added the privacy policy button.
From the plugin dashboard, you will be able to configure and manage the products you have activated or add new ones.
To find out how to configure your products, you can read the specific section of this guide.
Synchronize your already set up iubenda products with the WP plugin
If you have already activated some iubenda products, on the first step of the configuration process, click on “I’ve already made the set up on iubenda.com.”
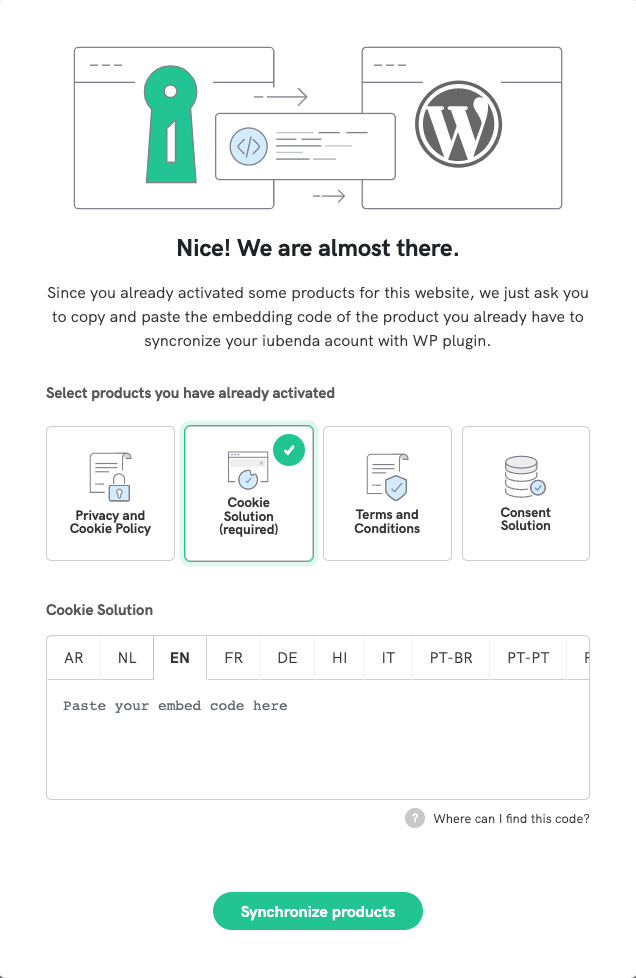
Then, paste the embed code of your Privacy Controls and Cookie Solution (required) and other products you have set up in your iubenda account, and that’s it. Our plugin will automatically synchronize your products within the plugin.
iubenda All-in-one plugin dashboard
Once you finish the first setup, you’ll have complete control of all the iubenda products you can manage and integrate within the plugin.
Learn how to configure the products available for the plugin below:
Privacy Controls and Cookie Solution
The simplified cookie banner/consent banner settings already ensure seamless operation, but you may want to customize your banner’s behavior and aspect thoroughly.
To do that, click on the configure button within the Privacy Controls and Cookie Solution area, then select Manual embed. Next, see the collapsible element below for advanced configuration options.
How to configure
Next, you can configure the cookie banner/consent banner directly in our configurator here.
You can check our complete guide on the Privacy Controls and Cookie Solution for more information.
Finally, paste the embed code and click save settings in the bottom-right of the page.
Automated prior-blocking of scripts
Our WP plugin will also recognize and automatically detect and block the cookies indicated in the above block list on your site.
Important
Our WordPress plugin automatically blocks scripts that are generated on the server side (therefore returned by PHP by WordPress). Scripts that are inserted into the page via JavaScript after the loading process of that page are not and cannot be blocked automatically.
These scripts can be blocked by entering the source into the Custom Script boxes in the plugin console or by using the manual wrapping method illustrated in the example below and (in more detail) in this help post
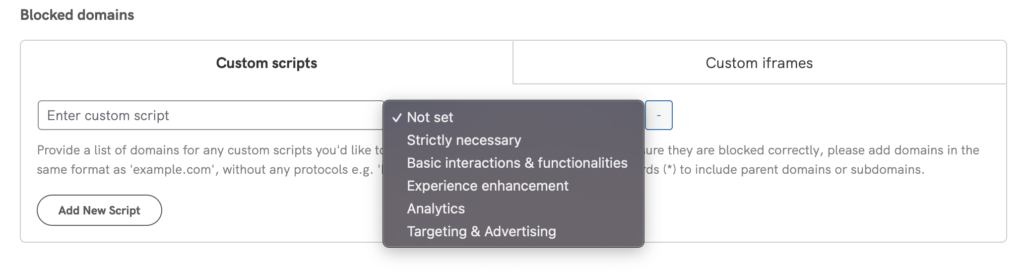
Blocking custom scripts from within the console
The Custom Scripts field makes it easy for you to block scripts inserted into the page directly from within the plugin console. This dramatically reduces the need for direct edits to the site’s code.
Here’s how to do it:
- In the left menu within your administration panel, click on iubenda.
- Next, click on configure in the Privacy Controls and Cookie Solution area and scroll down to find the Blocked domains setting.

- Enter your script or iframe sources as needed, assign their purpose (optional), and click the Save Changes button at the bottom-left of the page.
Usage Examples
Using these fields is pretty straightforward. Simply enter the script or iframe src attribute you’d like to block.
Script
If you wanted to block a social button (which inserts scripts into the page via JavaScript), you’d simply need to enter the script source, e.g. connect.socialwebsite.net/en_US/track.js into the scripts field.
iframe
Let’s say you wanted to block scripts inserted into the page via the following iframe
<iframe width="1280" height="720" src="https://www.videowebsite.com/embed/xxFhMChxx" frameborder="0" allow="accelerometer; autoplay; encrypted-media; gyroscope; picture-in-picture" allowfullscreen></iframe>What you’ll need to enter into the iframe field would be videowebsite.com/embed/ as this is the actual source of the scripts. Be careful NOT to enter the component id (videowebsite.com/embed/xxFhMChxx) to ensure that all scripts coming from the actual source are blocked.
Manual Use (wrapping method)
This method requires you to modify your site’s code directly. As explained below, you’ll need to go into the relevant section of your site’s code and add the scripts to be blocked.
For example, a conversion pixel for Google Ads would be handled this way:
[git:pre_html-code@https://github.com/iubenda/cookie-law-solution-codesnippets/blob/master/adwords_wp_plugin.html]
If you’ve enabled the per-category consent feature, you’ll need to assign the purpose. Resuming the previous example, being part of the “Targeting & Advertising” purpose (id 5):
<!--IUB-COOKIE-BLOCK-START-PURPOSE-5-->
      <script type="text/javascript">
      ...
      </script>
      <script type="text/javascript" src="..."></script>
      <noscript>
      ...
      </noscript>
<!--IUB-COOKIE-BLOCK-END-PURPOSE-5-->
If there are HTML / IMG / IFRAME elements, you will need to do it this way:
<!--IUB-COOKIE-BLOCK-START-->
      <iframe src="...
      <img src="...
<!--IUB-COOKIE-BLOCK-END-->
To stop automatic parsing/replacing the iframe/scripts that contain a defined src:
<!--IUB-COOKIE-BLOCK-SKIP-START-->
      <script type="text/javascript">...</script>
<!--IUB-COOKIE-BLOCK-SKIP-END-->
Shortcodes are available for elements installed directly within WordPress posts (as opposed to elements integrated at the template level – for example, footer.php):
[iub-cookie-policy]
[/iub-cookie-policy]
iubenda and Google AMP – How to collect cookie consent in WordPress
If you’re using or planning to use Google’s Accelerated Mobile Pages (AMP) to load your web pages faster on mobile, you might be wondering how to set up your WordPress site in a way that allows you to collect cookie consent and avoid penalties. It requires some work, but luckily, iubenda can help: in fact, our All-in-one compliance plugin for WordPress is fully compatible with AMP.
For a step-by-step guide (complete with sample codes, a demo, and WordPress tips) and more information on how to block cookies before user consent on AMP, read How to integrate iubenda Privacy Controls and Cookie Solution with Google AMP (WordPress method included).
AMP and “templates” folder permissions
You’ve enabled the Google AMP support, but got an error message when you auto-generate the AMP configuration file? The cause is a problem with the “templates” folder permissions. Here’s how to fix it:
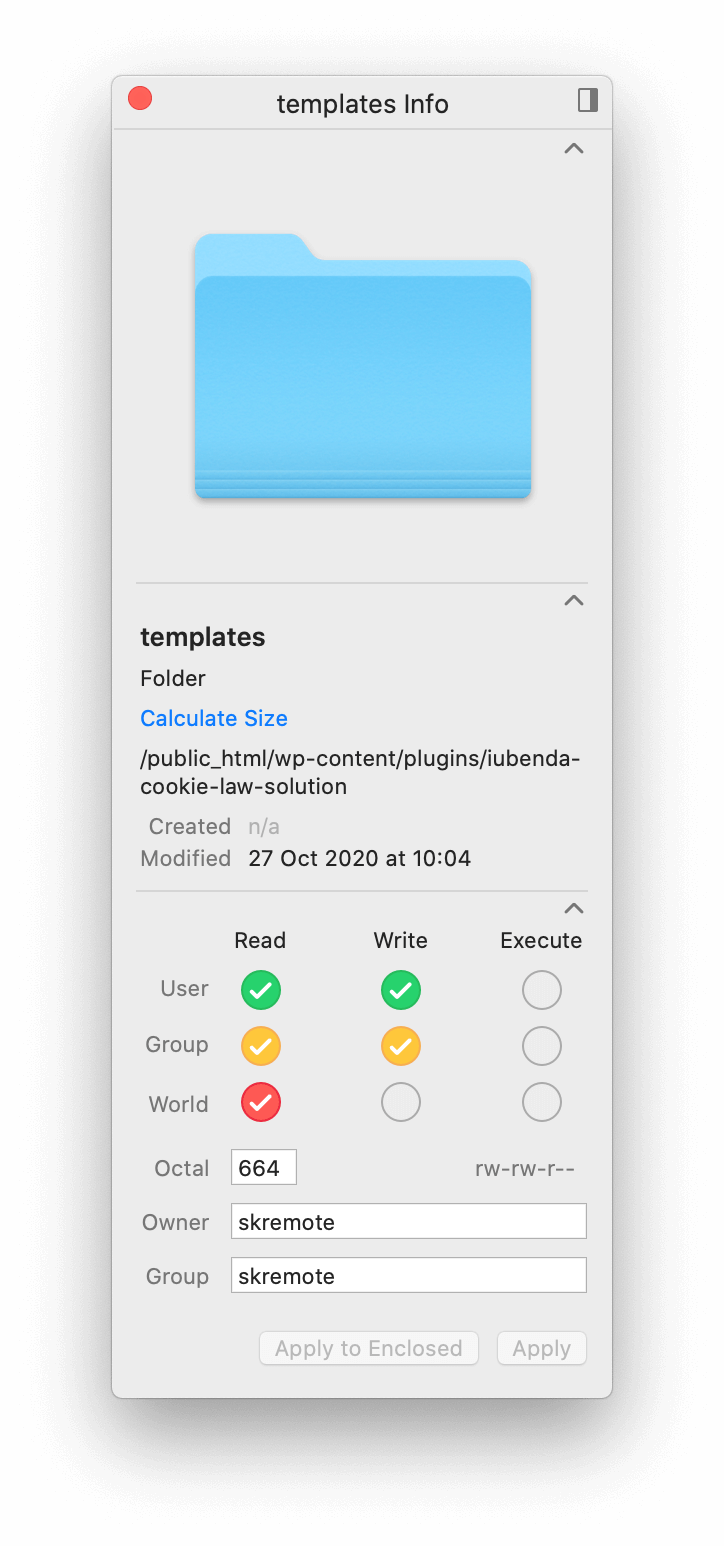
- Through your FTP client, enter the (previously uploaded) “iubenda-cookie-law-solution” folder and create (if missing) a subfolder called “templates”
- Set 664 permissions for the “templates” folder (the “Get info/Edit permissions” option is usually available via right click)

- Repeat the “Google AMP support” enable procedure and save


Further information
For API calls and xmlrpc we suggest the following parameter ?iub_no_parse=1: this will place the iubenda script in a deactivated state and therefore avoids all parsing/replacing operations.
Privacy and Cookie Policy
Our plugin automatically synchronizes the privacy and cookie policy you set up with our generator without any code copypasting.
How to configure
To start the configuration, click the Configure button under Privacy and Cookie Policy.
Then, click on “Setup your privacy and cookie policy on iubenda.com“
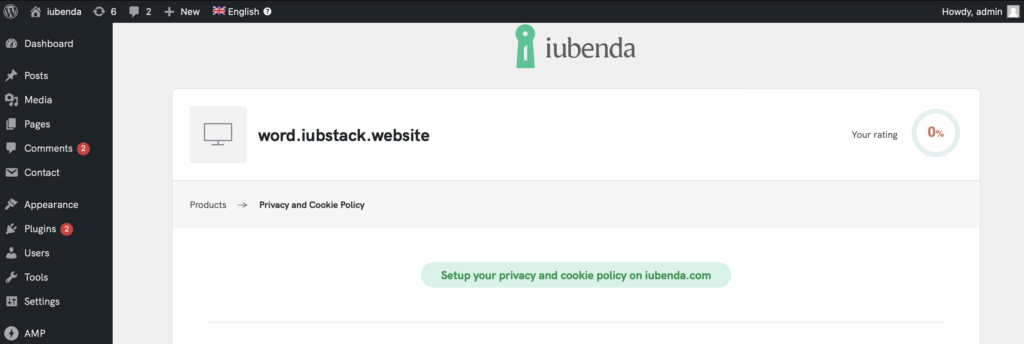
This will take you to the Privacy and Cookie policy generator on iubenda.com. There, you can set up and edit your policy.
💡 Any changes you make on the generator automatically reflect your WordPress site’s privacy and cookie policy. So, when you’re done configuring your documents on iubenda.com, you can return to the plugin, click on Save Settings, and your privacy and cookie policy will be updated!
See this guide if you need help setting up your privacy policy in your iubenda dashboard.
We also provide some integration options: you can choose the button style and position. If you select the “Add to the footer automatically” option, the widget will be automatically displayed in the footer of every page of your WordPress site.
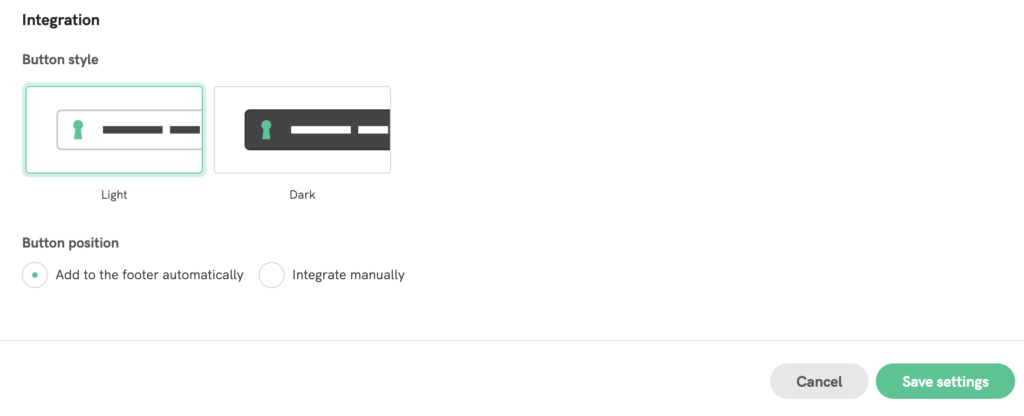
Otherwise, if you want to customize the button’s position, by selecting the “Integrate manually” option, you’ll find the code to copy and ready to be used.
Manual Integration for Elementor Users
If you see the alert:
“It seems you are using Elementor plugin, please use Elementor theme builder to add the iubenda legal widget manually to the footer” or “❗️We were not able to add a ‘Legal’ widget/block to the footer as your theme is not compatible, you can position the ‘Legal’ widget/block manually from here”
—either at the end of the setup wizard or in the Integration section of the Privacy and Cookie Policy Configurator—it means your theme isn’t fully compatible with our auto-adding feature. In that case, follow these clear steps to manually add the iubenda Legal Widget using Elementor:
- Open Your Footer Template:: In your WordPress dashboard, go to Templates and open the Footer template with Elementor.
- Find the iubenda Legal Widget: In the Elementor panel on the left, scroll or search for the iubenda Legal Widget.
- Drag and Drop the Widget: Click on the widget, then drag it into the footer area where you want your Privacy Policy and Cookie Policy links to appear.
- Save and Publish: Once you’re satisfied with the placement, click Update to make the changes live on your site, the Privacy Policy and Cookie Policy links will appear automatically in your footer.


This “semi-automatic” procedure ensures that your legal links are added correctly, even if your theme is not fully compatible with the auto-adding feature.
Consent Database
Our All-in-One WordPress plugin also allows you to record, review, and maintain comprehensive GDPR records of consent for your web forms. The plugin detects and identifies all supported forms that are embedded in the website like Contact Form 7, WP Forms, WordPress comment, Elementor Forms, and WooCommerce and offers a super easy mapping of checkout forms.
How to configure
To start, activate the Consent Database on iubenda.com in your iubenda dashboard and paste the API key where requested.
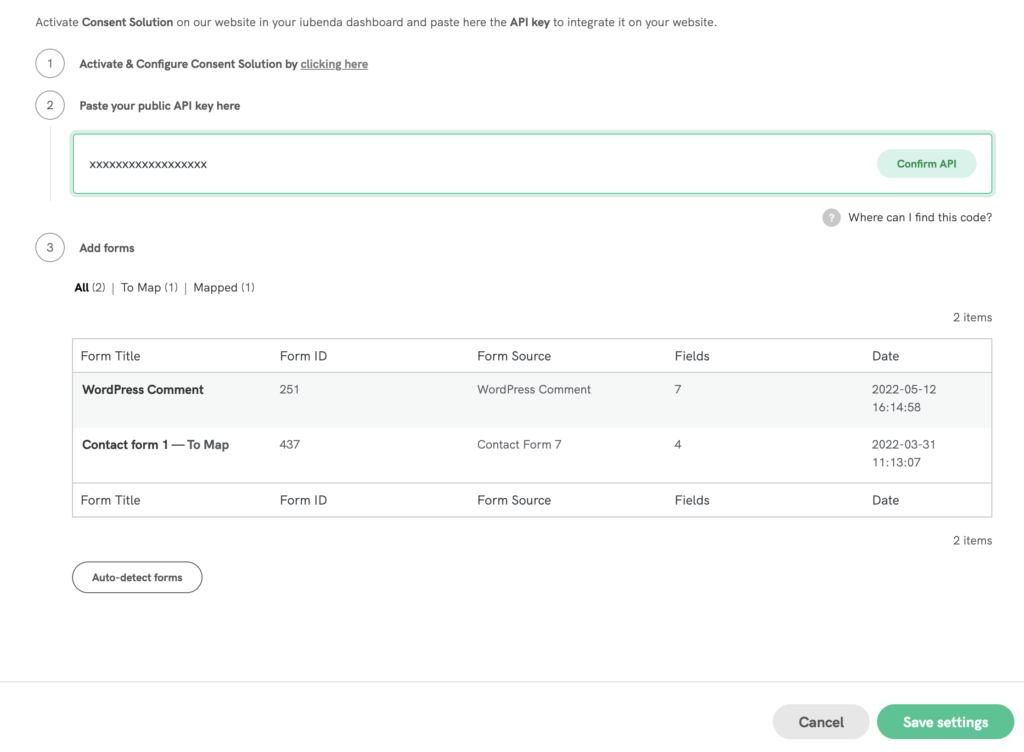
Then, you’re ready to configure your Consent Database, following this complete guide.
Once you’re done, remember to click on Save settings at the bottom right of the page.
Terms and Conditions
With the All-in-One WordPress plugin, you can also manage and integrate your Terms and Conditions documents into your WordPress site.
How to configure
To start, activate and configure your Terms and Conditions on the iubenda website. You can follow our step-by-step guide to the generation here.
Then, paste the embedding code and choose from the integration preferences provided.
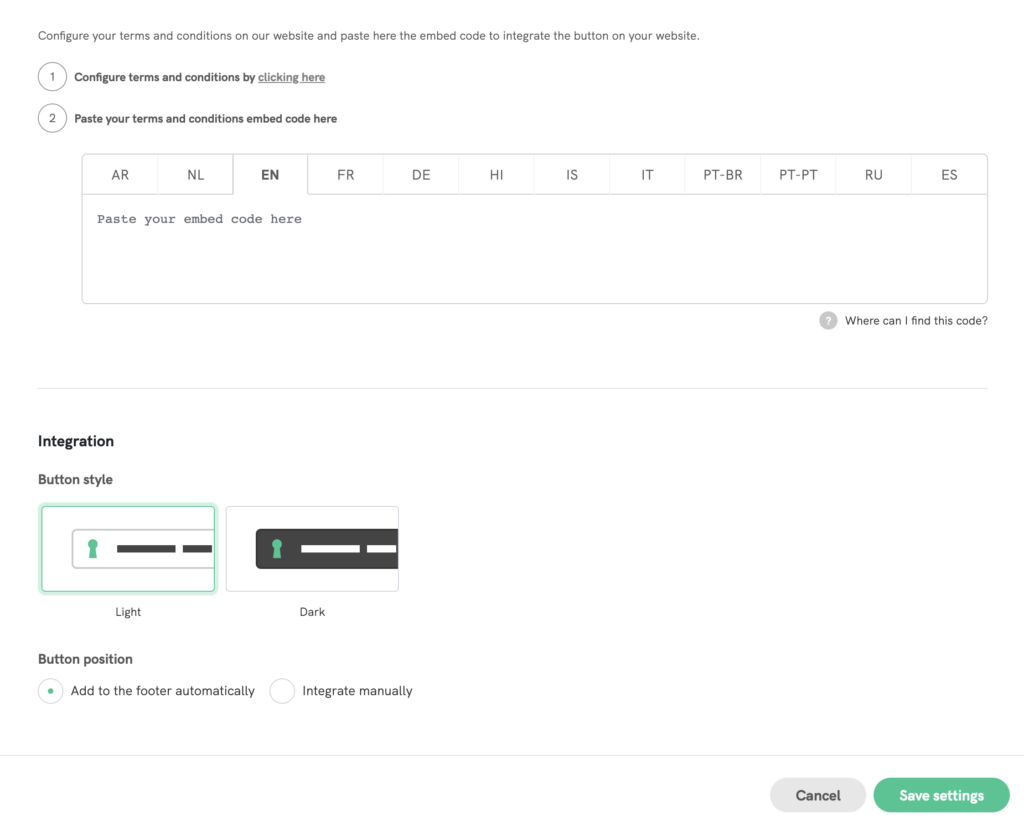
Once you’re done, remember to click on Save settings at the bottom right of the page.
Further information
We often provide updated versions of our plugin, which are unstable during the testing phase as Beta versions are.
To install a Beta version of the plugin, the first thing to do is install an external plugin called “WP Rollback”, which allows you to select an unofficial version of our plugin.
WP Rollback installation
Please note: WP Rollback requires a WordPress version above 4.0.
As for other plugins, you can install WP Rollback by accessing the Plugin area in your WordPress admin panel and clicking on “Add new”; from here, you can search for “WP Rollback” and install it.
After the installation and activation, it will be necessary to go back to the page on which all the installed plugins are listed. Here you’ll notice that “Rollback” will have appeared next to every entry.
All that needs to be done now is to look for the “iubenda Privacy Controls and Cookie Solution” plugin and click on the “Rollback” entry. Here you’ll find all the different versions of the plugin; the currently used version will be labeled “installed version”, while the Beta versions will be marked as such.
To install and test the Beta version of the plugin, click on the Beta entry you wish to use. This will cause the current version of the Plugin to be overwritten by the Beta version; to revert the process, the same process will have to be undertaken, the difference being the selecting of the previous stable version and not the Beta one.
To signal a bug, please email us and provide a clear and detailed description of the problem.
Attaching the debug information from WordPress along with your support request is always helpful. To access the debug information, open the WordPress installation folder and look for the file wp-config.php.
Once inside, please look for the following line:
define('WP_DEBUG', false);
Modify it to:
define('WP_DEBUG', true);
Once the file is saved, open a page on your WordPress, and the debug information will start to appear. Keep our plugin active and send us any errors or messages WordPress shows.
New Feature: WP Consent API Integration
The iubenda WordPress plugin is now fully compatible with the WP Consent API! This integration enhances the plugin’s ability to work seamlessly with other consent management plugins that also support the WP Consent API, ensuring better compliance with privacy regulations.
What is WP Consent API?
The WP Consent API is a plugin that standardizes how consent information is communicated between different plugins. By using the WP Consent API, plugins can register and read the current consent category in a uniform way. This enables consent management plugins like iubenda to interact smoothly with other plugins, improving overall compliance with privacy laws.
How to Enable WP Consent API in iubenda Plugin
To enable WP Consent API integration in the iubenda plugin, follow these simple steps:
- Install and Activate the WP Consent API Plugin
- In your WordPress dashboard, navigate to Settings → Plugins → Add New → search for WP Consent API and Activate the plugin.
- Enable WP Consent API in iubenda Plugin
- In the iubenda plugin dashboard, go to Privacy Controls and Cookie Solution → Configure.
- Ensure the checkbox (Integrate with WP Consent API (recommended)) for WP Consent API is visible and enabled. This will allow the iubenda plugin to work seamlessly with the WP Consent API.

Troubleshooting
Once everything is configured, you can verify the integration by checking the browser console for the expected behavior. There, you should see that the WP Consent API is correctly reading the consent signal for every purpose. You can also refer to the video below for a demonstration of how the integration works.

⚠️ Caution
After installation, please be sure to set-up prior blocking, as this is legally mandatory under EU Law. You can find various methods of prior blocking along with full instructions in this guide.