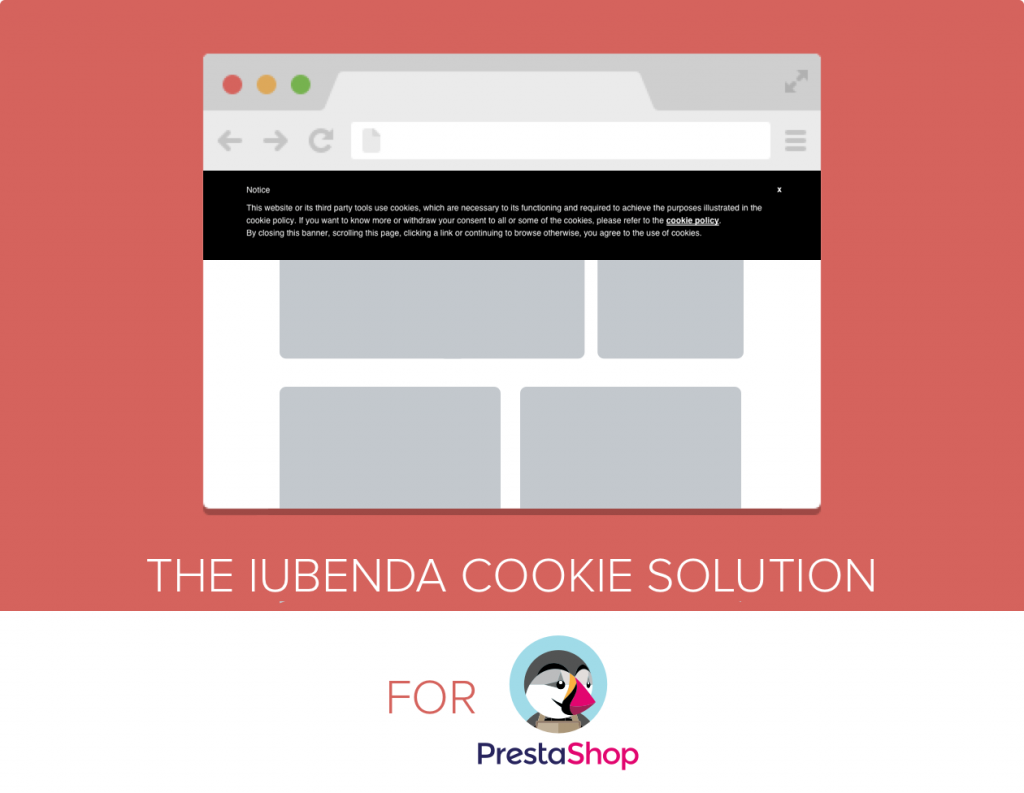
The PrestaShop plugin by iubenda allows you to automate the implementation of the cookie law rules, drastically reducing the necessity for direct interventions in the site’s code.
Caution
- The module is currently compatible with all versions of PrestaShop starting from 1.7 for PrestaShop 1.6 please see here.
- You also need to have overrides enabled (enabled by default)
Functionality
- The plugin automatically adds the iubenda code to all the pages of a site (to the
<head>tag); - Manages the visualization of the banner and of the cookie policy, as well as the saving of user’s consent preferences as per cookie installation;
- It supports the auto-assignment of categories when blocking scripts;
- Simplifies the management of the iubenda Privacy Controls and Cookie Solution for multilingual sites.
- AdRoll
- AddThis widgets
- Bing
- CodePen
- Criteo
- Disqus
- Elevio
- Facebook Comments
- Facebook widgets
- Freshchat
- Google AdSense
- Google Analytics
- Google Maps
- Google ReCaptcha
- Google Site Search
- Google Tag Manager
- Google oAuth
- Google+ widgets
- Headway
- Instagram widgets
- Kissmetrics
- LinkedIn widgets
- Mixpanel
- Neodata
- Olark
- Optimizely
- Outbrain
- PayPal widgets
- Pingdom
- Pinterest widgets
- Segment
- ShareThis widgets
- Twitter widgets
- UserVoice
- Vimeo
- YouTube
Instructions
Installation and activation
- Log in and open the admin section to get to your main PrestaShop dashboard;
- Click on Modules > Modules & Services in the sidebar menu;
- Click on Upload a module in the header section;
- To install the module upload the zip file (click here to download) – you must point to the module’s zip archive, and not its folder or any of its unpacked files.
If the installation is successful, you’ll get this message:
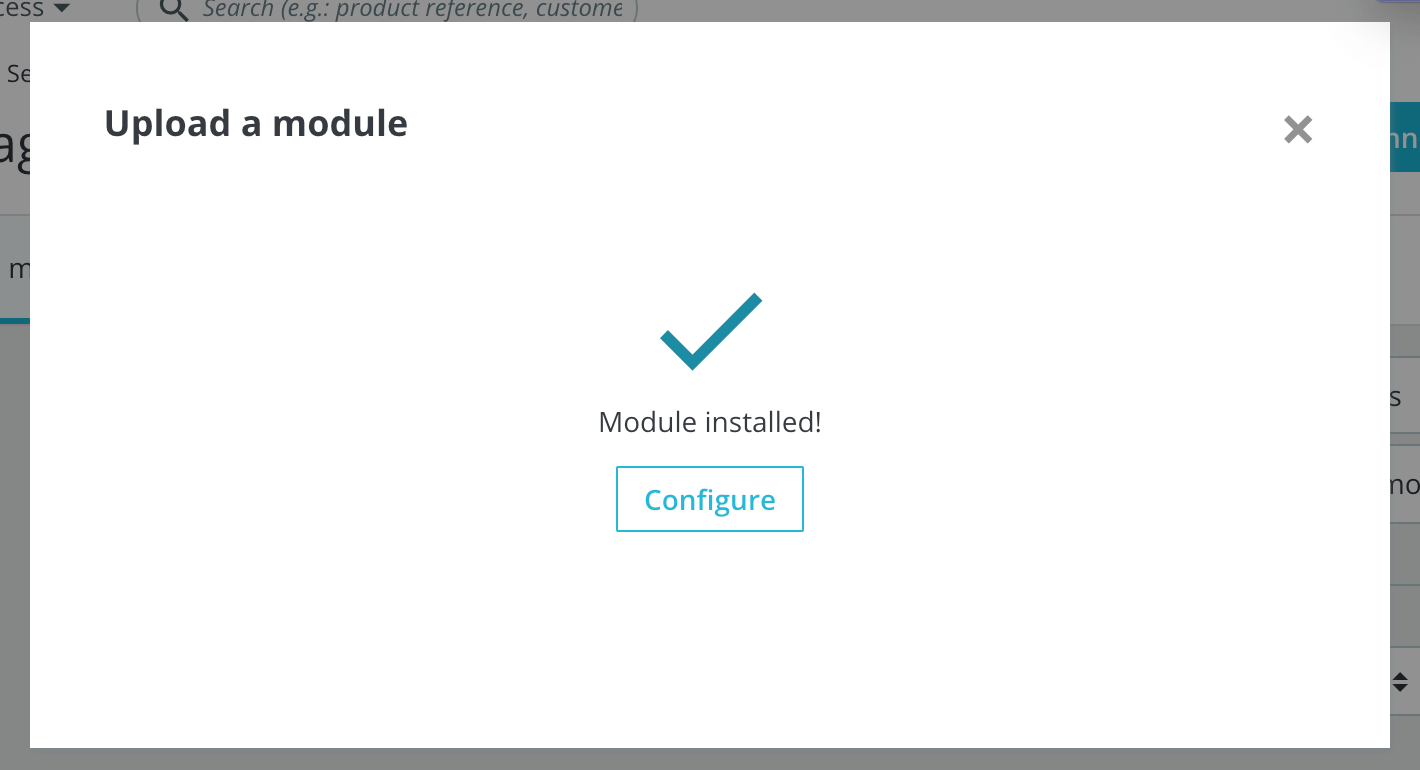
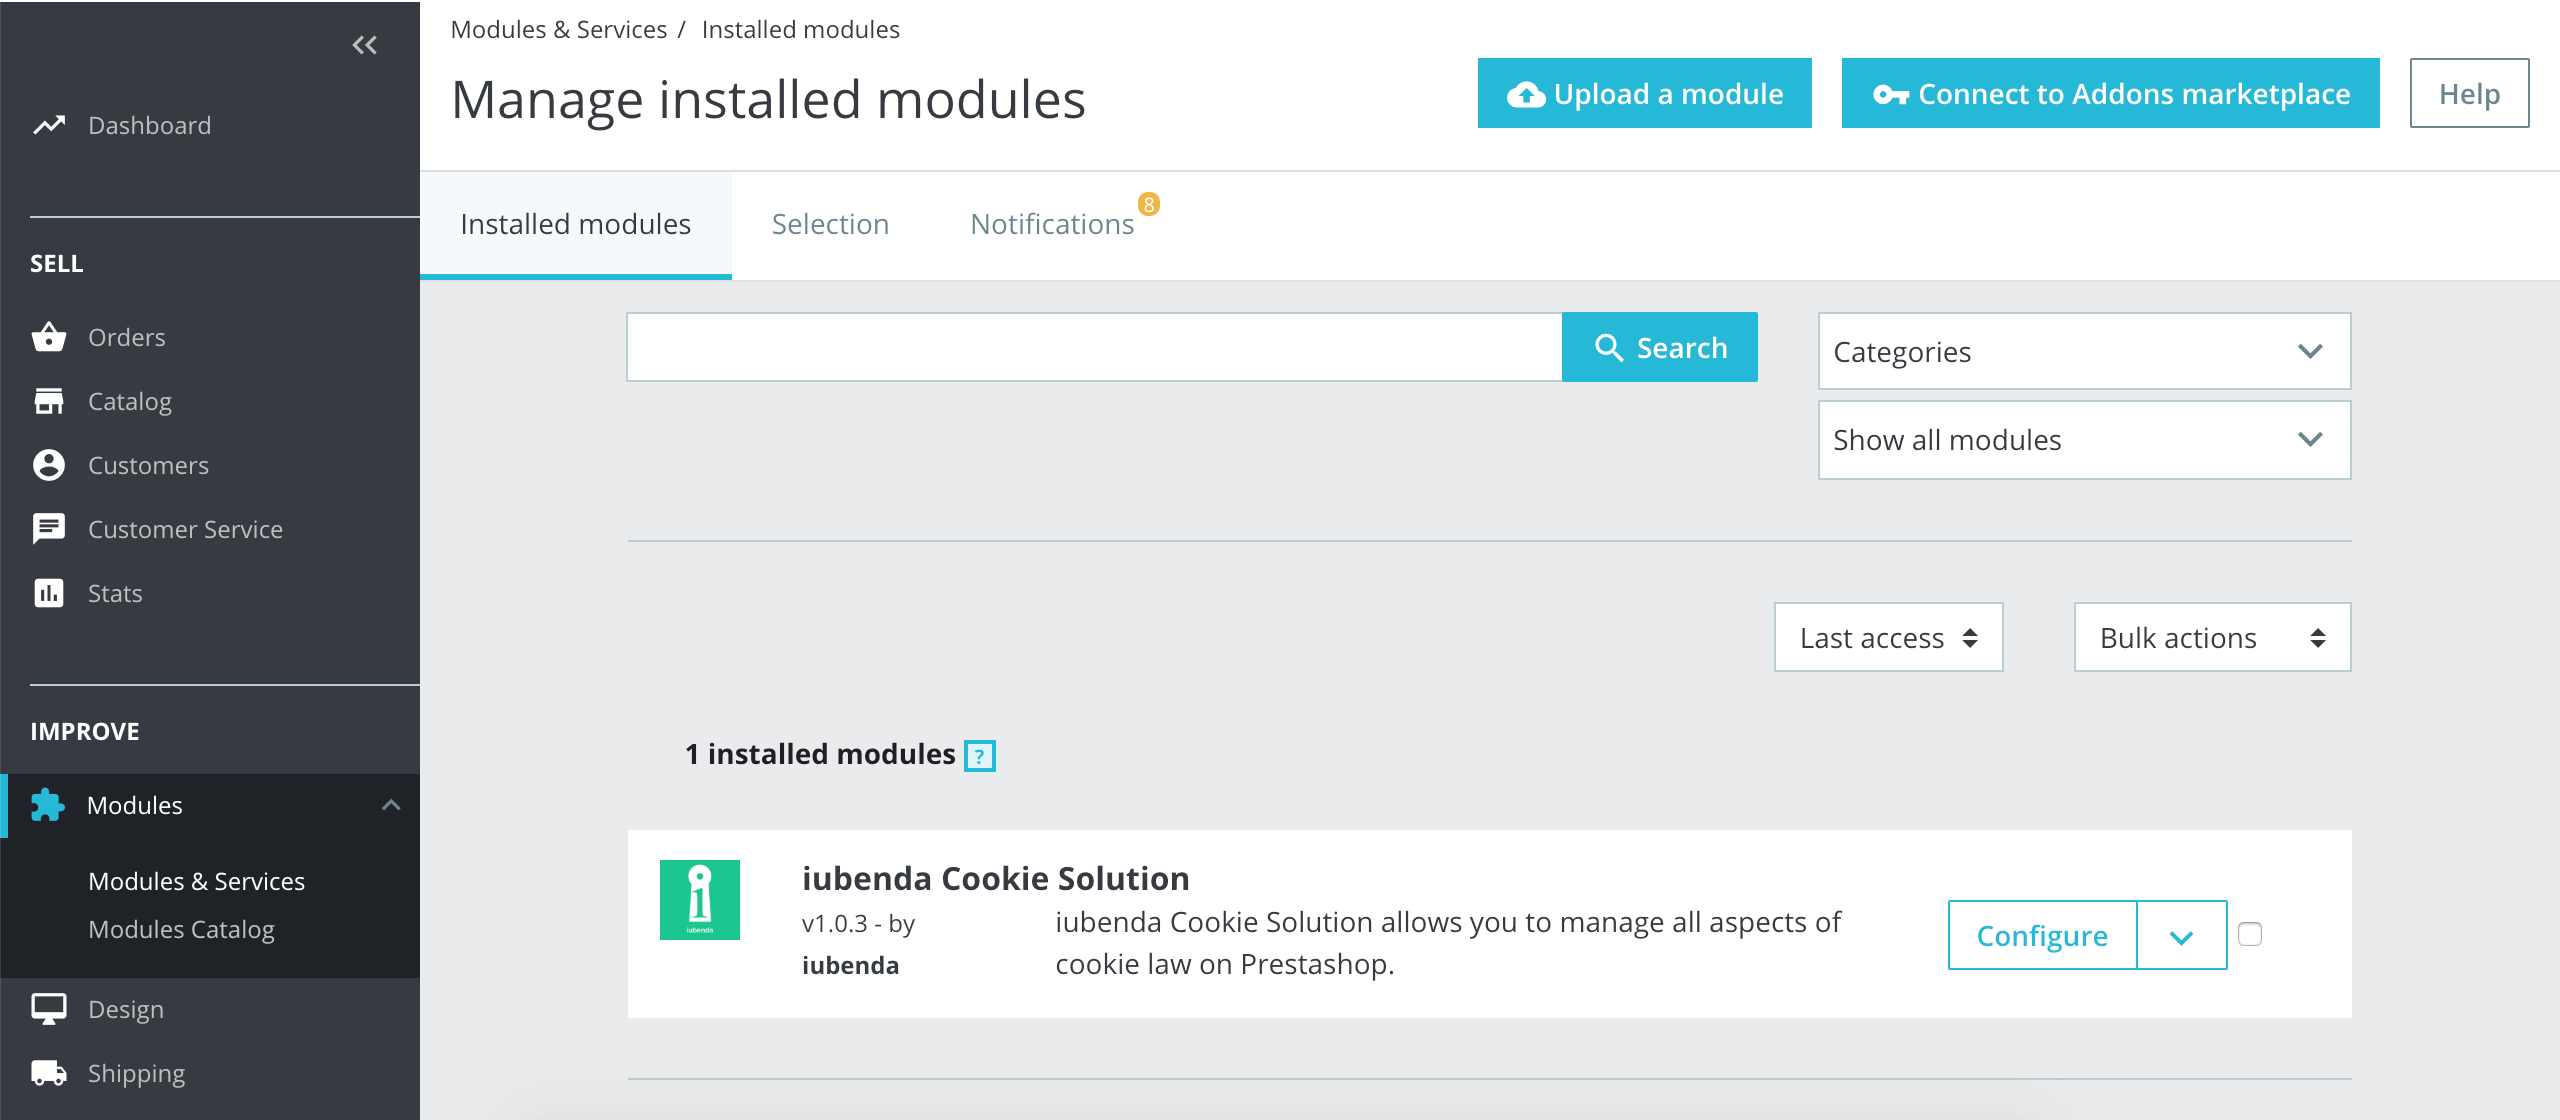
The module will then appear in your list of modules under “Modules & Services”.
Now it’s time to go configure the settings of the module.
How to add the cookie banner/consent banner and modify settings
Now that the module is ready, we need to feed it the necessary information from your iubenda account.
- If you haven’t clicked on the Configure button inside the “Module installed!” pop-up message, navigate to the Modules & Services page and find the iubenda module:

- Click on Configure to go to the module configuration settings.
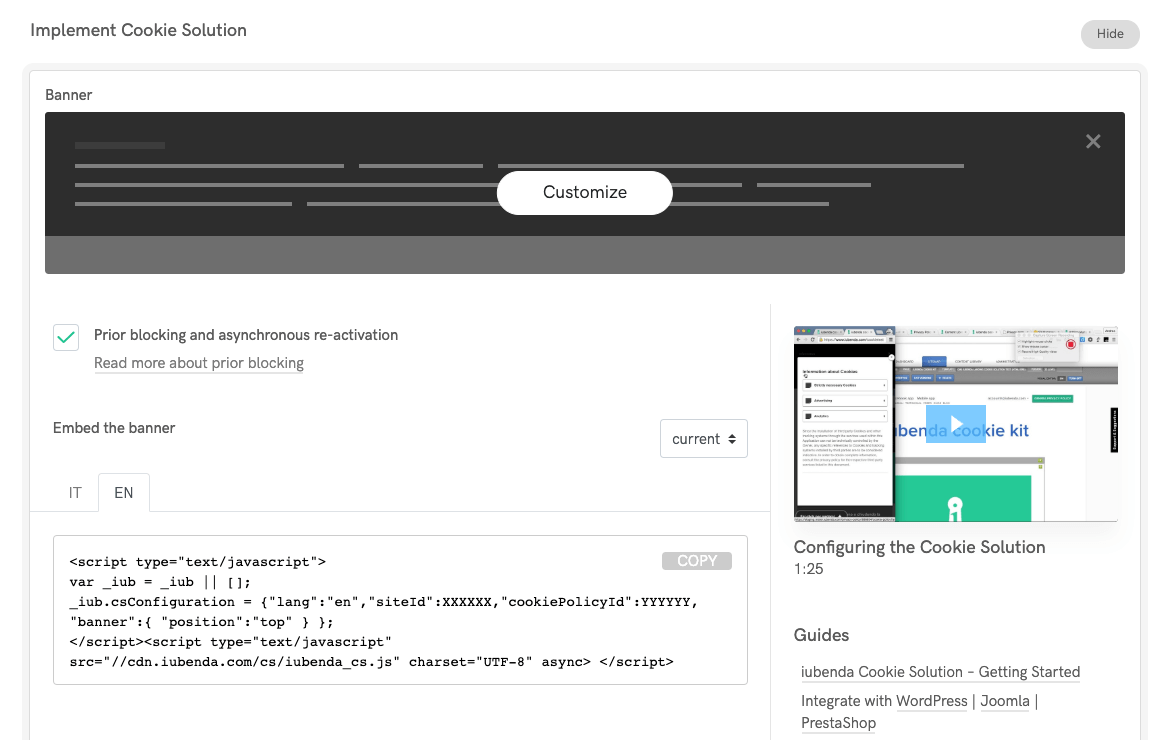
- Add the code from your iubenda account to the extension (this is what the embedding code looks like in your iubenda dashboard):
 (If you haven’t already generated your cookie banner/consent banner and code, you can do so here or for in-depth information, you can read the introduction to the iubenda Privacy Controls and Cookie Solution guide.)
- Paste that code into the plugin form and save:
 (Being PHP native, we recommend the primary, faster option for the parsing engine. If you’re experiencing some issues, try with the alternative based on a custom HTML DOM class)
 (If you haven’t already generated your cookie banner/consent banner and code, you can do so
 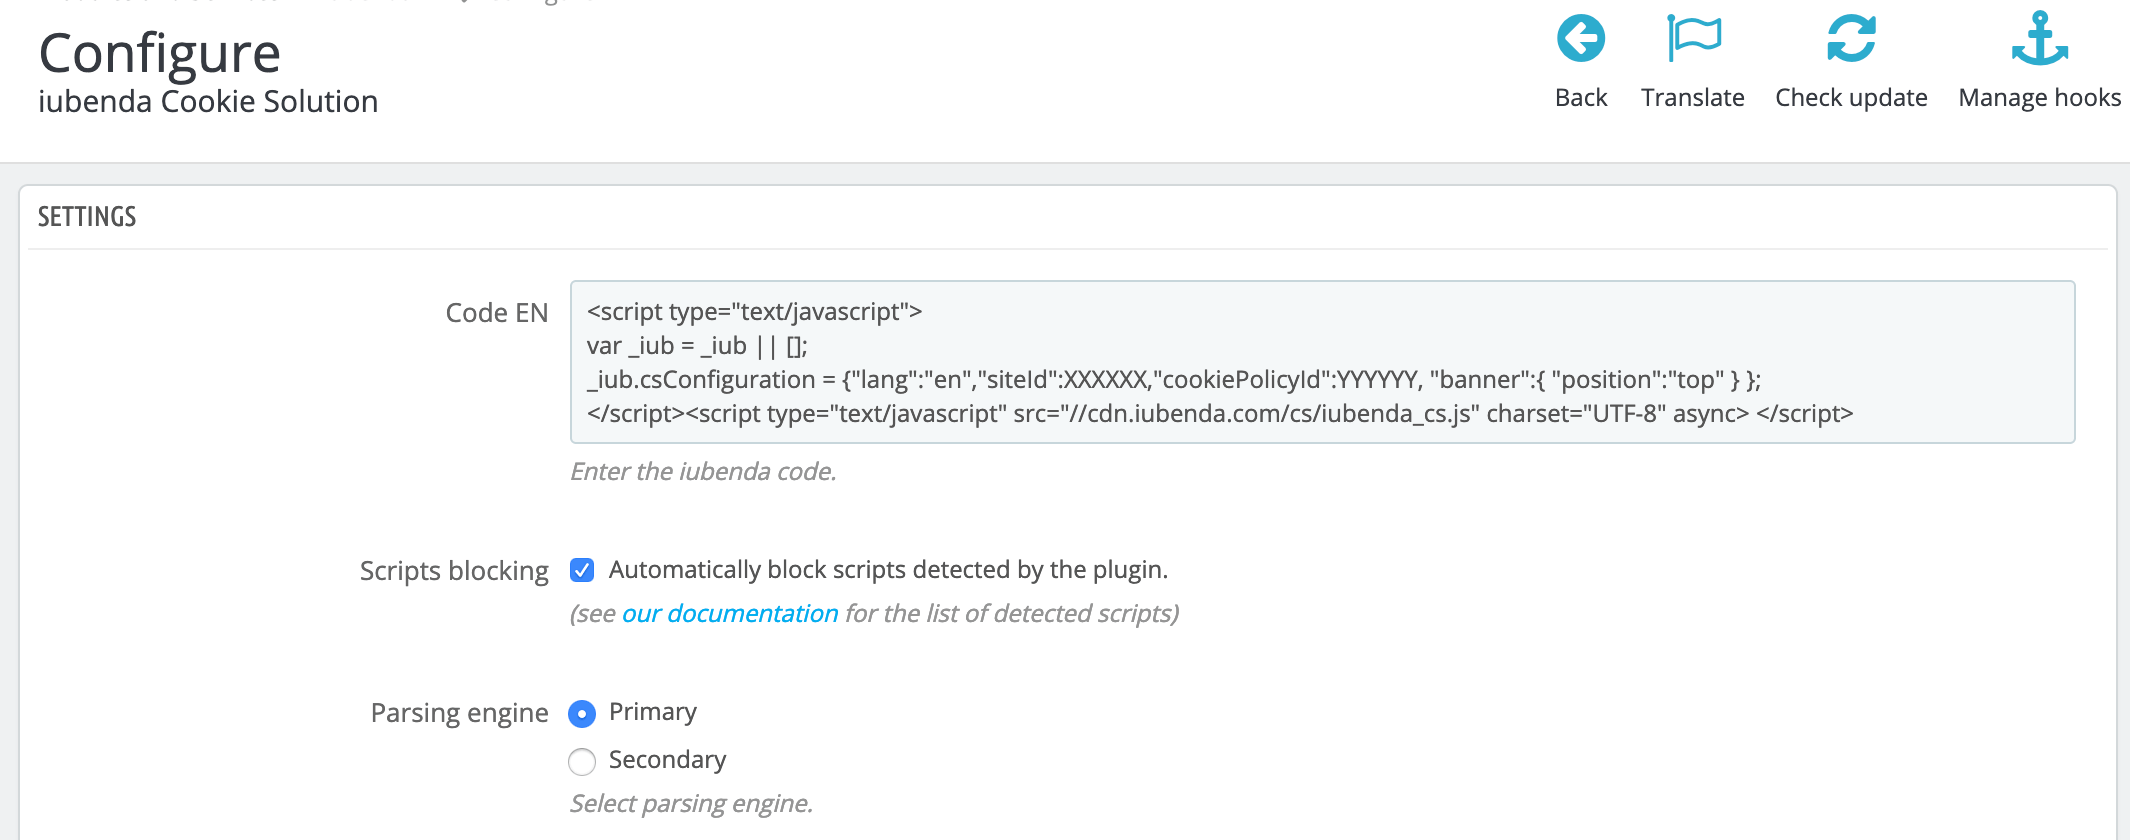 (Being PHP native, we recommend the primary, faster option for the parsing engine. If you’re experiencing some issues, try with the alternative based on a custom HTML DOM class)
Use
Once configured, the plugin will begin to show the banner on which your cookie policy will be shown/linked to users that visit your site for the first time without the need for any other further configurations. The plugin will also recognize and automatically detect and block the cookies indicated in the above block-list, that are present on your site.
Important
Our PrestaShop extension automatically blocks scripts that are generated on the server side (therefore returned by PHP by PrestaShop). Scripts that are inserted into the page via JavaScript after the loading process of that page are not and cannot be blocked automatically.
These scripts can be blocked by entering the source into the Custom Script boxes in the plugin console or by using the manual wrapping method illustrated in the example below and (in more detail) in this help post
Blocking custom scripts from within the console
The Custom Scripts field makes it easy for you to block scripts inserted into the page directly from within the plugin console. This greatly reduces the need for direct edits to the site’s code.
Here’s how to do it:
- On the left menu in your admin panel, go to the Improve section and click Extensions > Plugins.
- Next, search “iubenda”, and when the plugin appears, click on the Configure button.
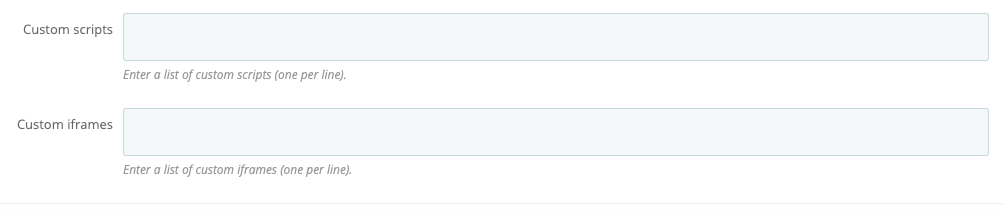
- Scroll down to find the Custom scripts and Custom iframes fields at the bottom of the page.

- Enter your script or iframe sources as needed, and click the Save button at the bottom-right of the page.
Usage Examples
Using these fields are pretty straightforward. Simply enter the script or iframe src attribute you’d like to block.
Script
If you wanted to block a social button (which inserts scripts into the page via JavaScript), you’d simply need to enter the script source, e.g. connect.socialwebsite.net/en_US/track.js into the scripts field.
iframe
Let’s say you wanted to block scripts inserted into the page via the following iframe
<iframe width="1280" height="720" src="https://www.videowebsite.com/embed/xxFhMChxx" frameborder="0" allow="accelerometer; autoplay; encrypted-media; gyroscope; picture-in-picture" allowfullscreen></iframe> What you’ll need to enter into the iframe field would videowebsite.com/embed/videowebsite.com/embed/xxFhMChxx) to ensure that all scripts coming from the actual source are blocked.
Manual Use (wrapping method)
This method requires you to directly modify your site’s code. You’ll need to go into the relevant section of your site’s code and add the scripts to be blocked as explained below.
<!--IUB-COOKIE-BLOCK-START-->
<script>
    (function(d, s, id) {
        var js, fjs = d.getElementsByTagName(s)[0];
        if (d.getElementById(id)) return;
        js = d.createElement(s);
        js.id = id;
        js.src = "//connect.socialwebsite.net/en_US/sdk.js#xfbml=1&version=v2.3&appId=808061959224601";
        fjs.parentNode.insertBefore(js, fjs);
    }(document, 'script', 'socialwebsite-jssdk'));
</script>
<!--IUB-COOKIE-BLOCK-END-->
If there are HTML / IMG / IFRAME elements, you will need to do it this way:
<!--IUB-COOKIE-BLOCK-START-->
      <iframe src="...
      <img src="...
<!--IUB-COOKIE-BLOCK-END-->
If you’ve enabled the per-category consent feature you’ll need to assign the purpose. Resuming the social button example, being part of the “Experience” purpose (id 3):
<!--IUB-COOKIE-BLOCK-START-PURPOSE-3-->
<script>
    ...
</script>
<!--IUB-COOKIE-BLOCK-END-PURPOSE-3-->
To stop automatic parsing/replacing the iframe/scripts that contain a defined src:
<!--IUB-COOKIE-BLOCK-SKIP-START-->
      <script type="text/javascript">...</script>
<!--IUB-COOKIE-BLOCK-SKIP-END-->
Further information
For API calls and xmlrpc we suggest the parameter ?iub_no_parse=1.
Troubleshooting
PrestaShop “Forbidden” error
Caution
Always remember to back up your website before attempting any fix.
In some rare cases, the system may return a “forbidden” error when you enter the Privacy Controls and Cookie Solution script, or any other script, into the Privacy Controls and Cookie Solution module and click “Save”.

This is likely related to a ModSecurity property of Apache activated in the PrestaShop backend. To solve the issue, you’ll need to disable the mod_security module. You can do this using the following procedure:
Click on Shop Parameters -> Click on Traffic&Seo -> Find the “Disable Apache ModSecurity Module” and set to “Yes”.
If for some reason the procedure doesn’t work, it may be necessary to contact your web hosting provider regarding your particular site restrictions.
Changelog and current version
1.3.1
Enhanced script insertion to follow _iub.csConfiguration based on autoblocking statusRemoved async from the autoblocking script
1.3.0
Introduced iubenda automatic blocking feature
1.2.0
Support the Prestashop latest version 8
Update the core iubenda classes to the latest version
1.1.18
Fix SSRF security vulnerability
Remove googletagmanager.com/gtm.js from basic interaction
1.1.17
Integrate with PageCache ultimate
1.1.16
Fix: Avoid overriding the purposes attribute if it was set
1.1.15
Fix: Purpose evaluation for iframes blocking
Fix: Block the custom scripts while parsing
1.1.14
Fix: Follow code standard to avoid conflict on overriding
Fix: Add per-purpose on inline script tags
Tweak: Add GA to per-purpose blocking support
1.1.13
Fix: Move FB connect to experience enhancement
1.1.12
Tweak: Add Google GPT to per-purpose blocking support
Fix: admin.js ready method deprecation
1.1.11
Fix: limit url sanitize to http protocols
Fix: AddThis per-purpose category
1.1.10
New: Per-purpose script blocking support
New: “Reject” button support
1.0.9
Tweak: Simple HTML Dom PHP class update to 1.9
Tweak: Code handled with official code validator
1.0.8
New: Introducing a way to skip specific script parsing
Fix: Improved handling of iubenda script HTML
Tweak: Support links update
1.0.7
Tweak: Adjust the iubenda PHP class handling
Tweak: Update iubenda logo
1.0.6
New: Option to block custom scripts and iframes
Tweak: Update and extend the list of blocked scripts including Google Site Search, Google oAuth, LinkedIn widgets, PayPal widgets, Freshchat, UserVoice, AdRoll, Olark, Segment, Kissmetrics, Mixpanel, Pingdom, Bing and Elevio
1.0.5
Tweak: Update and extend the list of blocked scripts including Pinterest, AddThis, Disqus, Optimizely, Neodata, Criteo, Outbrain, Headway and CodePen
Tweak: Interface improvements
1.0.4
Fix: Invalid iubenda parser implementation
1.0.3
Tweak: Update and unify iubenda parsing engine
1.0.2
Fix: Eage output empty if script blocking disabled
1.0.1
Tweak: iubenda faster class regex update
1.0
Initial release
⚠️ Caution
After installation, please be sure to set-up prior blocking, as this is legally mandatory under EU Law. You can find various methods of prior blocking along with full instructions in this guide.
Privacy Controls and Cookie Solution on PrestaShop 1.6.x
If you’re unable to upgrade to version 1.7.x (which is compatible with our module), you will need to integrate the code manually. To do this either:
- integrate the code into the
<head>tag of your website (as the first element), please see Manual embedding below for instructions on how to do this or; - use a module that allows you to add our Privacy Controls and Cookie Solution script in the
<head>tag of your website (as the first element), for this please see Embedding via a Prestashop module below.
Manual embedding
In this case, you will most likely need to edit the header.tpl file of your Prestashop theme and add the Privacy Controls and Cookie Solution script.
We do not have a dedicated guide for this, but you can find some helpful articles online, such as this one, on how to modify a PrestaShop template.
The Privacy Controls and Cookie Solution code should be placed between “literal” tags as shown below:
{literal}Cookie Solution Script{/literal}
Embedding via a Prestashop module
If you don’t want to put your hands on the code, you can also use a simple Prestashop module that allows you to add our Privacy Controls and Cookie Solution script in the <head> tag of the page, such as this module here.
Remember that, in addition to displaying a cookie banner/consent banner, you must also block cookies before consent. Need help with Prior blocking? Check out our guide on Manuel tagging here.