Have you generated a website using Wix and need to meet GDPR consent requirements?
Well, you’re in the right place. In this guide, we’ll take a look at GDPR consent proof requirements and how to add iubenda’s Consent Database to your Wix site.
→Jump to How to add the Consent Database to Wix
Why do I need GDPR proof of consent
Consent records are specifically required under the GDPR. Keeping a complete and thorough record of consent is required and is an essential part of privacy compliance. The records of proof are managed by you, the Data Controller. As a result, the GDPR requires you to keep “proofs” or records of consent that contain specific details that might prove that the consent received is genuine and therefore valid under the GDPR. Consent must be explicit, freely provided, and verifiable under the GDPR. You can read up more on iubenda’s Consent Database here.
What must GDPR consent records contain
These records should include a way of identifying the user, proof of consent, record of the consenting action, and the legal documents available to the user at the time of consent, among other things.
The following information should be recorded:
- who provided the consent;
- when and how consent was obtained from the particular user;
- the consent collecting form they were presented with at the time of collection; and
- whatever conditions and legal documents were in effect at the time the consent was obtained.
You can read about the full requirements here.
iubenda’s Consent Database automatically records and manages GDPR & LGPD consent and privacy preferences for each of your users. You can read up more on iubenda’s Consent Database here.
How to add iubenda’s Consent Database for Wix
Please note: the following method is only possible on pro/business accounts.
Once you’ve generated your Consent Database with iubenda we are going to install your Consent Database on a basic Wix contact form following these four simple steps:
- Create a contact form page on your Wix website
- Retrieve the name and id attributes from that form
- Add Consent Database to the <head> tag
- Customize the Submit function and add it at the end of the <body> tag
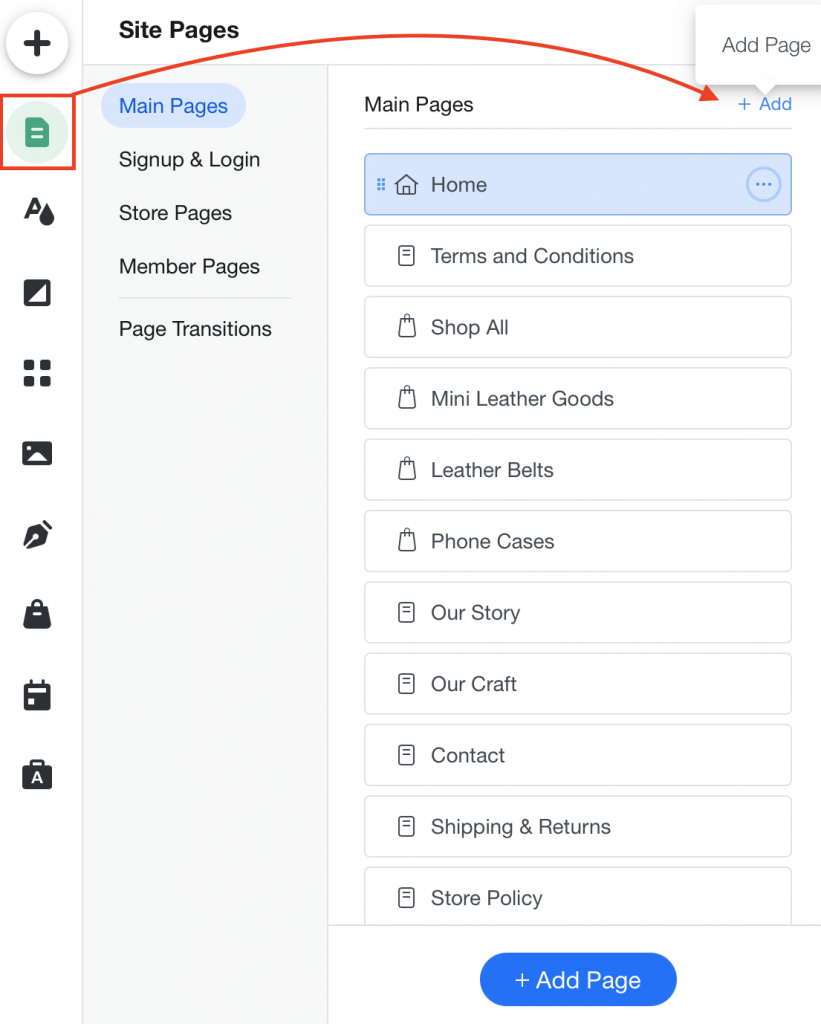
Step 1: create a contact form page
First, you need to create a contact form page on Wix. From the left sidebar choose Menu & Pages → Site Menu → Add Page
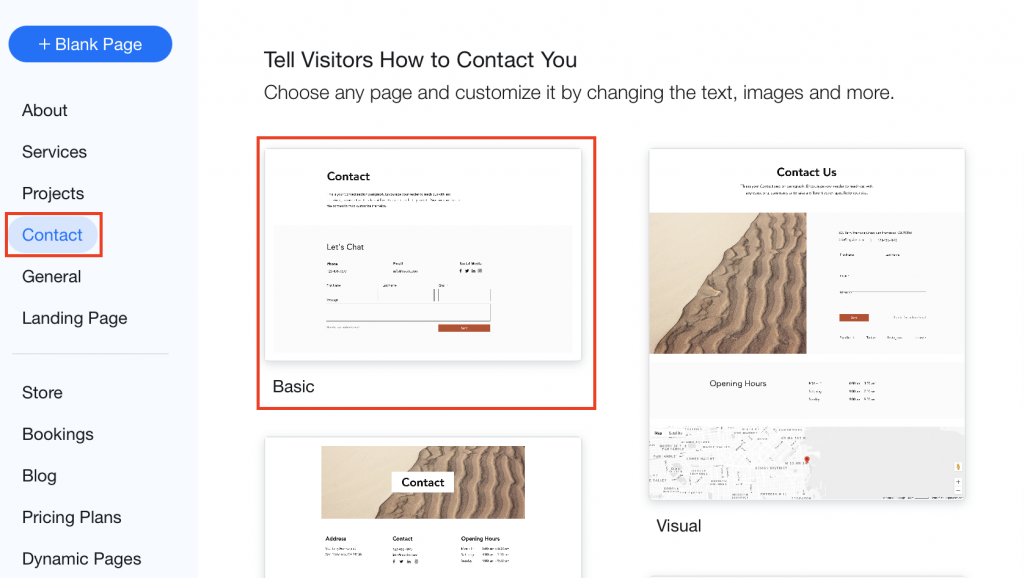
Next, you need to click on Contact and select the first option ‘Basic’.
Click “Publish” in the top right corner and then select “View Site”.
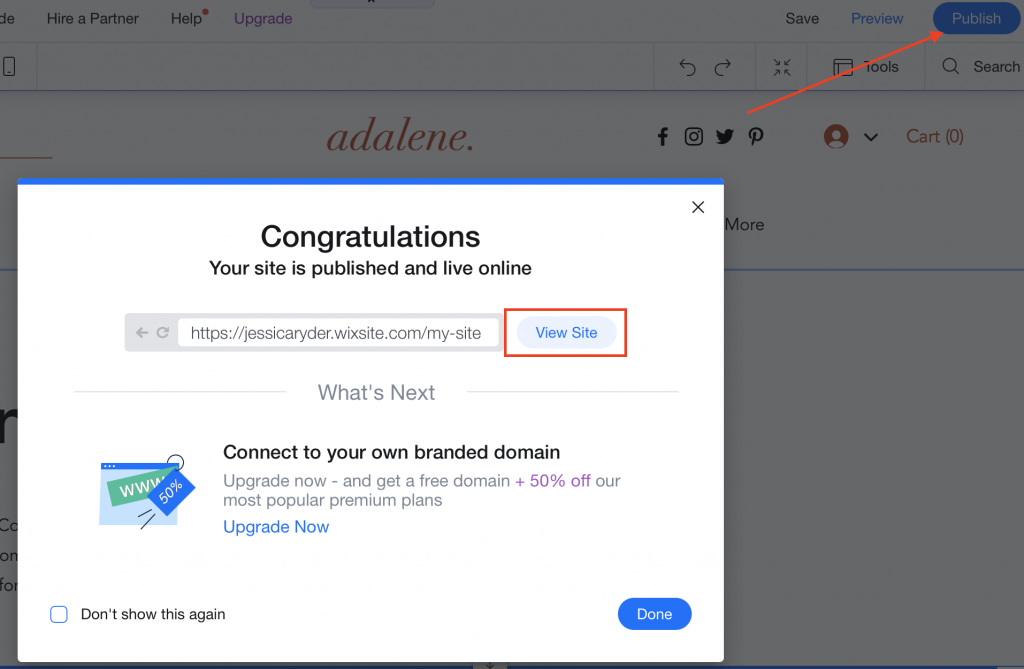
Your Wix website will open in a new browser now you can access the Contact page you just created.
Step 2: Retrieve name and id attributes of the form
Please note: to retrieve this data we will use the ‘Inspect’ function from chrome, Firefox Safari, opera, and internet explorer. For some of these search engines such as Safari, you may have to activate the developer tool in preferences. To do so, open the Safari browser, click on Safari -> Preferences > Advanced. Then, check the Show Develop menu in the menu bar checkbox. The Inspect Element feature is now enabled.
Depending on what browser you use the inspect function will look slightly different however, the method for retrieving the data remains the same. For example, if you are using Google chrome the inspect function will appear on the right-hand side of your screen as shown in the image below. If you are using Firefox the inspect function will appear at the bottom of your webpage.
We need to retrieve the name and id attributes of the form you just created, follow the guide below.
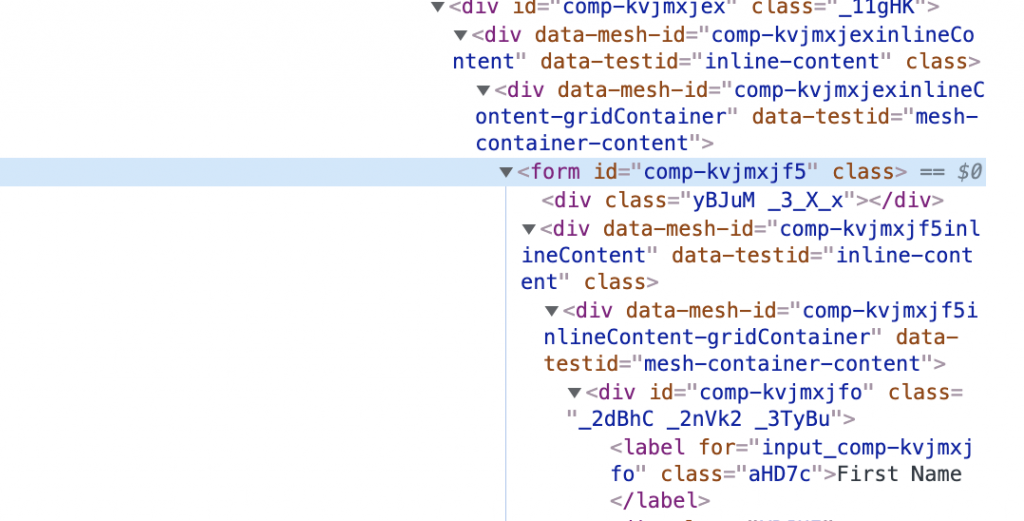
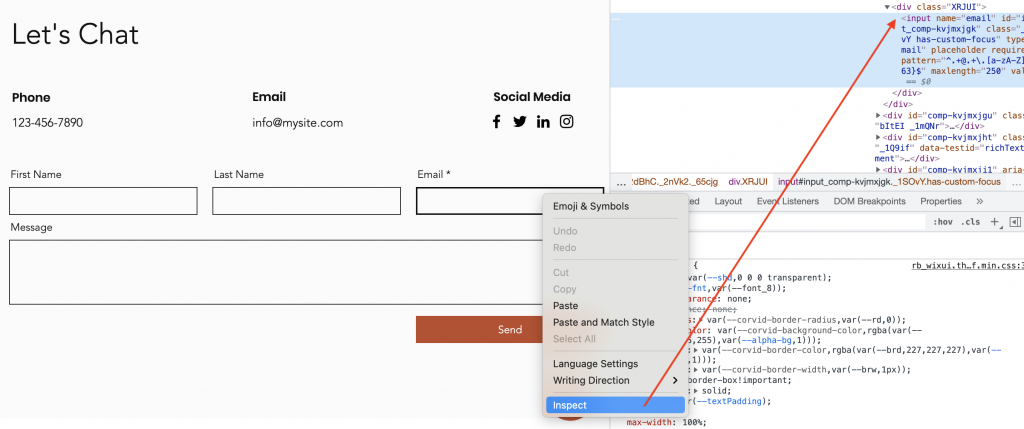
Right Click anywhere on your form then select “Inspect”
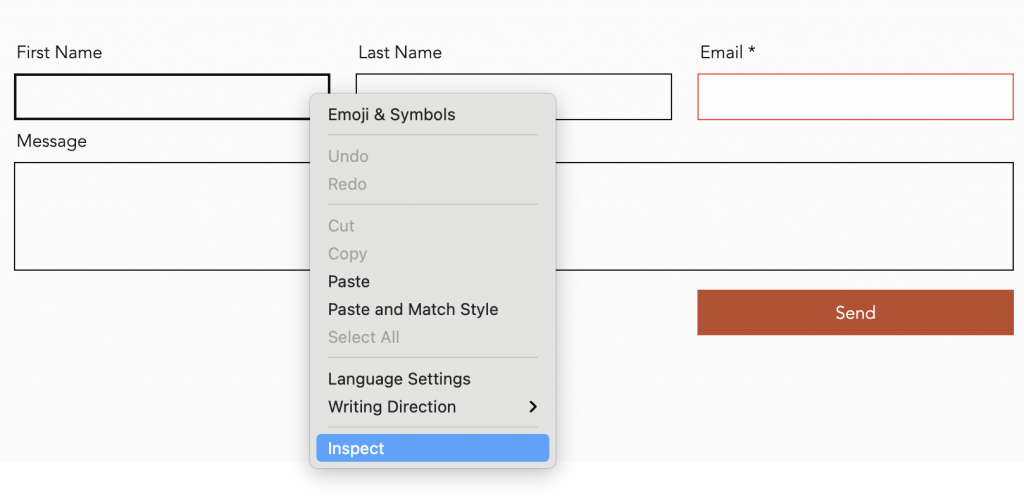
Now, search for the <form> tag and note down of the ID attribute.
In this example, the ID is: comp-kVjmxjf5
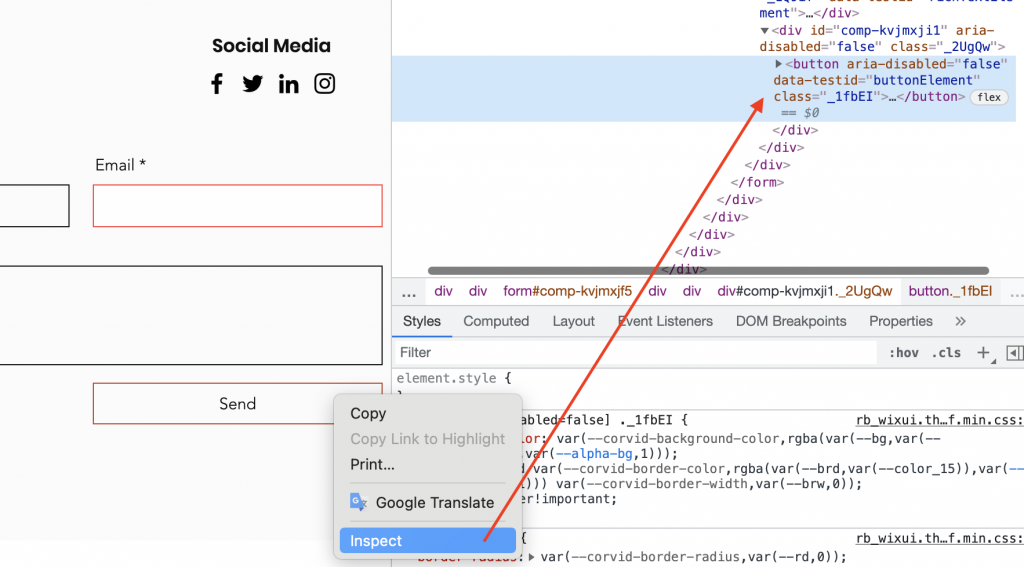
Next, we need to search for the ‘submit’ or ‘send’ button and take note of the class attribute. You can easily do this by hovering over the button → right-click → inspect.
In the example, the class attribute is: _1fbEI
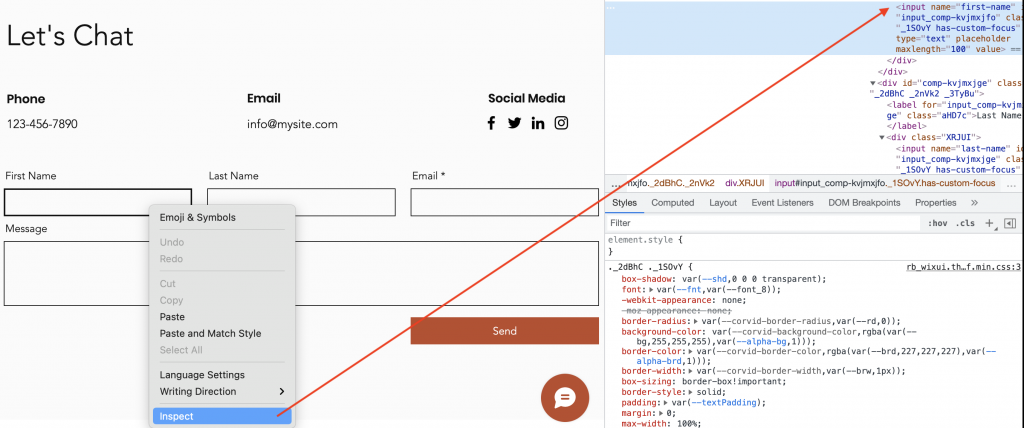
After that, look for the ‘First name’ field and note down the name attribute. You can easily do this by clicking on the “First Name” field → right-click → inspect.
The name attribute in this example is: first-name
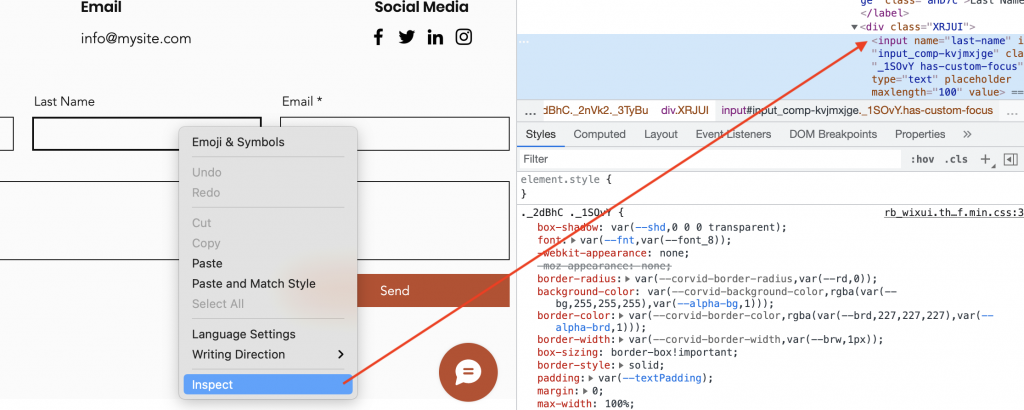
We want to do the same again with the ‘Last name’ field and note down the name attribute. To do this, right-click on the ‘Last name’ field and select “inspect”.
The name attribute in this example is: last-name
Repeat the above for the “Email” field. To do this, right-click on the ‘Email field and select “inspect”.
The name attribute in this example is: email
We can ignore any “message” or “subject” field as it is not needed for the creation of our consent.
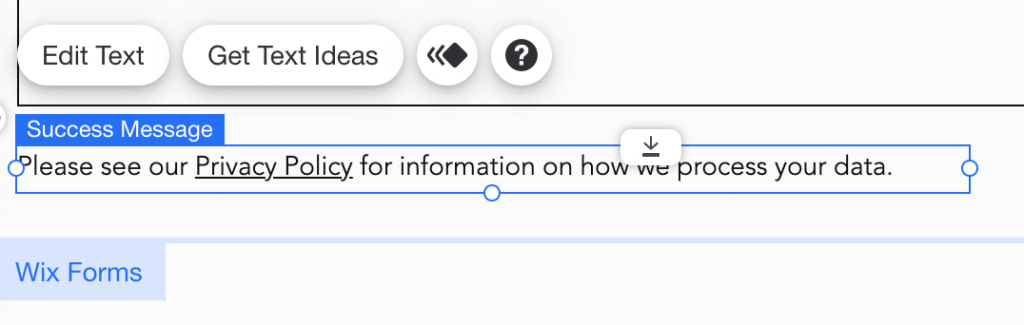
Now head back to the editor and you can add a personal text with a link to read your Privacy Policy. To do this hover over the text at the bottom of the form and select “Edit Text”.
Step 3: Add Consent Database Init function to the <head> tag
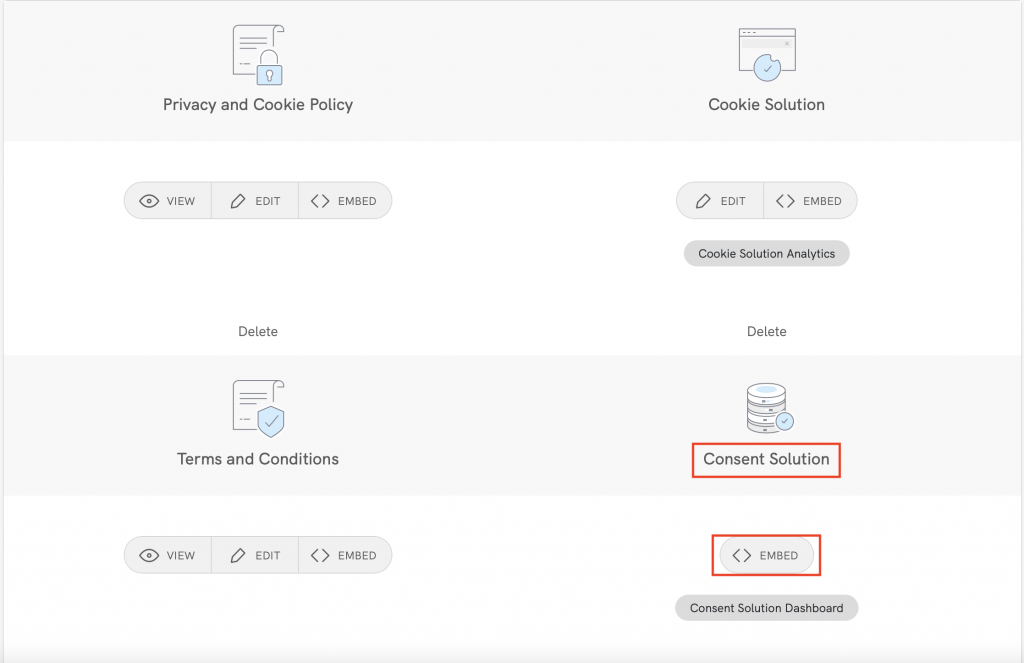
We need to copy the Consent Database from your iubenda dashboard. Click on [Your website] > Consent Database > Embed
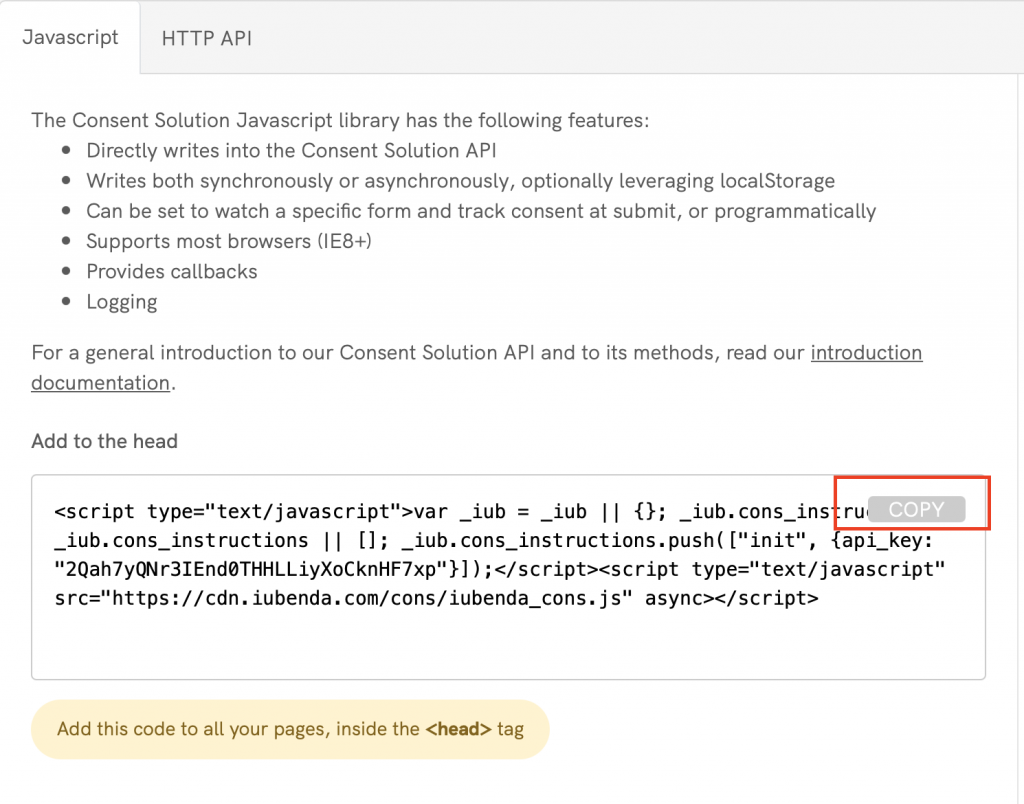
Copy your code, as shown below using the Javascript tab by clicking on the COPY button.
Now we need to add this to the <head> tag. Here we are going to follow Wix’s official procedure.
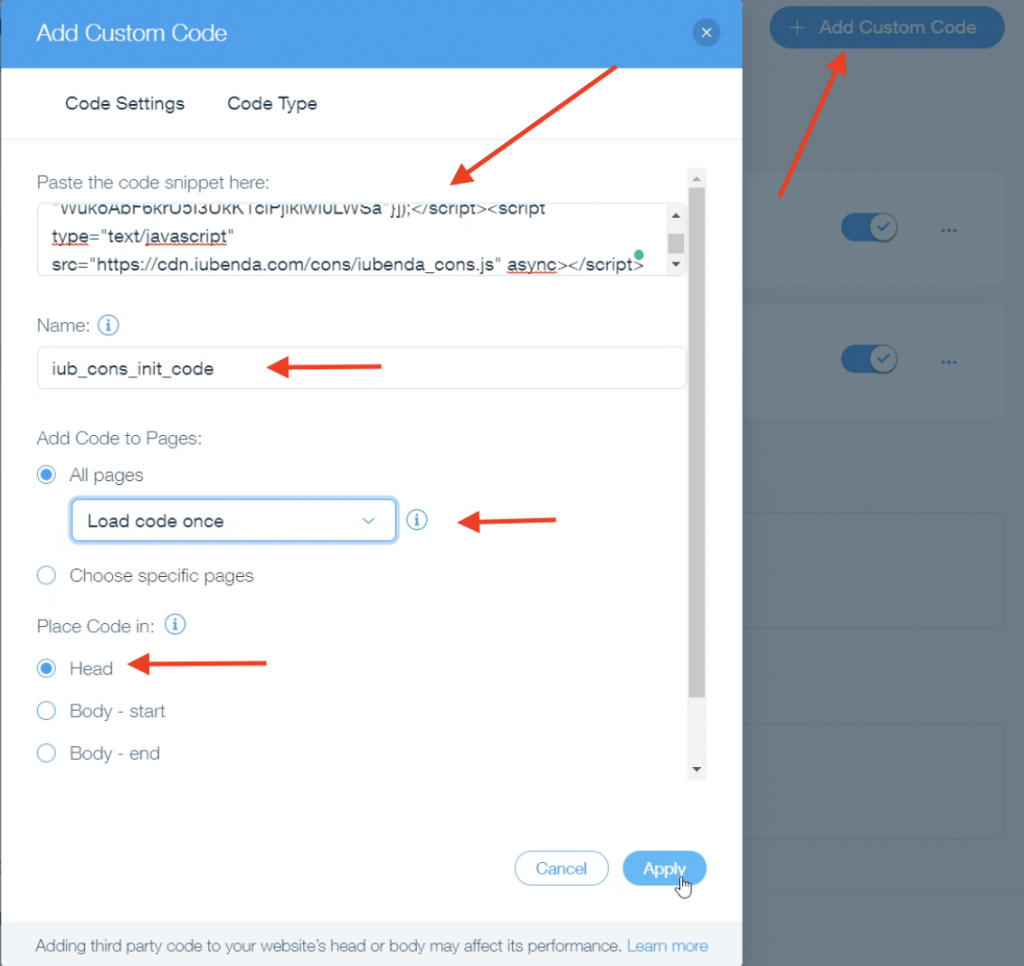
Go to Settings in your site’s dashboard → Advanced Section → Add custom code.

Click on + Add Custom Code in the top right corner and complete the form as explained below.
- Paste your code from iubenda into the text box labeled “Paste the code snippet here:”
- Give your snippet a name: iub_cons_init_code
- Make sure to select All pages > (load code once)
- Select the Head tag
- Click on Apply.
Step 4: Customize the Submit function and add it at the end of the <body> tag
In this step, you’ll need to customize the code below. Replace our example attributes (highlighted in red in the image below) with your attributes from step 1 above.
- The form id: the example from this guide is comp-kVjmxjf5
- The submit / send button: the example from this guide is document.getElementsByClassName(“_1fbEI”)[0] .
- the
first_name, last_nameandemailsubject mapping (remember that you have four non-editable options:first_name,last_name,full_nameandemail); - The privacy_acceptance: since there isn’t a checkbox, we need to make the acceptance true. In the example below we have named it privacy_acceptance;
- the
legal_notices, which are automated if you sync your iubenda legal documents with the Consent Database (here, we use the standard identifiersprivacy_policyandcookie_policy and term).
<script type="text/javascript">
document.getElementsByClassName("_1fbEI")[0].onclick=function(e){
e.preventDefault();
_iub.cons_instructions.push(["submit",{
form: {
selector: document.getElementById("comp-kVjmxjf5"),
map: {
subject: {
first_name: "first-name",
last_name:"last-name",
email: "email"
},
}
},
consent: {
preferences: {
privacy_acceptance: true,
},
legal_notices: [
{
identifier: 'privacy_policy',
},
{
identifier: 'cookie_policy',
}],}},
{success:function(response){console.log(response);
document.getElementById("comp-kVjmxjf5").submit()},}])}
</script>
Lastly, we need to add this Submit script at the end of the <body> tag. To do this, go to Settings in your site’s dashboard → Advanced Section → Add custom code.

Then, click on Add Custom Code in the “Body End” section.
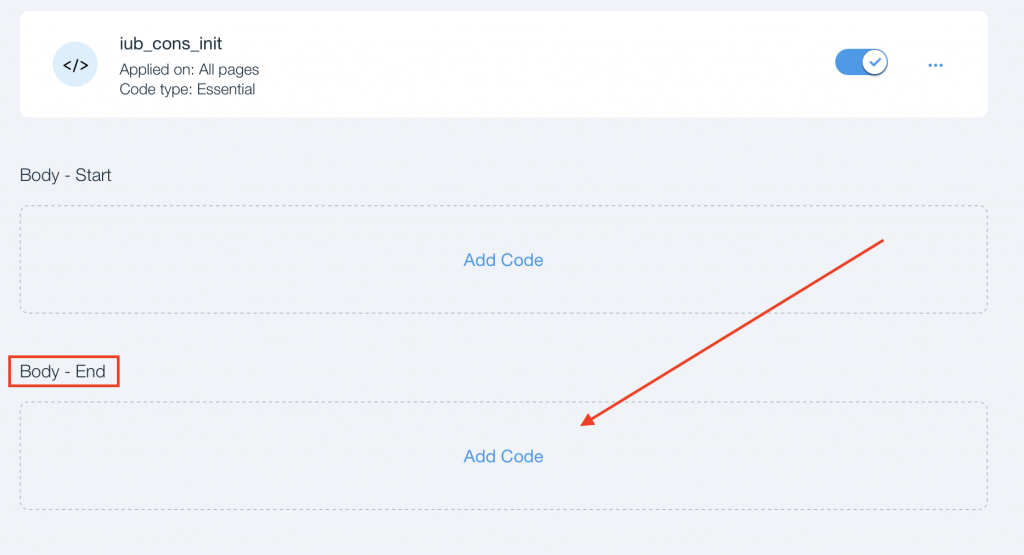
After that, paste our Submit function into the text box ‘paste the code snippet here:’ and then we can name it cons_submit_script.
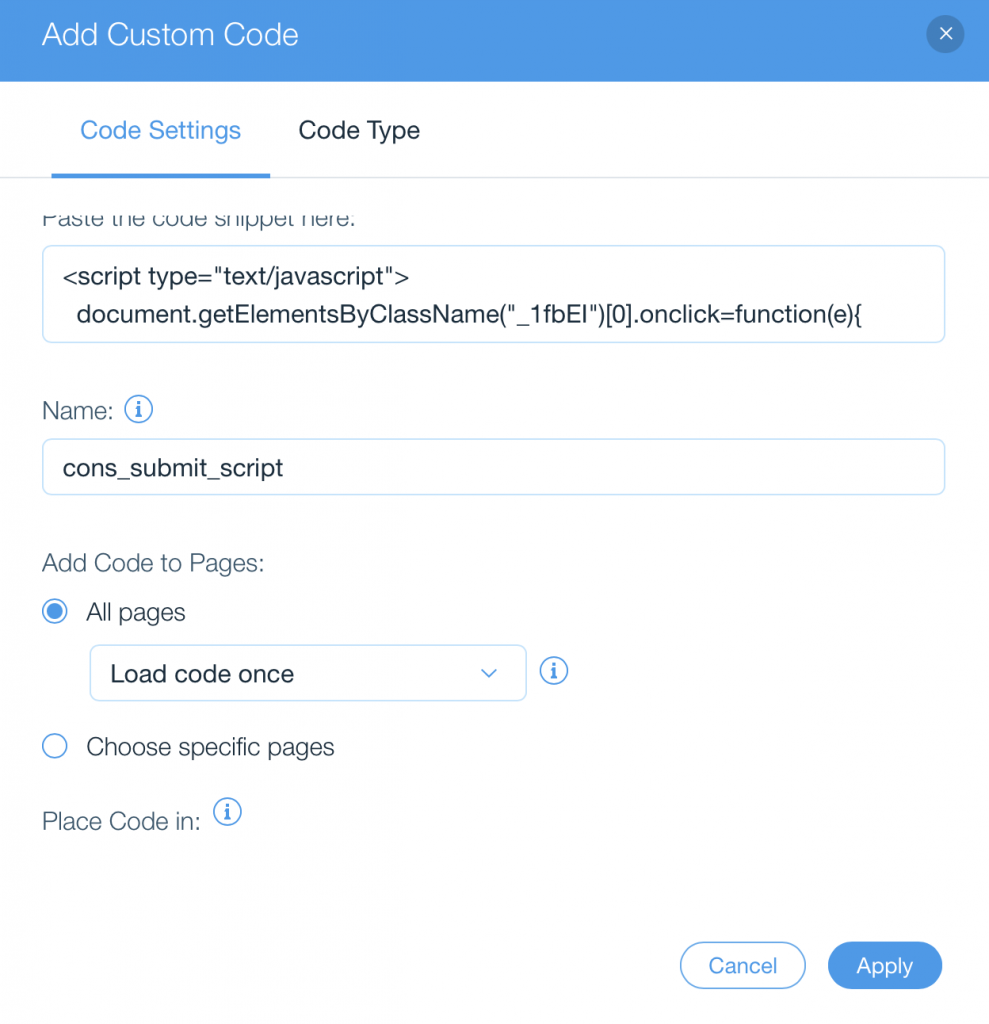
Click on Apply! Congratulations, you’ve integrated your iubenda Consent Database on Wix!