The Joomla! plugin by iubenda allows you to automate the implementation of the cookie law rules, drastically reducing the necessity for direct interventions in the site’s code.
Caution
- The plugin is downloadable directly from the official Joomla! Extensions Directory
- The plugin requires Joomla! 2.5 or above
- The plugin works better with versions of PHP 5.3 or later
Functionality
- The plugin automatically adds the iubenda code to all the pages of a site (to the
HEADsection). - Allows you to automatically or manually block scripts that can install cookies prior to consent, without the need of direct intervention on the code.
- Asynchronously re-activates cookie scripts once consent is collected.
- Handles the display of the cookie banner/consent banner and cookie policy, allowing you to fully customize the banner to match the look and colors of your site if needed.
- Saves user preferences about the use of cookies and displays a clean page (without banner) to users who have already provided their consent.
- Integrates with IAB’s Transparency and Consent Framework.
- Features an easy-to-use interface for entering custom scripts and iframes.
- Detects bots/spiders and serves them a clean page so that your SEO efforts are never compromised.
- It supports the auto-assignment of categories when blocking scripts.
- The remote configuration feature ensures that all changes made in the configurator are automatically applied to your website, eliminating the need to re-embed the code.
- AdRoll
- AddThis widgets
- Bing
- CodePen
- Criteo
- Disqus
- Elevio
- Facebook Comments
- Facebook widgets
- Freshchat
- Google AdSense
- Google Analytics
- Google Maps
- Google ReCaptcha
- Google Site Search
- Google Tag Manager
- Google oAuth
- Google+ widgets
- Headway
- Instagram widgets
- Kissmetrics
- LinkedIn widgets
- Mixpanel
- Neodata
- Olark
- Optimizely
- Outbrain
- PayPal widgets
- Pingdom
- Pinterest widgets
- Segment
- ShareThis widgets
- Twitter widgets
- UserVoice
- Vimeo
- YouTube
Instructions
If you’re installing the plugin for the first time, jump directly to the installation instructions here.
Otherwise, if you’ve previously installed an older version of the plugin directly from this site, you can update to the latest version of the plugin by following the steps below.
- First, delete the old version of the plugin — Click on Extensions > Manage, select the plugin and click on the Uninstall button at the top of the section.
- Go to the official Joomla! Extension Directory here and download the plugin.
- Install by following the installation steps below.
Installation
- Download the free plugin here.
- Access your Admin panel (http://example.com/admin123/) and log in
- Go to your Extensions menu that is on the top of the screen in the Admin panel and click on Manage > Install
- Drag and drop file zipped iubenda plugin file or click Browse for file and select the iubenda file from your computer.
Activation
Joomla 3.10 (old) instructions
- Click on Extensions > Manage > Manage;
- Search “iubenda” and enable the plugin.
How to add the cookie banner/consent banner and modify settings
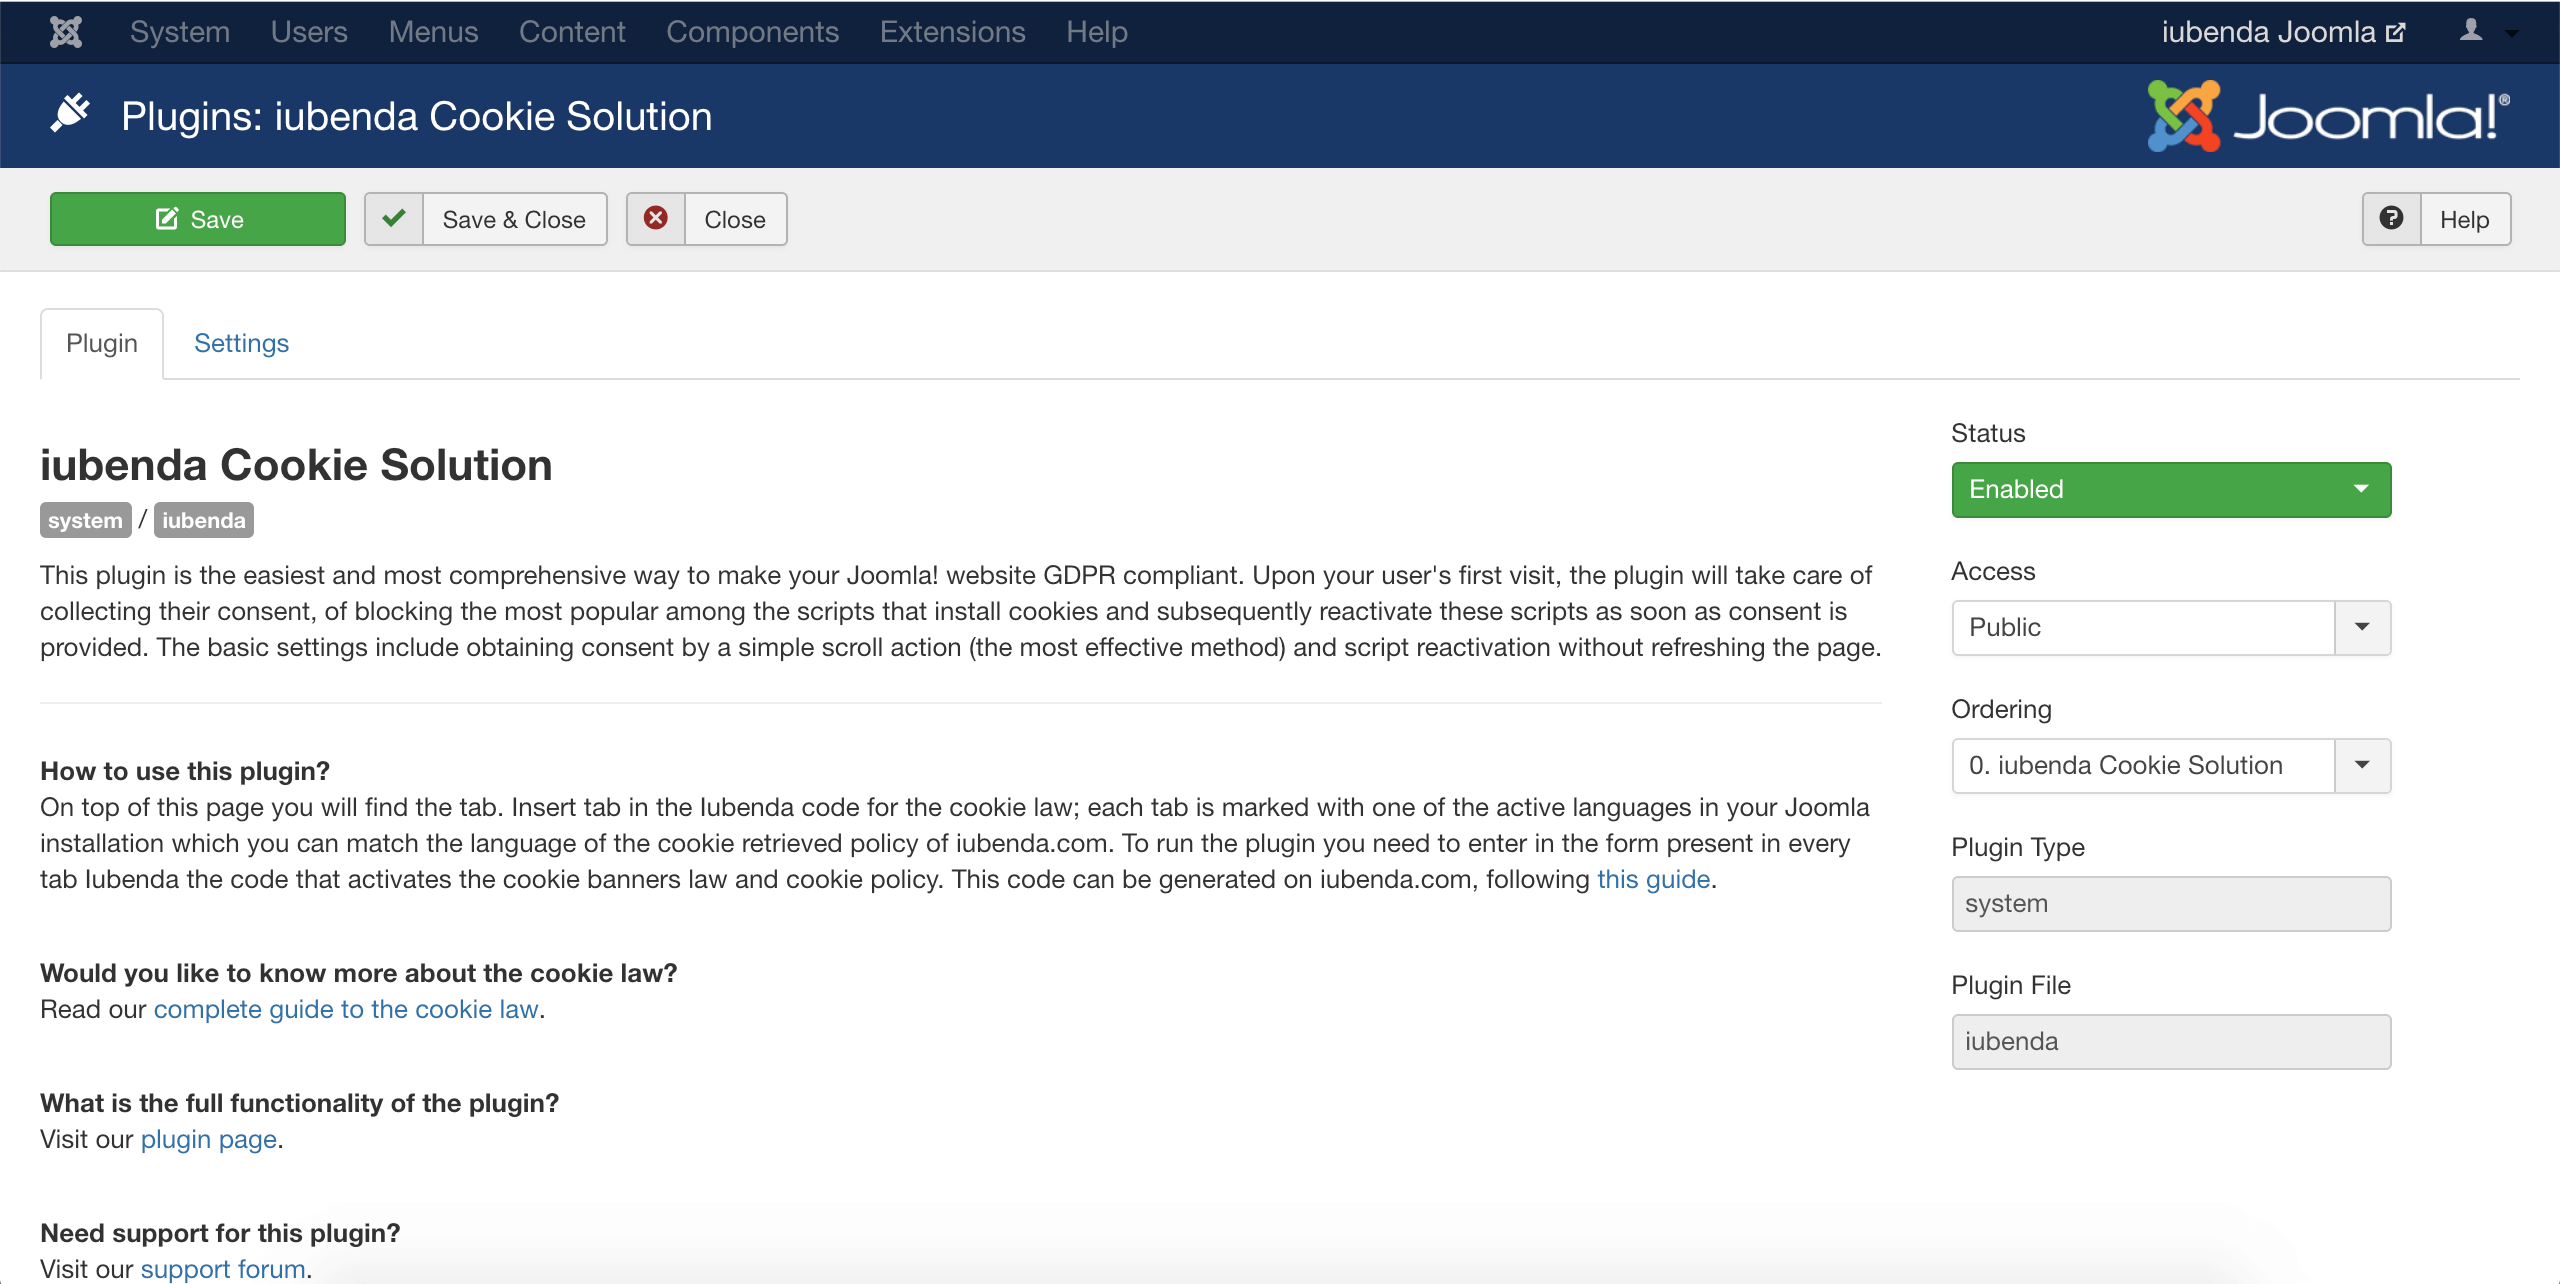
Click on the item Extensions > Plugins;
Search “iubenda” and click on the plugin name (you can see what the interface looks like below):
Copy your Privacy Controls and Cookie Solution code from the Privacy Controls and Cookie Solution embed section of your iubenda account
 (If you haven’t already generated your Privacy Controls and Cookie Solution code within your iubenda account, you can read more about how to do that here: introduction to the iubenda Privacy Controls and Cookie Solution)
Click on Settings, paste that code into the plugin form and save:
 (Being PHP native, we recommend the primary, faster option for the parsing engine. If you’re experiencing some issues, try with the alternative based on a custom HTML DOM class)
Starting from your Joomla dashboard select the System icon on the left of your screen.
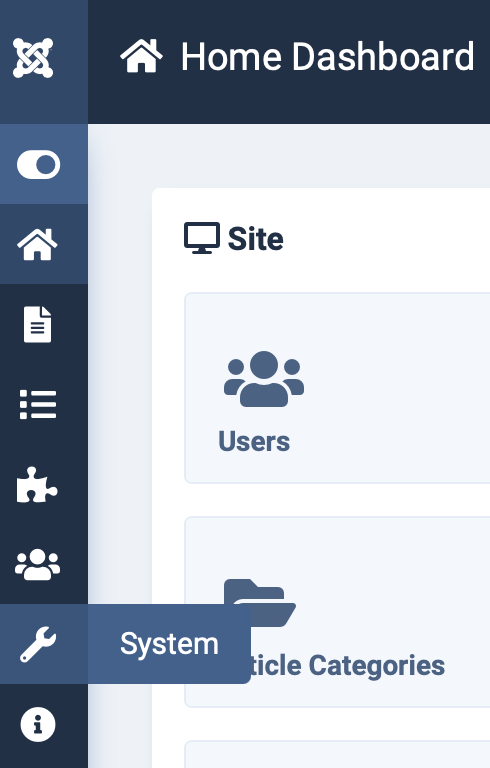
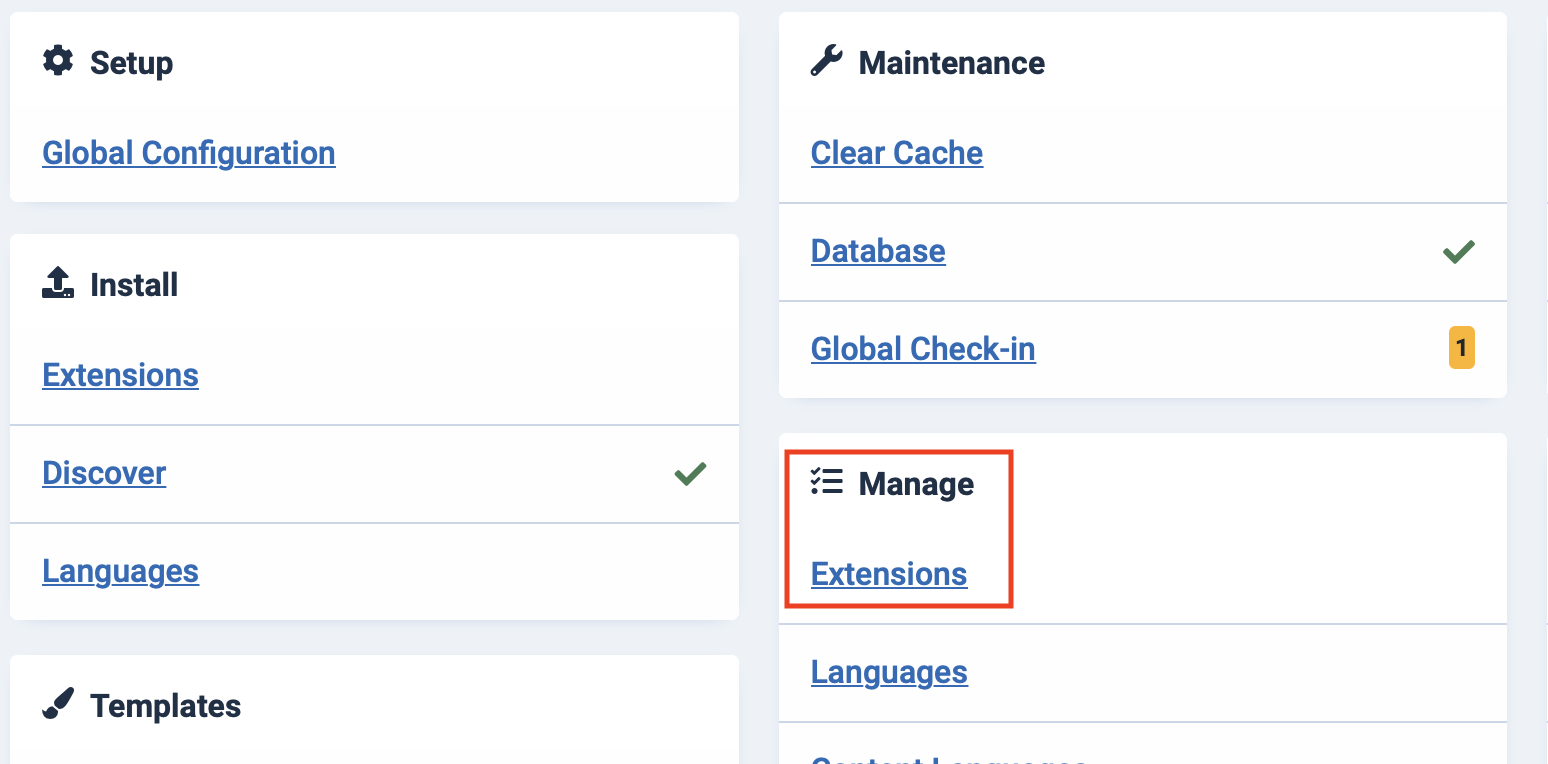
Next, find the “manage” menu and select Extensions.
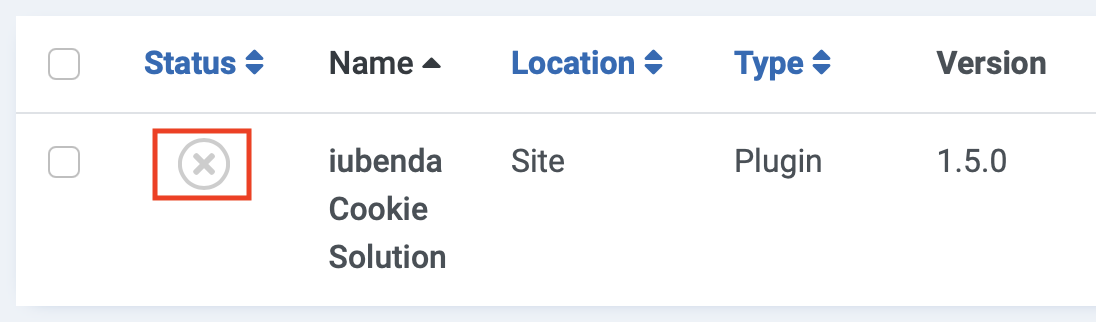
In the search bar at the top of your screen type in “iubenda” and press the enter button on your keyboard.

After that, click on the X to the left of “iubenda Privacy Controls and Cookie Solution”.
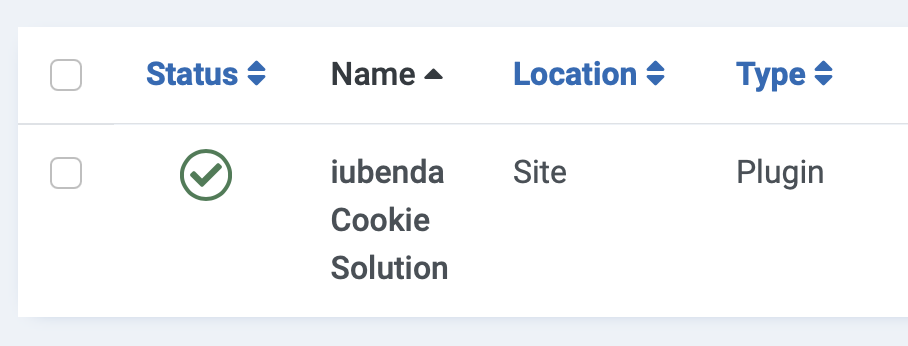
That’s it! You’ve successfully activated your iubenda Privacy Controls and Cookie Solution on Joomla!
How to add the cookie banner/consent banner and modify settings
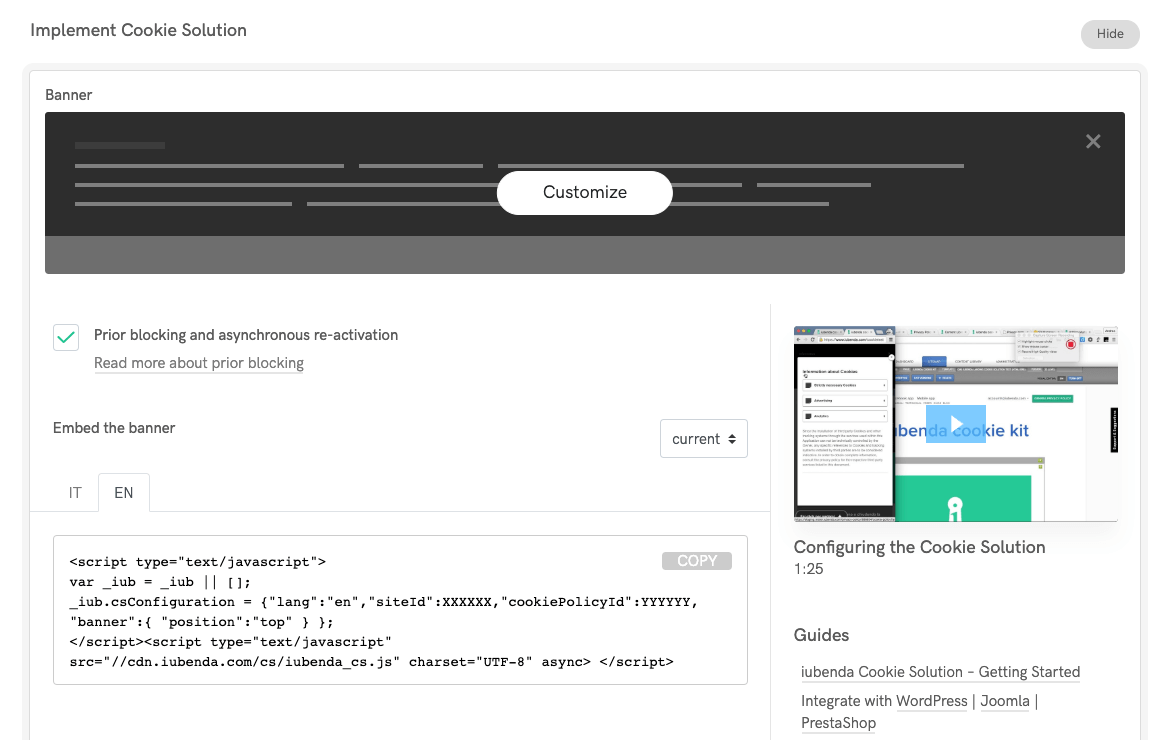
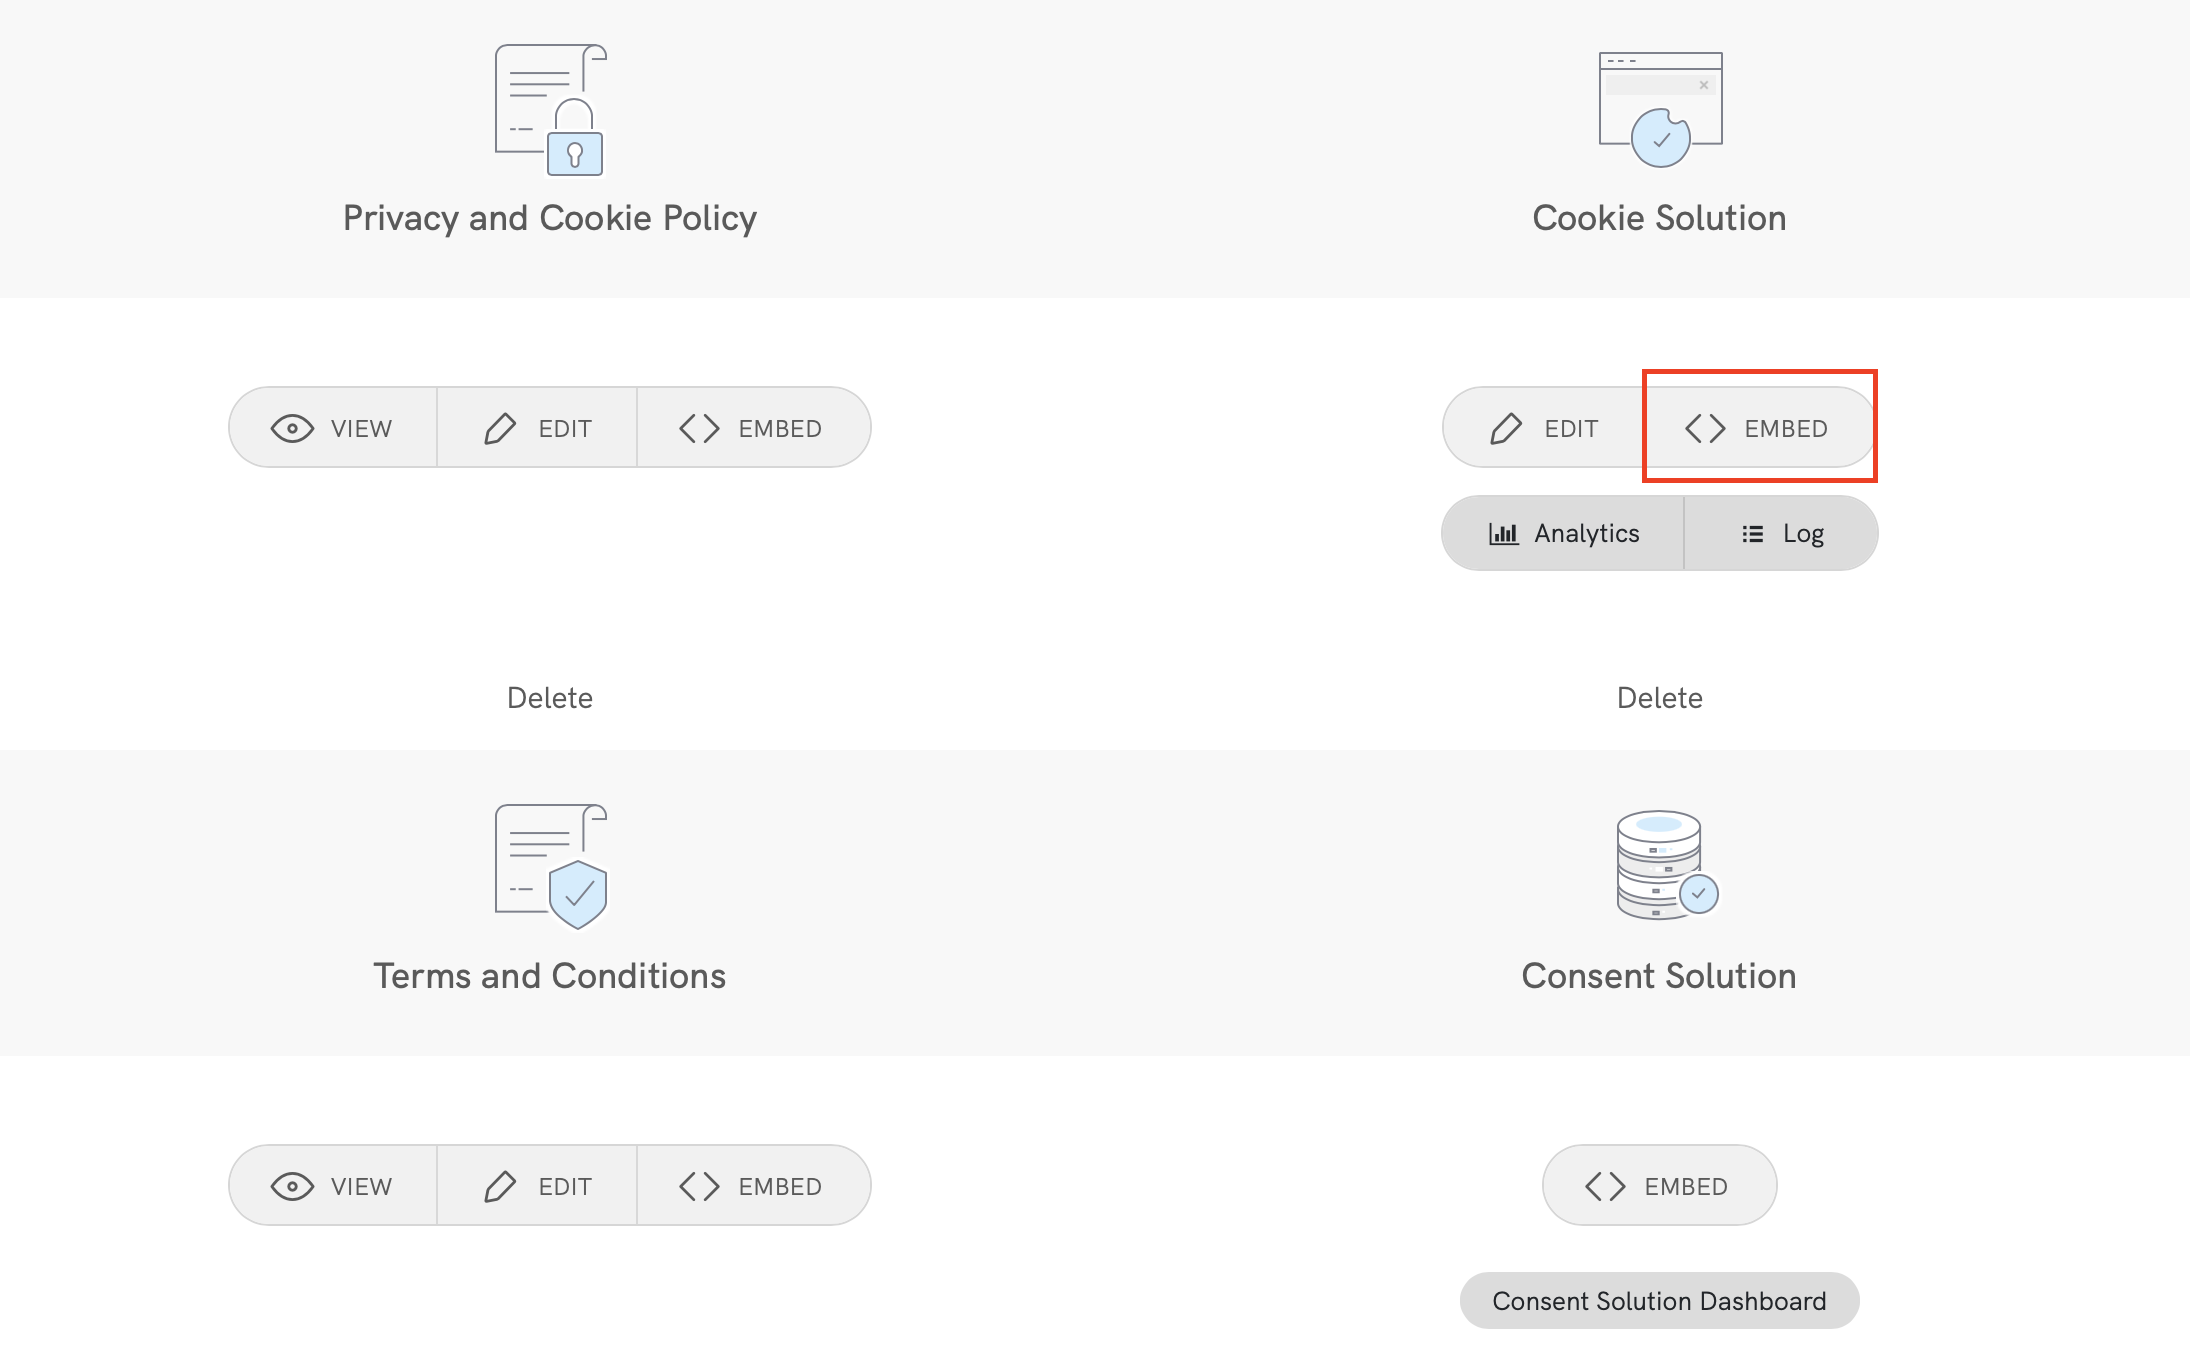
Let’s start by copying your Privacy Controls and Cookie Solution code from the Privacy Controls and Cookie Solution embed section of your iubenda account. Under the title ‘Privacy Controls and Cookie Solution’ in your dashboard select the <> EMBED button.
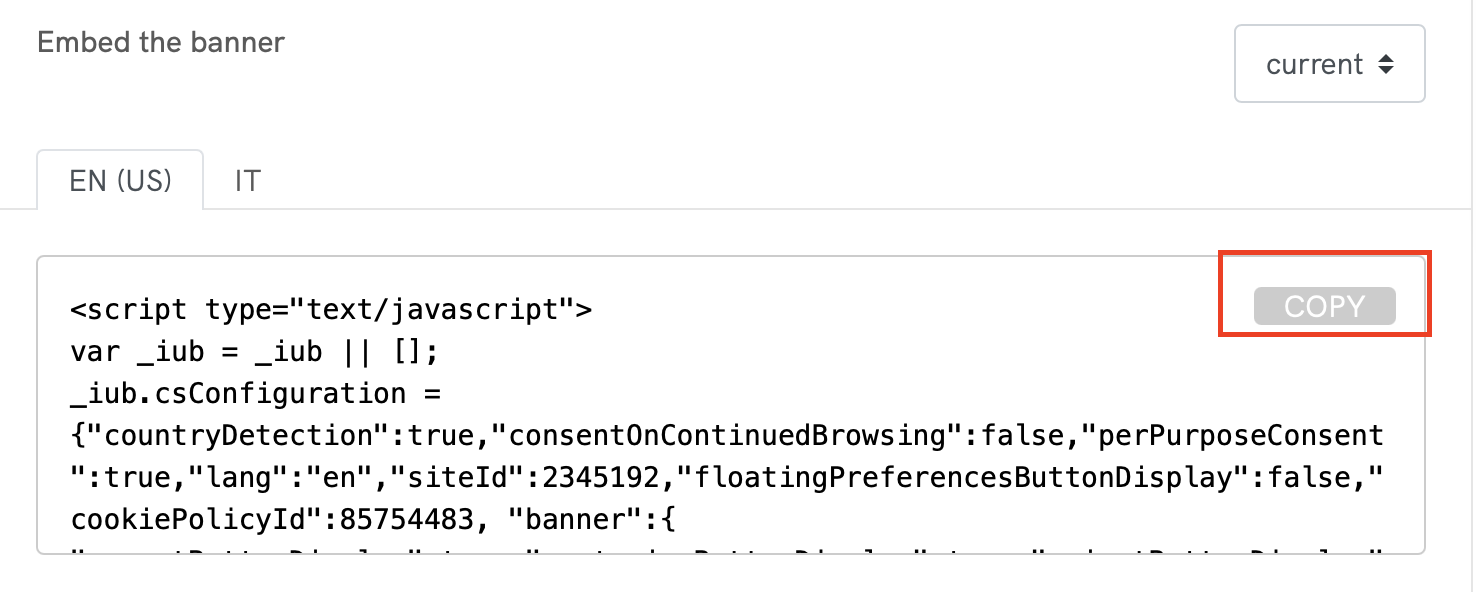
Next, under the title ‘Embed the banner’, click on the COPY button on the right side of your code.
(If you haven’t already generated your Privacy Controls and Cookie Solution code within your iubenda account, you can read more about how to do that here: introduction to the iubenda Privacy Controls and Cookie Solution).
Then head over to your Joomla dashboard select the System icon on the left of your screen.

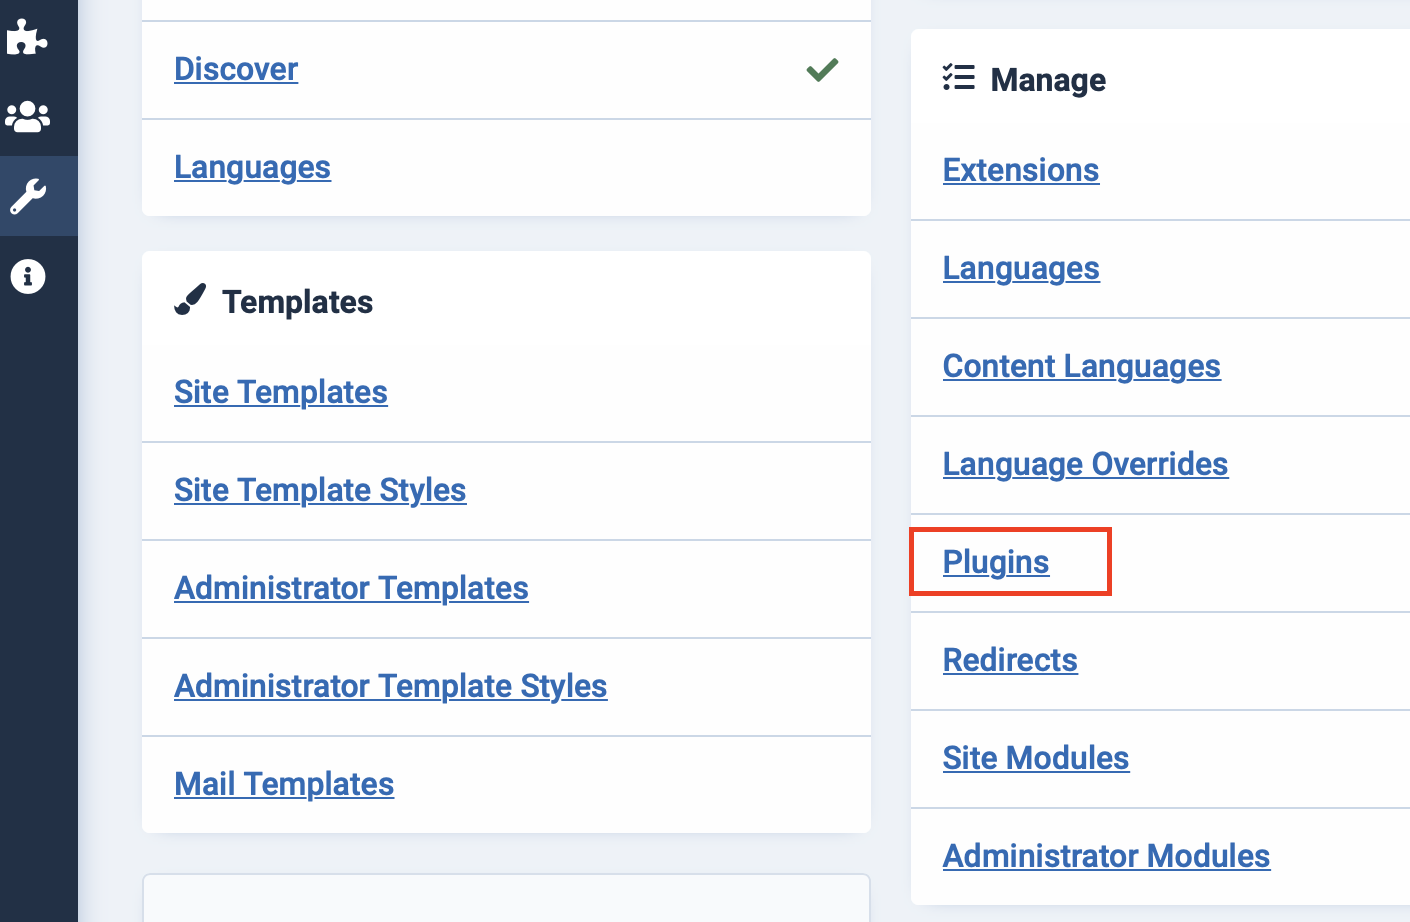
Next, find the “manage” menu and select Plugins.
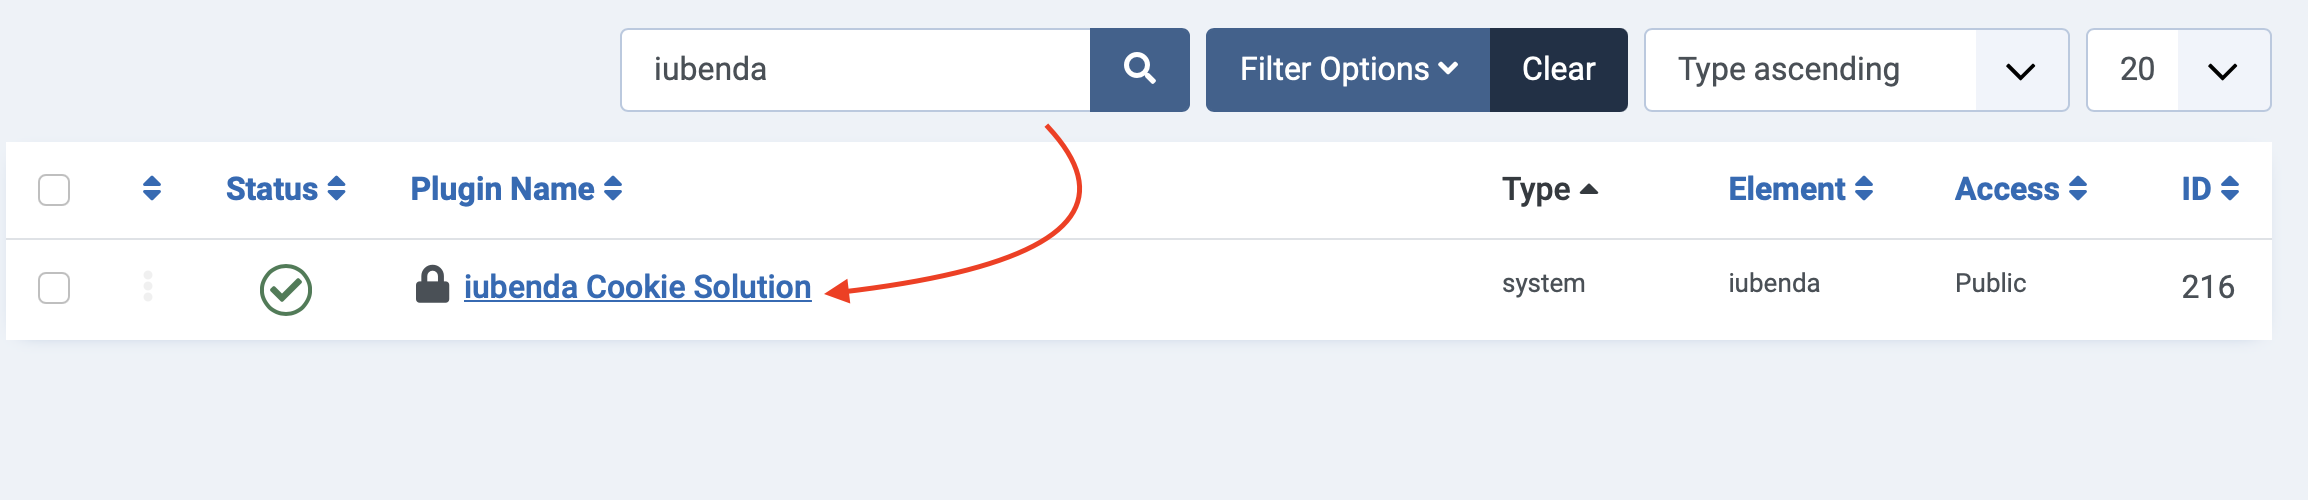
Search “iubenda” using the search bar at the top and press the enter button on your keyboard. After that, click on the plugin name “iubenda Privacy Controls and Cookie Solution”.
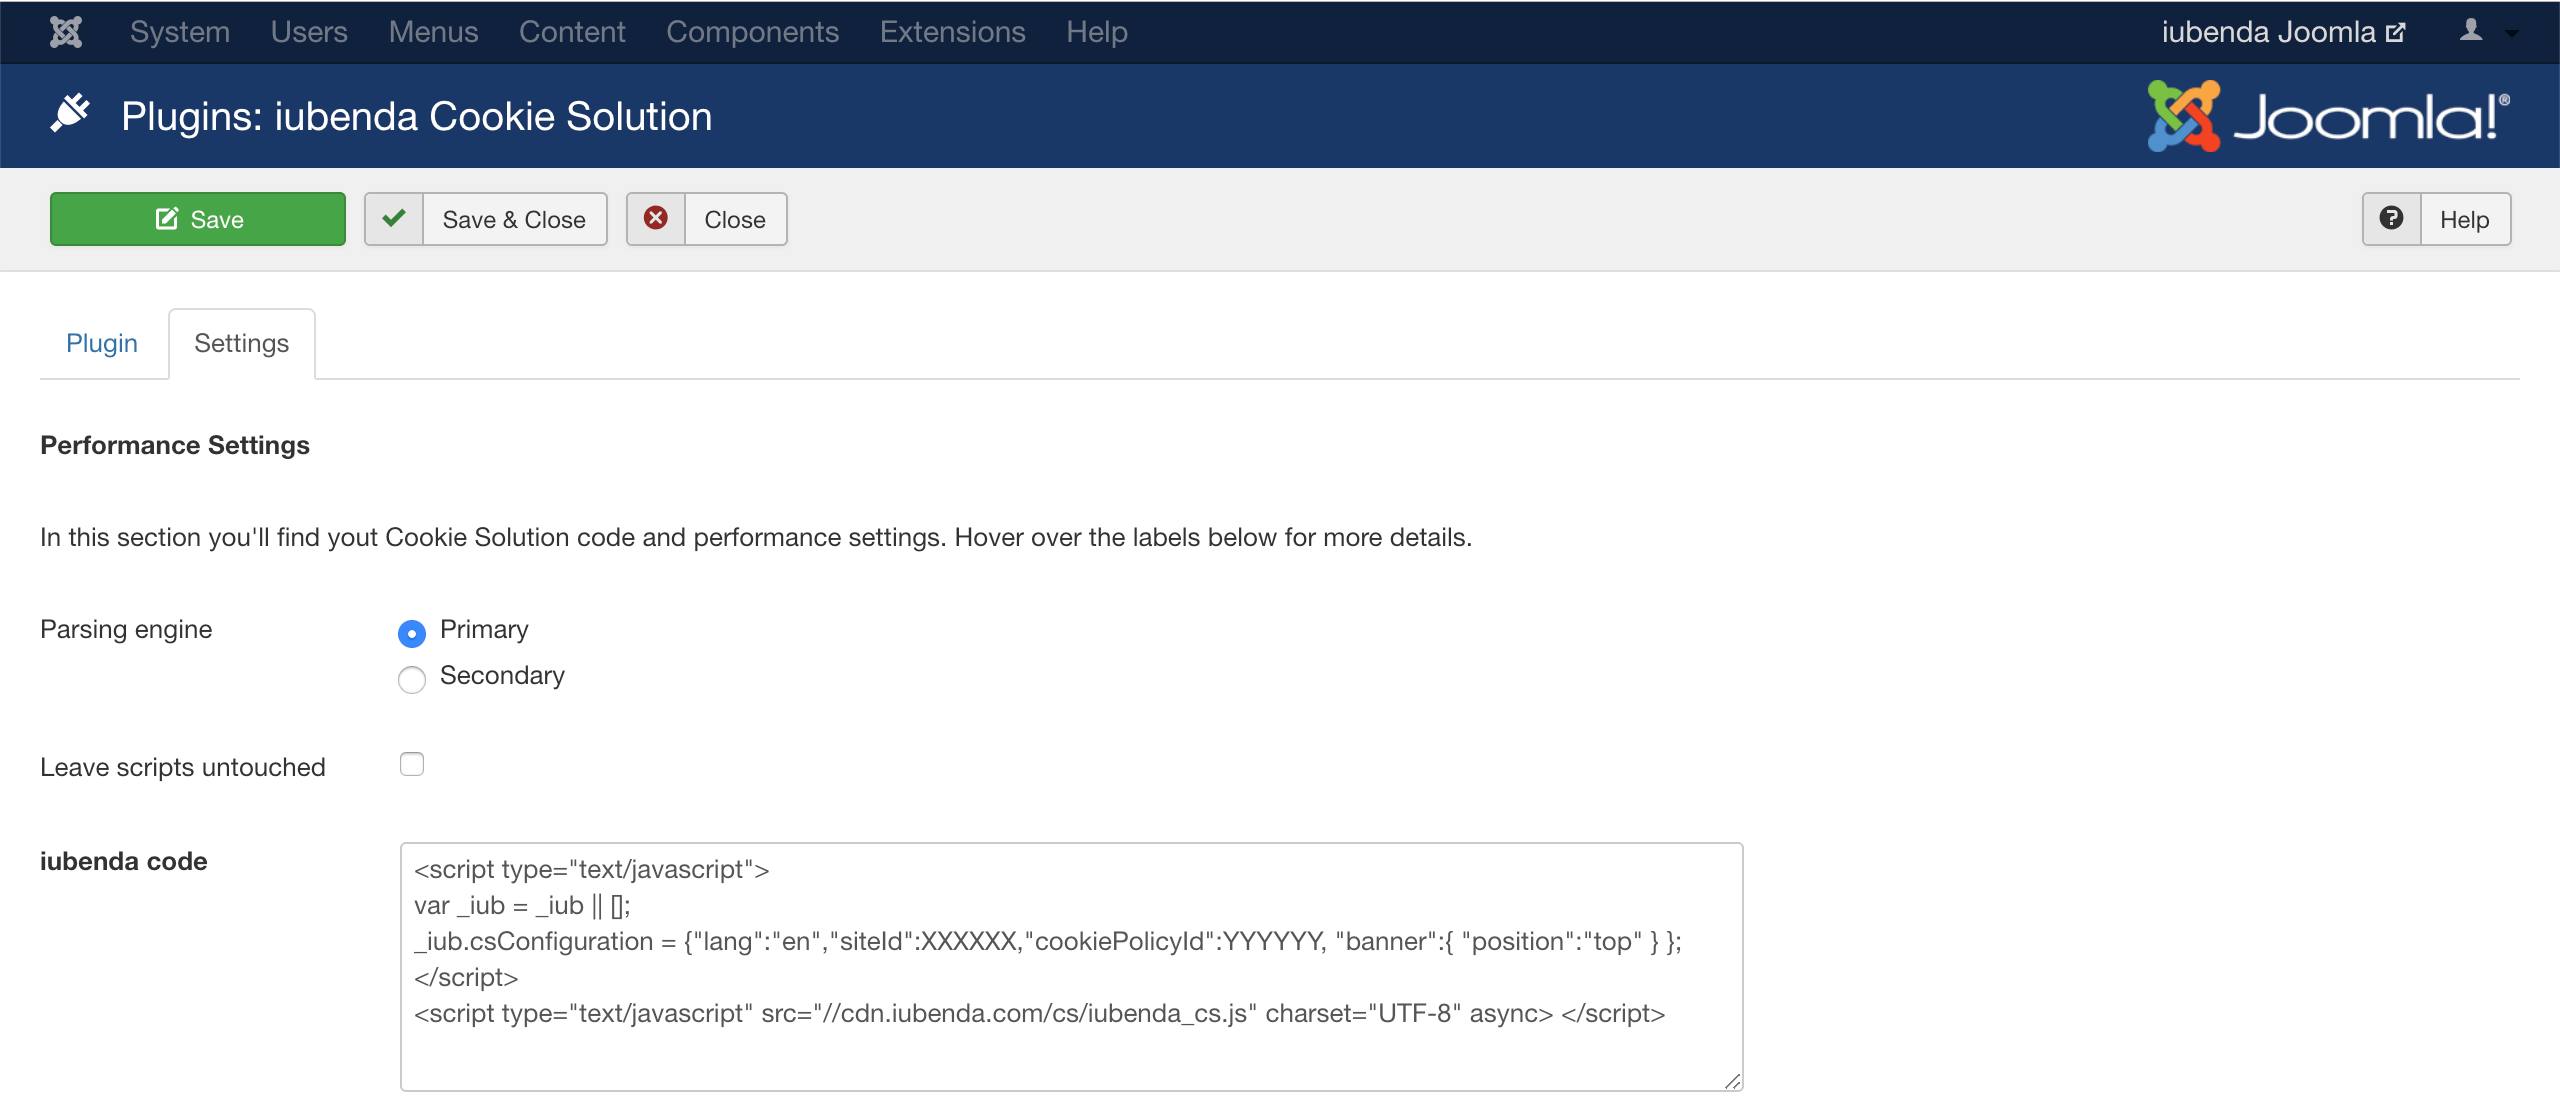
Next, click on the Settings menu next to the plugin menu at the top of your screen.
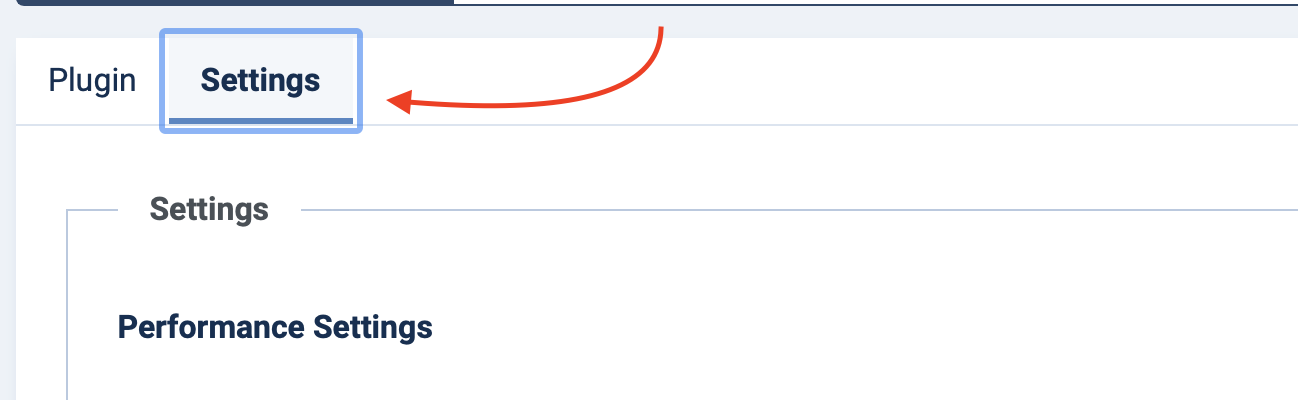
Scroll down till you find ‘iubenda code’ and paste your Privacy Controls and Cookie Solution code from your iubenda dashboard into the text box.

Being PHP native, we recommend selecting the primary, faster option for the parsing engine. If you’re experiencing some issues, try with the alternative based on a custom HTML DOM class.

Then, click on save & close in the top left of your screen and you’re done!
Use
Once configured, the plugin will begin to show the banner on which your cookie policy will be shown/linked to users that visit your site for the first time without the need for any other further configurations. The plugin will also recognize and automatically detect and block the cookies indicated in the above block-list, that are present on your site.
Important
Our Joomla! extensions automatically block scripts that are generated on the server side (therefore returned by PHP by Joomla). Scripts that are inserted into the page via JavaScript after the loading process of that page are not and cannot be blocked automatically.
These scripts can be blocked by entering the source into the Custom Script boxes in the plugin console or by using the manual wrapping method illustrated in the example below and (in more detail) in this help post
Blocking custom scripts from within the console
The Custom Scripts field makes it easy for you to block scripts inserted into the page directly from within the plugin console. This greatly reduces the need for direct edits to the site’s code.
Here’s how to do it:
- In your admin panel, go to Extensions > Plugins.
- Next, search “
iubenda ”, click on the plugin name then the Settings tab at the top. - Scroll down to find the Custom scripts and Custom iframes fields at the bottom of the page.

- Enter your script or iframe sources as needed, assign the category (optional), and click the Save & Close button at the top of the page.
Usage Examples
Using these fields are pretty straightforward. Simply enter the script or iframe src attribute you’d like to block.
Script
If you wanted to block a social button (which inserts scripts into the page via JavaScript), you’d simply need to enter the script source, e.g. connect.socialwebsite.net/en_US/track.js into the scripts field.
iframe
Let’s say you wanted to block scripts inserted into the page via the following iframe
<iframe width="1280" height="720" src="https://www.videowebsite.com/embed/xxFhMChxx" frameborder="0" allow="accelerometer; autoplay; encrypted-media; gyroscope; picture-in-picture" allowfullscreen></iframe>
What you’ll need to enter into the iframe field would videowebsite.com/embed/videowebsite.com/embed/xxFhMChxx) to ensure that all scripts coming from the actual source are blocked.
Manual Use (wrapping method)
This method requires you to directly modify your site’s code. You’ll need to go into the relevant section of your site’s code and add the scripts to be blocked as explained below.
<!--IUB-COOKIE-BLOCK-START-->
<script>
    (function(d, s, id) {
        var js, fjs = d.getElementsByTagName(s)[0];
        if (d.getElementById(id)) return;
        js = d.createElement(s);
        js.id = id;
        js.src = "//connect.socialwebsite.net/en_US/sdk.js#xfbml=1&version=v2.3&appId=808061959224601";
        fjs.parentNode.insertBefore(js, fjs);
    }(document, 'script', 'socialwebsite-jssdk'));
</script>
<!--IUB-COOKIE-BLOCK-END-->
If there are HTML / IMG / IFRAME elements, you will need to do it this way:
<!--IUB-COOKIE-BLOCK-START-->
      <iframe src="...
      <img src="...
<!--IUB-COOKIE-BLOCK-END-->
If you’ve enabled the per-category consent feature you’ll need to assign the purpose. Resuming the social button example, being part of the “Experience” purpose (id 3):
<!--IUB-COOKIE-BLOCK-START-PURPOSE-3-->
<script>
    ...
</script>
<!--IUB-COOKIE-BLOCK-END-PURPOSE-3-->
To stop automatic parsing/replacing the iframe/scripts that contain a defined src:
<!--IUB-COOKIE-BLOCK-SKIP-START-->
      <script type="text/javascript">...</script>
<!--IUB-COOKIE-BLOCK-SKIP-END-->
⚠️ Caution
After installation, please be sure to set-up prior blocking, as this is legally mandatory under EU Law. You can find various methods of prior blocking along with full instructions in this guide.