Have you generated a website using Hubspot and need to meet GDPR consent requirements?
Well, you’re in the right place. In this guide, we’ll take a look at GDPR consent proof requirements and how to add iubenda’s Consent Database to your Hubspot site.
→Jump to How to add a Consent Database on Hubspot
Why do I need GDPR proof of consent
Consent records are specifically required under the GDPR. Keeping a complete and thorough record of consent is required and is an essential part of privacy compliance. The records of proof are managed by you, the Data Controller. As a result, the GDPR requires you to keep “proofs” or records of consent that contain specific details that might prove that the consent received is genuine and therefore valid under the GDPR. Consent must be explicit, freely provided, and verifiable under the GDPR. You can read up more on iubenda’s Consent Database here.
What must GDPR consent records contain
These records should include a way of identifying the user, proof of consent, record of the consenting action, and the legal documents available to the user at the time of consent, among other things.
The following information should be recorded:
- who provided the consent;
- when and how consent was obtained from the particular user;
- the consent collecting form they were presented with at the time of collection; and
- whatever conditions and legal documents were in effect at the time the consent was obtained.
You can read about the full requirements here.
iubenda’s Consent Database automatically records and manages GDPR & LGPD consent and privacy preferences for each of your users. You can read up more on iubenda’s Consent Database here.
How to add iubenda’s Consent Database on Hubspot
Below is our easy-to-follow step-by-step guide to successfully integrate your Consent Database on Hubspot.
First things first, Go to your HubSpot account and entre your enter your WordPress admin.
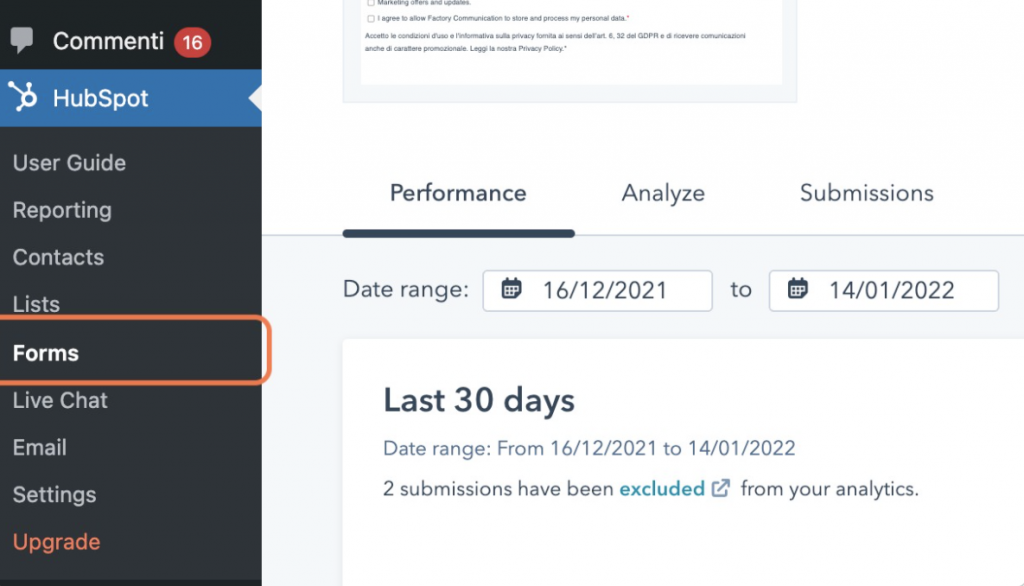
Then, under the Hubspot section on the left of your screen select forms.
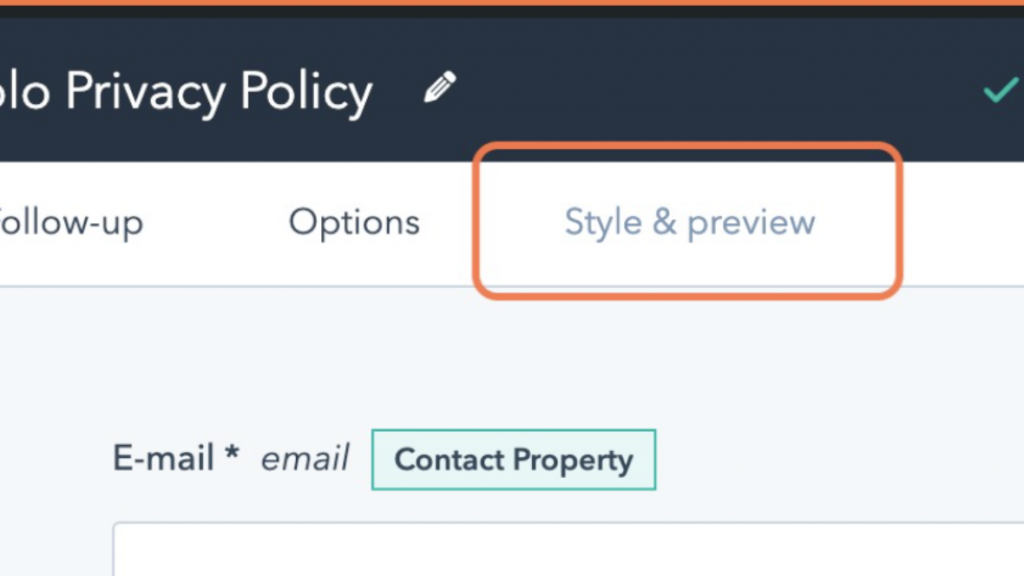
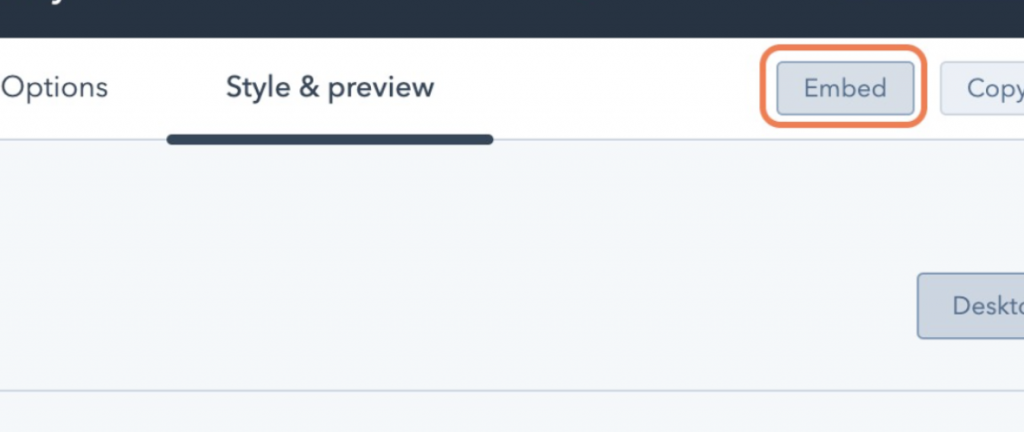
Select the form you want to map and click on “Edit”. Then, click on style and preview.
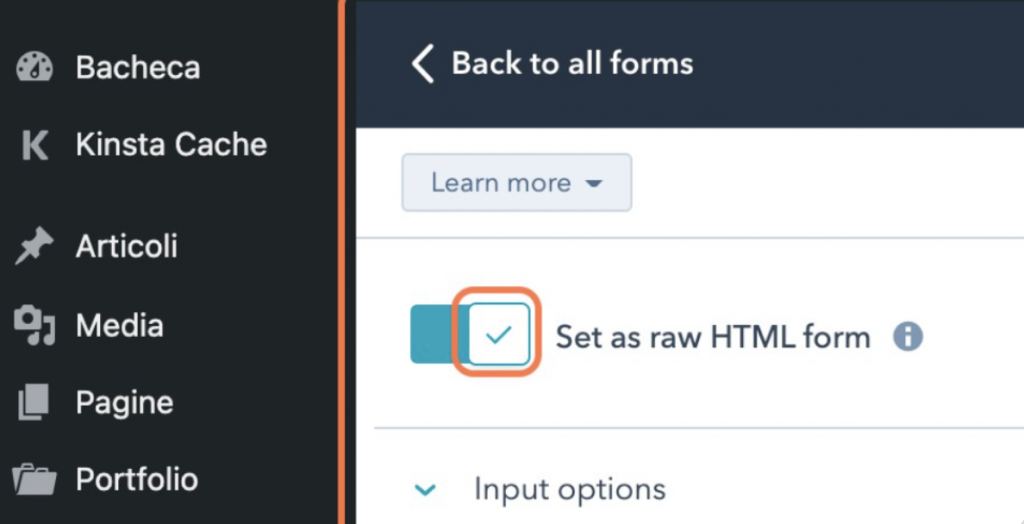
Next, check Set as raw HTML form on. The form will render as a raw HTML element on your external page as opposed to inside an iframe (any default HubSpot styling applied to the form will be removed).
After that, update the changes made, by clicking on Update in the top right corner of your screen.
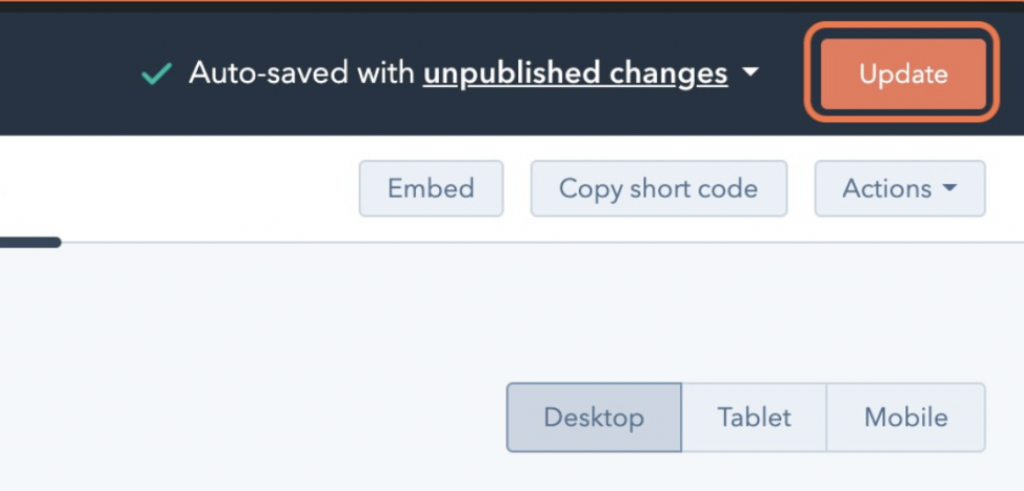
Now, click on the Embed button.
The next set of steps will require you to make some additions to the code.
Please note, the code used in this guide is an example.
- Copy the script in the text editor. Click Copy to copy the form embed code.
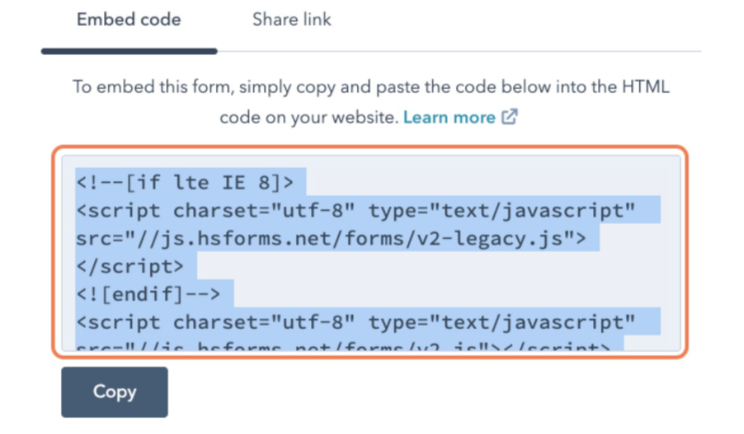
The embed code you just copied will look something like this: (Please note, this code is an example.)
<script charset="utf-8" type="text/javascript" src="//js.hsforms.net/forms/v2-legacy.js (http://js.hsforms.net/forms/v2-legacy.js)"></script>
<![endif]-->
<script charset="utf-8" type="text/javascript" src="//js.hsforms.net/forms/v2.js (http://js.hsforms.net/forms/v2.js)"></script>
<script>
hbspt.forms.create({
region: "your_region_code",
portalId: "your_hubspot_portal_id",
formId: "your_hubspot_form_id"});
</script>
2. Now, add your form embed code (which is similar to the example code above) to your external page. If you’ve already embedded your form, you must replace the existing embed code with this new, unstyled version.
3. Next, you need to add your iubenda Consent Database. To do this, right after the opening of the script that includes your region, portalId and formId, paste your Consent Database mapping script along with function callIubInstruction(). Include the onFormReady: callIubInstruction, onFormSubmitted: function(){_iub.cons.sendFromLocalStorage()} functions right after your formId too. The mapping script should follow the JS Load function with Map (no data-attribute) example.
<script charset="utf-8" type="text/javascript" src="//js.hsforms.net/forms/v2-legacy.js (http://js.hsforms.net/forms/v2-legacy.js)"></script><br />

<![endif]→<br />
<script charset="utf-8" type="text/javascript" src="//js.hsforms.net/forms/v2.js (http://js.hsforms.net/forms/v2.js)"></script><br />
<script>
function callIubInstruction() {

_iub.cons_instructions.push(["load",{
submitElement: document.getElementsByClassName("hs-button")[0],
form: {
selector: document.getElementById("form_id_taken_from_developer_tools"),
map: {
subject: {
first_name: "firstname",
last_name: "lastname",
email: "email"
},
preferences: {
legal_documents: "checkbox_name_1",
newsletter: "checkbox_name_2",
}
}
},
consent: {
legal_notices: [
{
identifier: 'privacy_policy',
},
{
identifier: 'cookie_policy',
},
{
identifier: 'term',
}
],
}
}]);
};
hbspt.forms.create({
region: "your_region_code",
portalId: "your_hubspot_portal_id",
formId: "your_hubspot_form_id",
onFormReady: callIubInstruction,
onFormSubmitted: function(){_iub.cons.sendFromLocalStorage()},
});
</script>
Once you’ve added and modified the form script, save the edits you’ve made on the page. Congratulations, you’ve integrated your iubenda Consent Database on Hubspot!