A blog can really be a powerful tool for your business. For example, if you’re running an e-commerce, a blog can help you rank on search engines and boost your products. It can also help you cultivate a relationship with your users, improving customer retention and trust.
However, it’s important that everything is set up correctly. Before launching your blog or hitting “Publish” on a new blog post, there are a few elements you need to check.
Here’s where our blog checklist can come in handy!
To make it more useful, we’ve divided it into four sections. So you can jump directly to what you need.

📌 Blog Launch Checklist: Setting Up Your Blog
Let’s start our blog checklist. First thing first, you need to set up your blog. Of course, you can skip these steps if you already have launched yours.
Find your niche
The first thing to do is identify your niche, that is what you’re going to write about and who you’re talking to.
This step is crucial in creating a blog that resonates with your audience, and it will make it a lot easier to find topics to cover. Your niche should be something that you are passionate about and have some expertise in: it could be a topic that you enjoy writing about or a subject that you are knowledgeable in.
By choosing a niche, you will be able to create content that is focused, relevant, and valuable to your readers, and you’ll instantly improve your website.
Choose a catchy title
Your blog’s title is the first thing that your readers will see. It should be catchy, memorable, and reflect the content of your blog. A good title can help you stand out from the crowd and attract more readers to your blog.
Select a blogging platform
Now it’s time to start the actual setup. So, you need to choose a blogging platform.
There are several platforms available, but WordPress is one of the most popular and user-friendly options. It offers a range of features and customization options, making it easy to create a blog that is unique and professional.
Take care of the technical side
Once you have chosen your platform, it’s important to take care of the technical side of your blog.
This includes:
- Using a responsive theme that works on all devices: many platforms have built-in responsive themes, so you can select the one you prefer.
- Setting up analytics to track your website traffic: this will help you identify which pieces of content are performing better, or where you can improve.
- Using an SEO tool to optimize your content for search engines: SEO should be a crucial part of writing your content, and there are tools that can help you with that. For example, if you’re using WordPress, there are plugins that will guide you in the optimization.
- Adding legal documents: this step is often overlooked, but it shouldn’t be. Your blog will probably collect personal data, so you want to avoid breaching privacy laws such as the GDPR or CPRA. For your blog, you’re required to have a privacy policy. Then you’ll likely also need a cookie policy and a terms and conditions document with a copyright disclaimer.
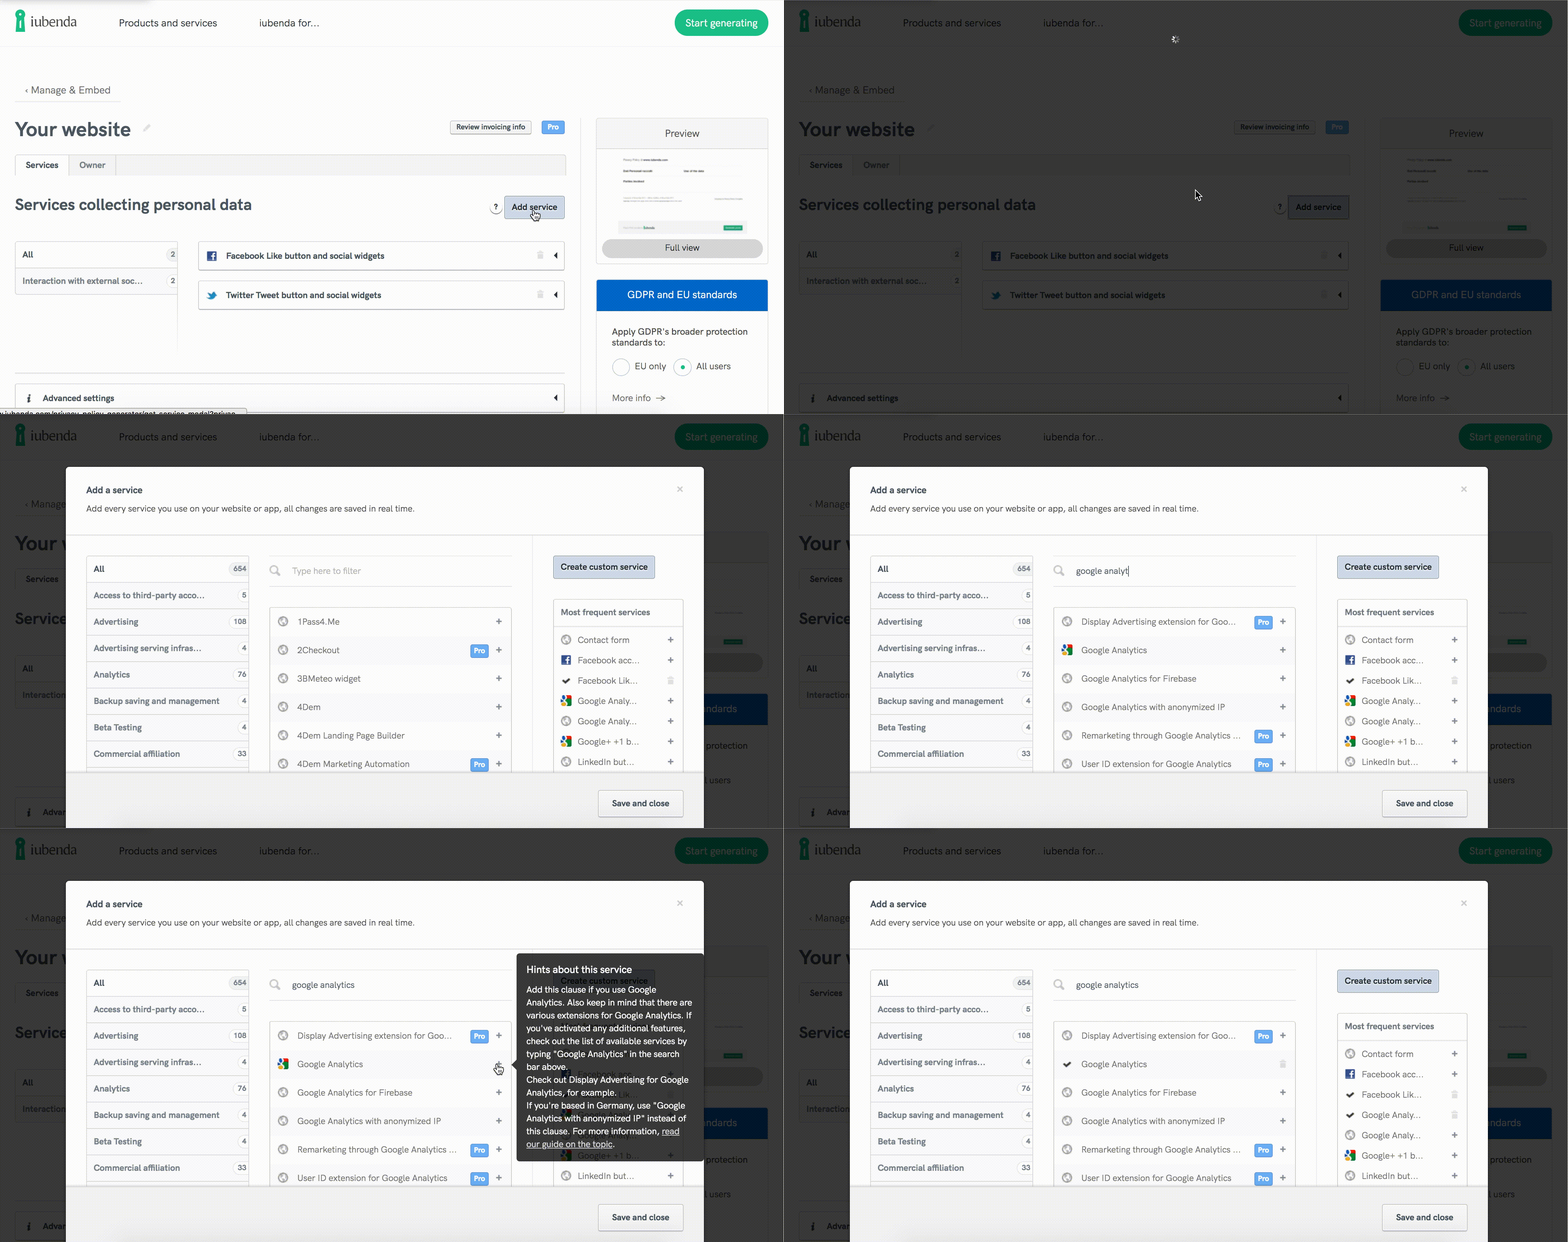
💡 How to create a privacy policy for your blog
Do you need to create a privacy policy for your blog? With iubenda, it’s easier than you think!
- Scan your blog with our Site Scanner.
- Add all the relevant clauses in one click.
- Copy and paste to add your privacy policy to your blog!

Write an About page
Don’t forget to write an About page or section. It’s an opportunity to introduce yourself to your readers and engage them with your story and your content.
Your About page should be engaging, informative, and include details about your background, interests, and expertise.
Add a contact form
Lastly, your readers should be able to get in touch with you. That’s why you should add a contact form!
It’s important to include a contact form that is easy to use and includes all the necessary fields, such as name, email, message and a link to your legal documents.
This article can be useful 👉 How to create GDPR compliant forms
📌 Blog Post Checklist: The Writing Stage
Well done, you’ve set up your blog! Now it’s time to start writing. We’ve put together this mini-checklist to help you write your first blog post.
Let’s dive in 👇
Brainstorm your content
Before you actually start writing, you should have a clear idea of what you’re going to write about. You’ve already identified your niche, so you probably already know, but now you should go into more details.
There are three main steps:
- Carry out keyword research: keyword research will help you identify the topics to focus on. It can also help you identify any gap in your competitors’ content, that you may want to fill.
- Identify your content pillars: content pillars are the main topics you’re going to cover. Once you have four or five content pillars, it will be a lot easier to create new content. For example, you can break down a broad topic into many smaller pieces of content, and each one can become a blog post.
- Create a content calendar: now take all these elements and create a content calendar. Decide how many blog posts you’ll write each week or month and schedule them, so you can keep track of the process.
Write!
We’re finally there: now it’s time to write!
Of course, you’ll have your own style and tone of voice, but it’s useful to keep in mind these few tips:
Your titles should be catchy
The title is the first thing your readers see, and it should tempt them to open your article. The catchier your title will be, the more your blog post will stand out!
You should use subheadings
What’s your first instinct when you see a wall of text? Probably to close the page you’re reading.
That’s why you should divide your blog post into paragraphs and use subheadings. H2 and H3 will make your content more digestible for your readers and will help you with SEO as well!
You should add images and/or videos
Visual content can make your content more engaging for your readers and improve your ranking.
Nowadays, it’s easy to find nice free images for your blog posts. For example, Unsplash is a great repository where to download royalty-free pictures.
Don’t forget interlinking
While you write, don’t forget to link to other relevant posts you have written. This will help your users have more information on the topic they’re reading and increase the time they spend on your blog.
📌 The Post-Writing Stage
Don’t hit “Publish” yet, we have a few more steps left in our blogging checklist. It’s time to optimize and make sure everything looks good!
Proofread
Re-read what you wrote, check for spelling and grammar mistakes. A poorly written piece of content will not be effective and it will compromise the reputation of your blog.
SEO-optimize
If you’ve followed the previous steps, your blog post should already be SEO-optimized, but there are a few more things to do:
- Check the keyword density within your blog post: you should repeat your keywords throughout your post, but don’t exaggerate. Adding too many repetitions will damage your ranking.
- Add a meta title and meta description: these meta tags will help you with SEO. The meta title is simply the title you give to your page, while the meta description is what you see on search engines. Make sure they’re not too long and that they reflect the content of your page. Here’s an example:

- Add alt text to your images: the alternative text will show in case your images cannot load, and it also improves the accessibility of your blog. The alt text is also a nice space for keywords.
- Review your URL: the URL of your blog post should be short (within 3 or 5 words) and reflect the topic of the page. It’s also a good SEO practice to add your main keyword there.
Publish!
You’re ready to publish! Don’t forget to share your post on social media, to improve its reach.
Blog checklist ✅
Setting up your blog
I’ve found my niche
I’ve chosen a catchy title
I’ve selected a blogging platform
I’ve taken care of the technical side (a responsive theme, analytics, a SEO tool and legal documents)
I’ve written an About page
I’ve added a contact form
The writing stage
I’ve brainstormed my content (I’ve carried out keyword research, I’ve identified my content pillars and I’ve created a content calendar)
I’ve written my blog post, following the best practices
The post-writing stage
I’ve proofread my content
I’ve SEO-optimized my blog post (I’ve checked the keyword density, I’ve added meta tags and alt text, I’ve reviewed the URL)
I’ve hit “Publish”!
Be careful: don’t launch your blog without legal documents!
Like every other website, blogs need to meet online legal requirements. Failure to do it could result in serious consequences for your activity.
So, what do you need?
- A privacy policy, because you’ll collect and process personal data – even if you think you aren’t. Personal data is any information that can lead to the identification of a person: for example, IP addresses are considered personal data.
- A cookie policy, and maybe a cookie banner. If you’ve installed any analytics tool or social media integrations, you’re likely using cookies. You need to disclose this information to your readers.
- A terms and condition document, with a copyright disclaimer. Terms and Conditions aren’t mandatory for your blog, but if you want to protect your content, it’s best to have them, with a specific clause for copyright.
iubenda’s set of solutions is designed to help you make your blog compliant, in just a few minutes.
- Scan your blog with our Site Scanner.
- Add all the relevant clauses and generate your documents.
- Copy and paste to add your documents to your blog!
About us
Attorney-level solutions to make your websites and apps compliant with the law across multiple countries and legislations.
